jueves, 25 de octubre de 2018

How to Make the Perfect Relish Tray A relish tray was always part of any holiday meal or special occasion when I was growing up.  This updated version deserves a prominent place on every dinner table! I grew up in Kenosha, Wisconsin, on the shores of Lake Michigan.  Kenosha sits in the very southeastern corner between Milwaukee and Chicago.  If you could hear me talk, you’d hear I still have some of that Wisconsin twang. I grew up in the era of the Wisconsin Supper Club.  In fact, my high school graduation dinner celebration was held at the Hob Nob, one of the better known Wisconsin supper clubs.  What is a supper club you may ask?   The Chicago Tribune defines it this way, “A Wisconsin supper club is an independently owned, fine-dining destination restaurant, typically in a picturesque locale on the edge of town. The menu comes from yesteryear, void of pretense and decidedly non-froufrou — prime rib, broiled white fish, shrimp cocktail — with enough complimentary sides and trimmings to satisfy a second meal. A relish tray should begin the meal, and three hours later, is bookended with house-made bread pudding or cheesecake. On Fridays they should serve an all-you-can-eat fish fry. A band might be performing. Mixed cocktails such as Manhattans and brandy old-fashioneds are preferred over wine or beer. If you leave hungry, you have not dined in a supper club.” Supper Club Relish Tray The  Hob Nob, in Racine, Wisconsin, just north of my hometown was our family’s favorite supper club. Prime Rib and steak were always on the menu and the portions were large. As a child I always got to order a Shirley Temple for a treat.  You never left a supper club hungry. And there was always a relish tray. We often enjoyed a relish tray at home too on special occasions. The relish tray always consisted of a variety of pickled vegetables.  My mom’s favorite was the pickled watermelon rind but the relish tray could also include pickles, pickled cauliflower, pickled beets, baby corn, carrots and of course olives.  Those were always the favorite of the kids and had to be eaten off the ends of your fingers! Another item that could be found in the Wisconsin supper club was the Kaukauna cheese ball.  My family has been eating Kaukauna cheese since my childhood.  In fact, it was my mother’s favorite snack.  It was the first spreadable cheese and created by the founder, Hubert Fassbender, who was also a beer distributor. He created the iconic spreadable cheese after numerous tavern owners requested something to serve at their bars.  It soon became a staple of the supper club too. Kaukauna is celebrating their 100th anniversary this year and I am excited to join together with them to celebrate and pay tribute to their beginnings in the Wisconsin supper club.  While their iconic cheese balls, logs and cups have been a tradition for generations, Kaukauna is also looking to expand their appeal to folks who are looking for fewer ingredients in their food by introducing their new No-Artificial-Anything Cheese Balls.  Their cheese can now be found in the deli section and cheese cases of your local grocery store The Kaukauna cheese ball is the perfect addition to a relish tray and any party or celebration.  Check out all their other products here.  As a child, my favorite was always the Kaukauna Port Wine cheese. The key to a perfect relish tray is a variety of textures, shapes, color and flavors.  The relish tray was originally a combination of pickled veggies, mainly because at the time, fresh produce from Central and South America was not readily available in grocery stores but canned, pickled fruits and vegetables were. Since availability is not longer a problem,  I like to use a combination of pickled and fresh veggies for variety. Relish Tray Ingredients: Spreadable Kaukauna cheese and crackers Black olives Green pimento olives Baby pickles Pickled beets Carrot sticks and celery sticks Pickled watermelon rind Pickled baby corn Pepper slices Pickled cauliflower Make a relish tray, along with a Kaukauna cheese ball part of your upcoming holiday celebrations. Author information Leigh Anne Hi – I’m Leigh Anne! Food, family and friends are three of my favorite things. I love sharing easy, delicious recipes and entertaining ideas that everyone will love. When she started her blog, Your Homebased Mom, over 9 years ago she had no idea that it would one day house over 2,400 recipes and ideas! . | Facebook | Google+ | Pinterest | Continue reading How to Make the Perfect Relish Tray. This post is from Your Homebased Mom. If you are not reading it from our feed, it has been STOLEN. Please contact Leigh Anne to let us know. Enjoy the posts.
A relish tray was always part of any holiday meal or special occasion when I was growing up.  This updated version deserves a prominent place on every dinner table!relish tray and cheese plate

I grew up in Kenosha, Wisconsin, on the shores of Lake Michigan.  Kenosha sits in the very southeastern corner between Milwaukee and Chicago.  If you could hear me talk, you’d hear I still have some of that Wisconsin twang. I grew up in the era of the Wisconsin Supper Club.  In fact, my high school graduation dinner celebration was held at the Hob Nob, one of the better known Wisconsin supper clubs.  What is a supper club you may ask?

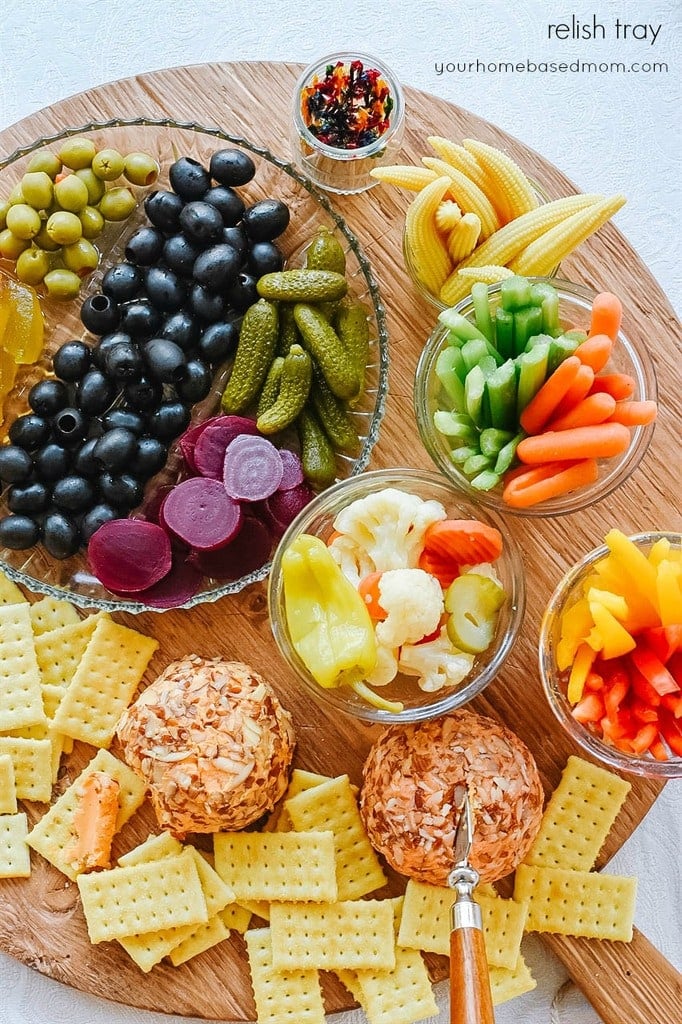
deluxe Relish Tray served on a cutting board


The Chicago Tribune defines it this way,

“A Wisconsin supper club is an independently owned, fine-dining destination restaurant, typically in a picturesque locale on the edge of town. The menu comes from yesteryear, void of pretense and decidedly non-froufrou — prime rib, broiled white fish, shrimp cocktail — with enough complimentary sides and trimmings to satisfy a second meal. A relish tray should begin the meal, and three hours later, is bookended with house-made bread pudding or cheesecake. On Fridays they should serve an all-you-can-eat fish fry. A band might be performing. Mixed cocktails such as Manhattans and brandy old-fashioneds are preferred over wine or beer. If you leave hungry, you have not dined in a supper club.”
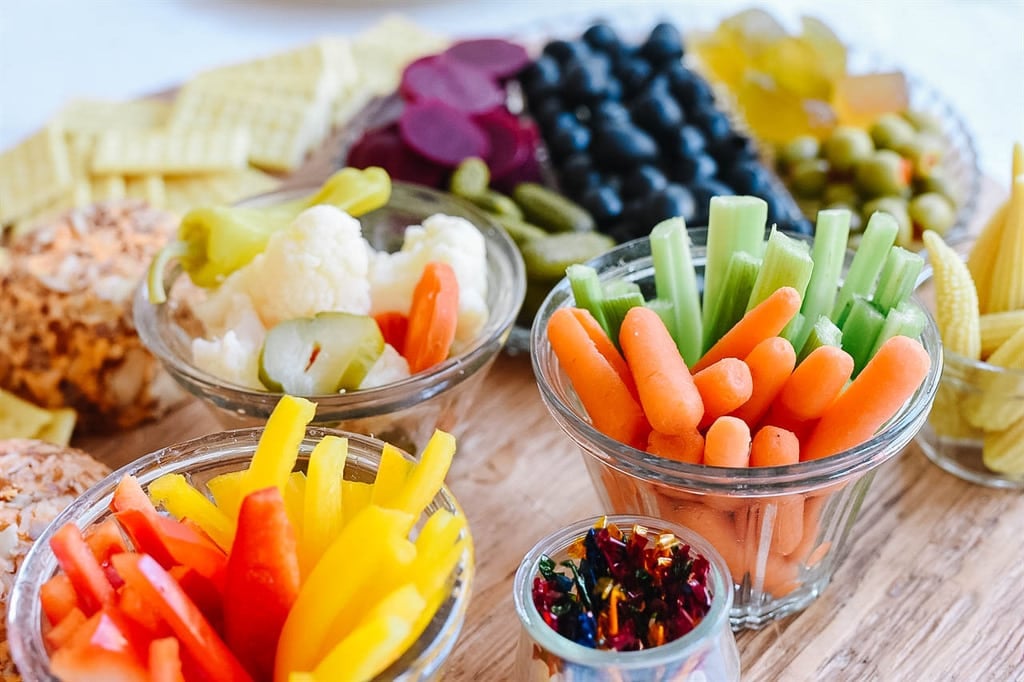
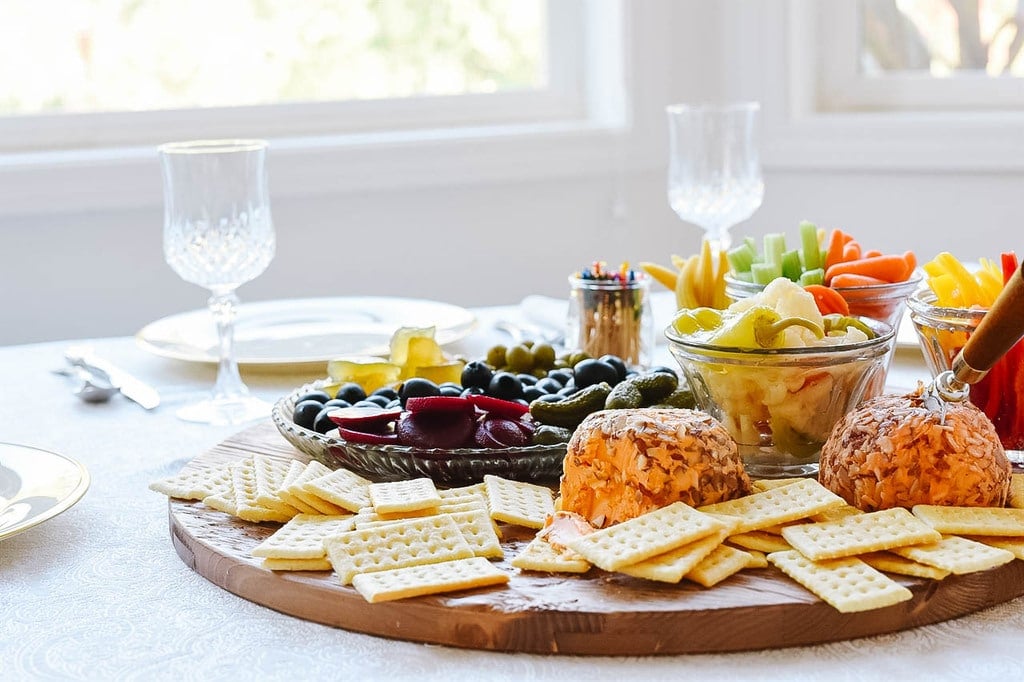
Relish Tray with cheese ball

Supper Club Relish Tray

The  Hob Nob, in Racine, Wisconsin, just north of my hometown was our family’s favorite supper club. Prime Rib and steak were always on the menu and the portions were large. As a child I always got to order a Shirley Temple for a treat.  You never left a supper club hungry. And there was always a relish tray.
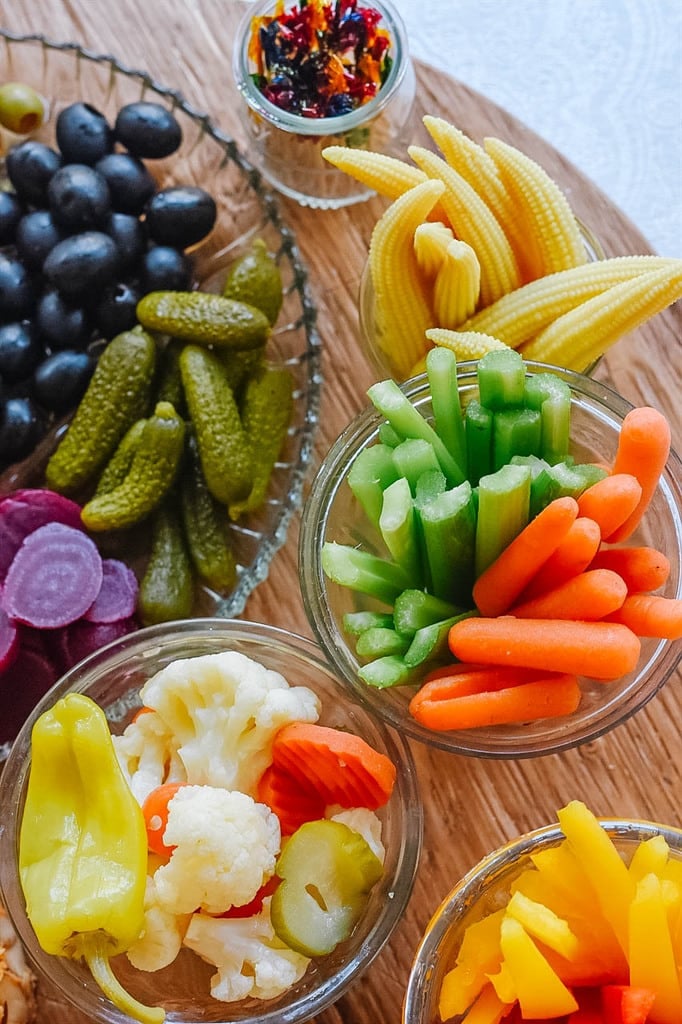
Relish Tray with carrots celery and pickled veggiesWe often enjoyed a relish tray at home too on special occasions. The relish tray always consisted of a variety of pickled vegetables.  My mom’s favorite was the pickled watermelon rind but the relish tray could also include pickles, pickled cauliflower, pickled beets, baby corn, carrots and of course olives.  Those were always the favorite of the kids and had to be eaten off the ends of your fingers!
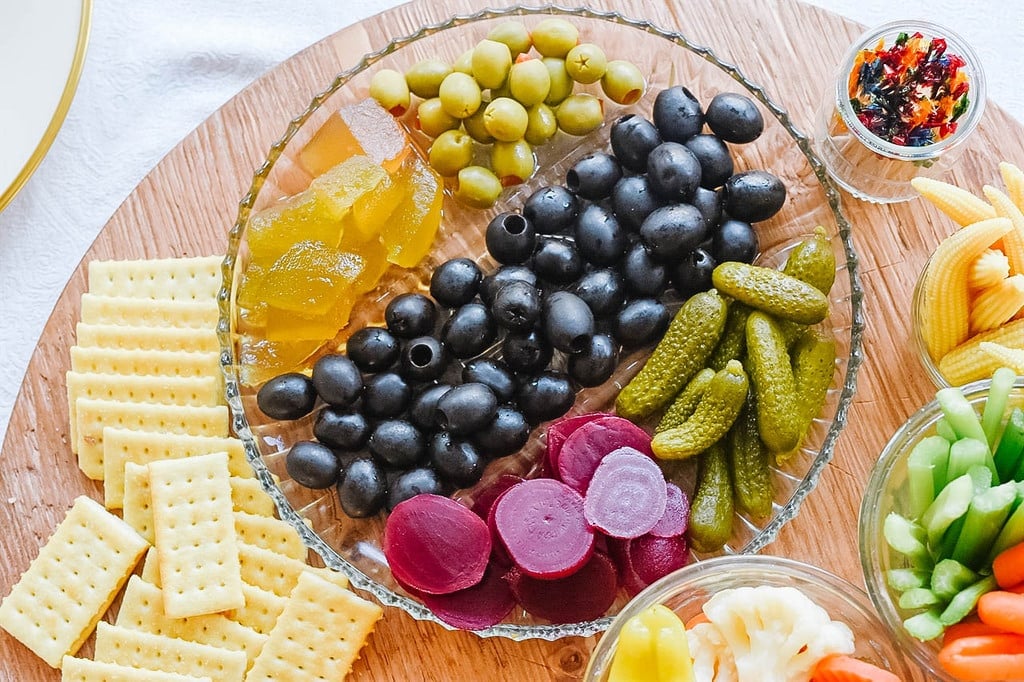
pickle and olive Relish Tray

Another item that could be found in the Wisconsin supper club was the Kaukauna cheese ball.  My family has been eating Kaukauna cheese since my childhood.  In fact, it was my mother’s favorite snack.  It was the first spreadable cheese and created by the founder, Hubert Fassbender, who was also a beer distributor. He created the iconic spreadable cheese after numerous tavern owners requested something to serve at their bars.  It soon became a staple of the supper club too.

Relish Tray with kaukauna cheese balls

Kaukauna is celebrating their 100th anniversary this year and I am excited to join together with them to celebrate and pay tribute to their beginnings in the Wisconsin supper club.  While their iconic cheese balls, logs and cups have been a tradition for generations, Kaukauna is also looking to expand their appeal to folks who are looking for fewer ingredients in their food by introducing their new No-Artificial-Anything Cheese Balls.  Their cheese can now be found in the deli section and cheese cases of your local grocery store
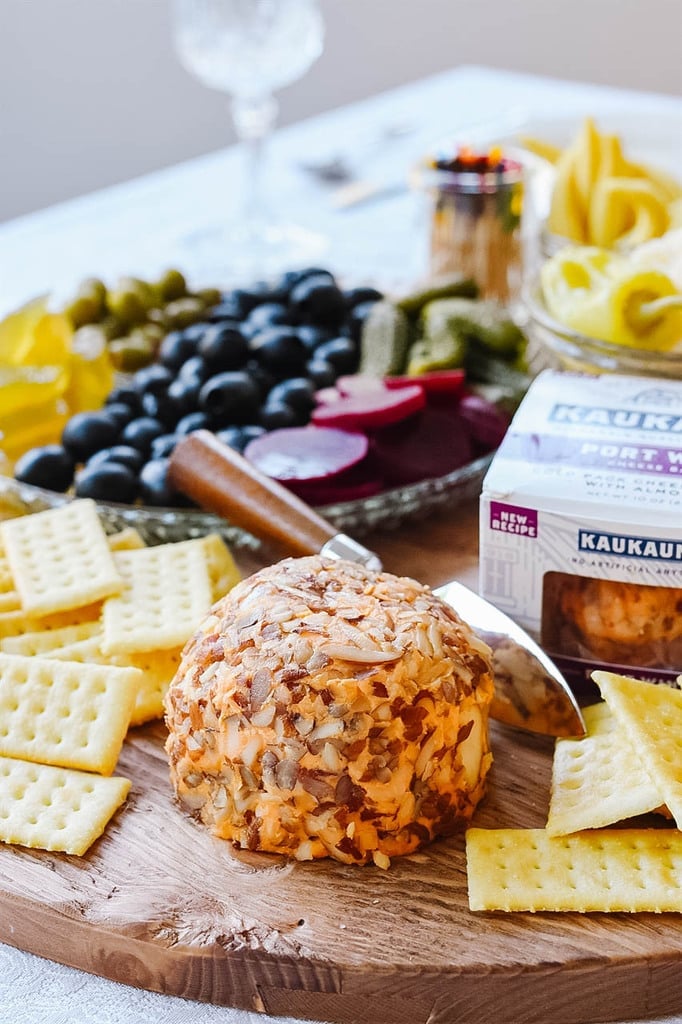
kaukauna cheese ball on a Relish Tray

The Kaukauna cheese ball is the perfect addition to a relish tray and any party or celebration.  Check out all their other products here.  As a child, my favorite was always the Kaukauna Port Wine cheese.
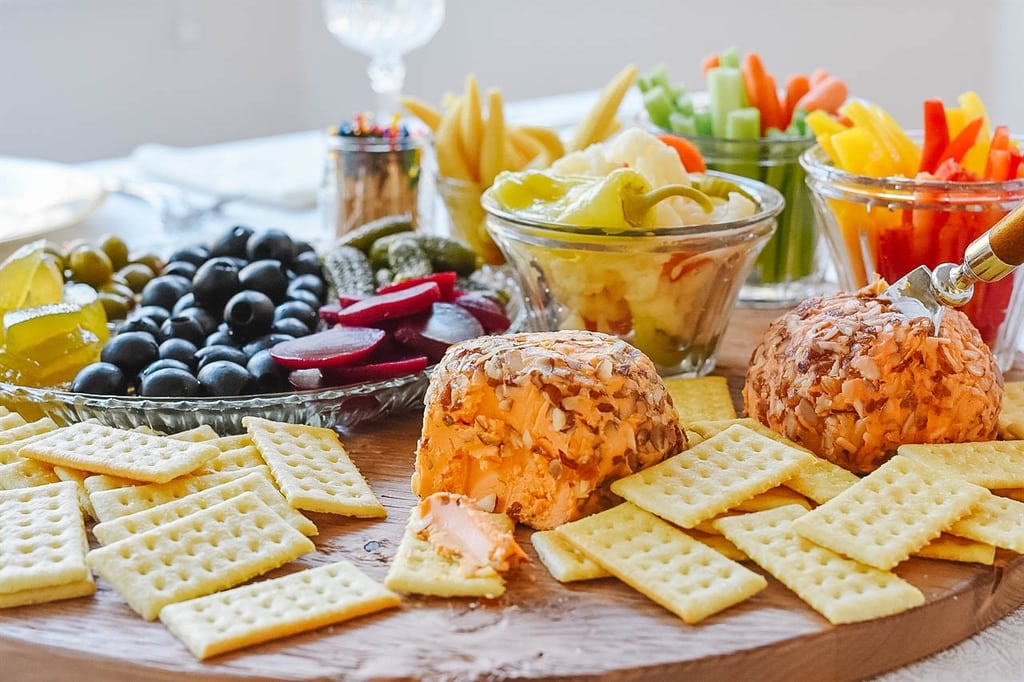
Relish Tray and cheese board

The key to a perfect relish tray is a variety of textures, shapes, color and flavors.  The relish tray was originally a combination of pickled veggies, mainly because at the time, fresh produce from Central and South America was not readily available in grocery stores but canned, pickled fruits and vegetables were. Since availability is not longer a problem,  I like to use a combination of pickled and fresh veggies for variety.

Relish Tray Ingredients:

  • Spreadable Kaukauna cheese and crackers
  • Black olives
  • Green pimento olives
  • Baby pickles
  • Pickled beets
  • Carrot sticks and celery sticks
  • Pickled watermelon rind
  • Pickled baby corn
  • Pepper slices
  • Pickled cauliflower

Make a relish tray, along with a Kaukauna cheese ball part of your upcoming holiday celebrations.
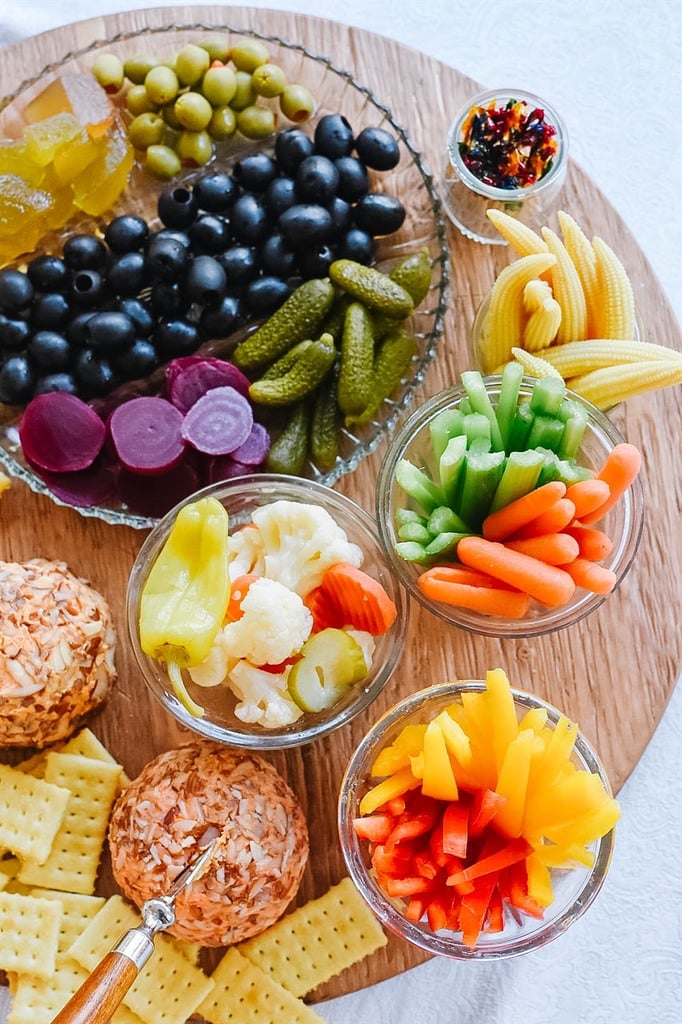
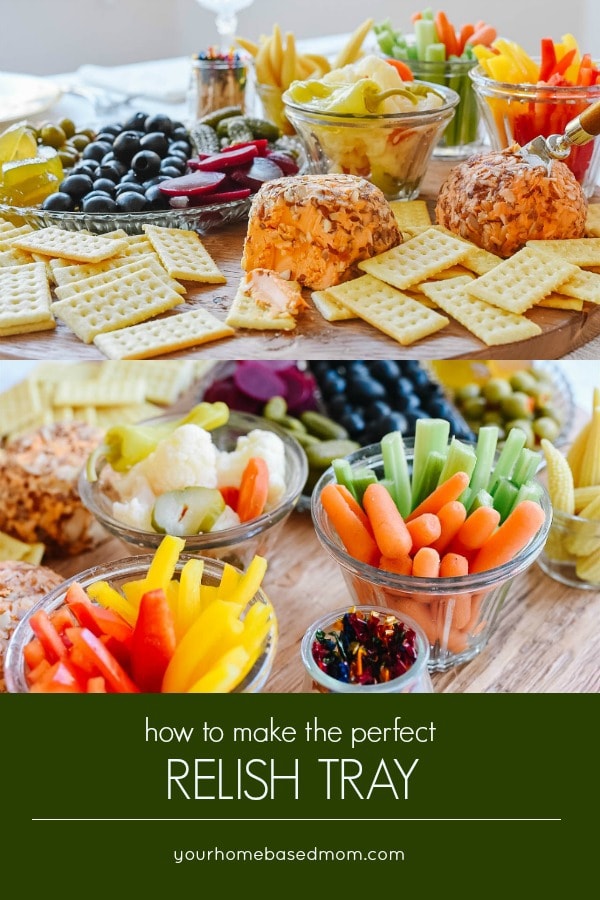
Relish Tray pickles olives cheese ball crackers veggies

how to make the perfect relish tray

Author information

Leigh Anne

Hi – I’m Leigh Anne! Food, family and friends are three of my favorite things. I love sharing easy, delicious recipes and entertaining ideas that everyone will love. When she started her blog, Your Homebased Mom, over 9 years ago she had no idea that it would one day house over 2,400 recipes and ideas! .

Continue reading How to Make the Perfect Relish Tray. This post is from Your Homebased Mom. If you are not reading it from our feed, it has been STOLEN. Please contact Leigh Anne to let us know. Enjoy the posts.


from Your Homebased Mom https://ift.tt/2qbKswz
via IFTTThttps://ift.tt/2CHrGVB

viernes, 19 de octubre de 2018

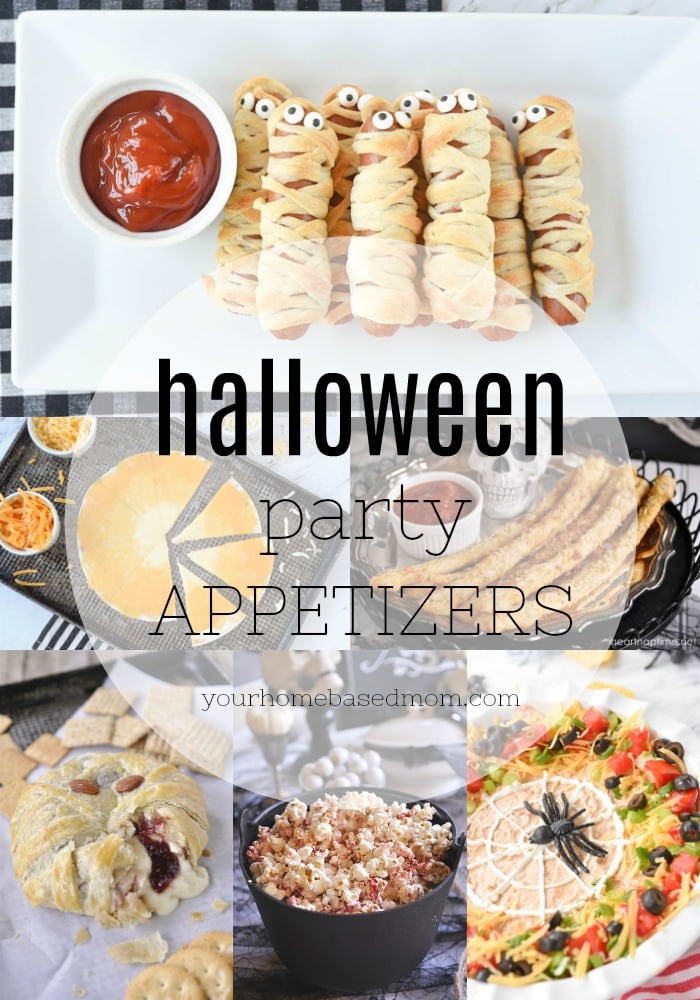
Halloween Appetizers Whether you are hosting a big Halloween party or just making some fun Halloween food for your family, you will love these fun and easy Halloween Appetizers. One of the most traditional Halloween meals are Mummy Dogs.  We make them every year, and this year I added the edible googley eyes to make them even more fun! But if you aren’t a fan of hot dogs, then try these Mummy Meatballs instead. A quick and easy appetizer that doubles as a side to your Halloween dinner, these bony breadsticks are as delicious as they are fun! Looking for something fun, festive, and easy enough you can have the kids make it themselves?  You will love these candy corn quesadillas.  All you need is three varieties of cheeses and large flour tortillas! Looking for a Halloween Appetizer that the adults will love?  Look no further than Mummy Wrapped Brie. And for even more Halloween fun, add a layer of raspberry jelly for a spooky surprise when you cut into it.  Scary and delicious! We love a good seven layer dip at our house, and with the help of some sour cream you have a perfectly spooky Spider 7 Layer Dip your Halloween guests will love. Fun for a party or just a night of scary Halloween movies, bloody Popcorn is quick an easy to make.  Pop up your favorite popcorn and add a little red food coloring to the butter before you toss the popcorn in it. And what Halloween party would be complete without a little witch’s brew to drink. No matter what your Halloween plans, have a little fun with one of these festive Halloween Appetizers! Make sure to heck out these fun Halloween treats too! Orange Chocolate Halloween Popcorn Halloween Hot Chocolate Witch’s Cauldron Halloween Sundae Author information Leigh Anne Hi – I’m Leigh Anne! Food, family and friends are three of my favorite things. I love sharing easy, delicious recipes and entertaining ideas that everyone will love. When she started her blog, Your Homebased Mom, over 9 years ago she had no idea that it would one day house over 2,400 recipes and ideas! . | Facebook | Google+ | Pinterest | Continue reading Halloween Appetizers. This post is from Your Homebased Mom. If you are not reading it from our feed, it has been STOLEN. Please contact Leigh Anne to let us know. Enjoy the posts.

Whether you are hosting a big Halloween party or just making some fun Halloween food for your family, you will love these fun and easy Halloween Appetizers.

Halloween Appetizers

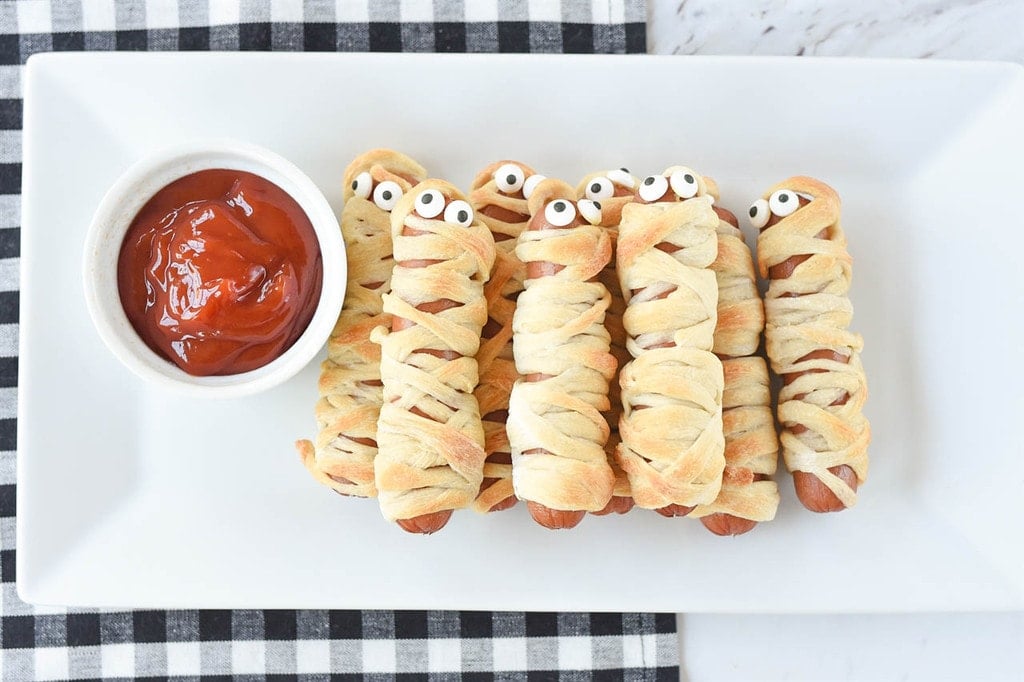
Mummy Dogs halloween appetizer

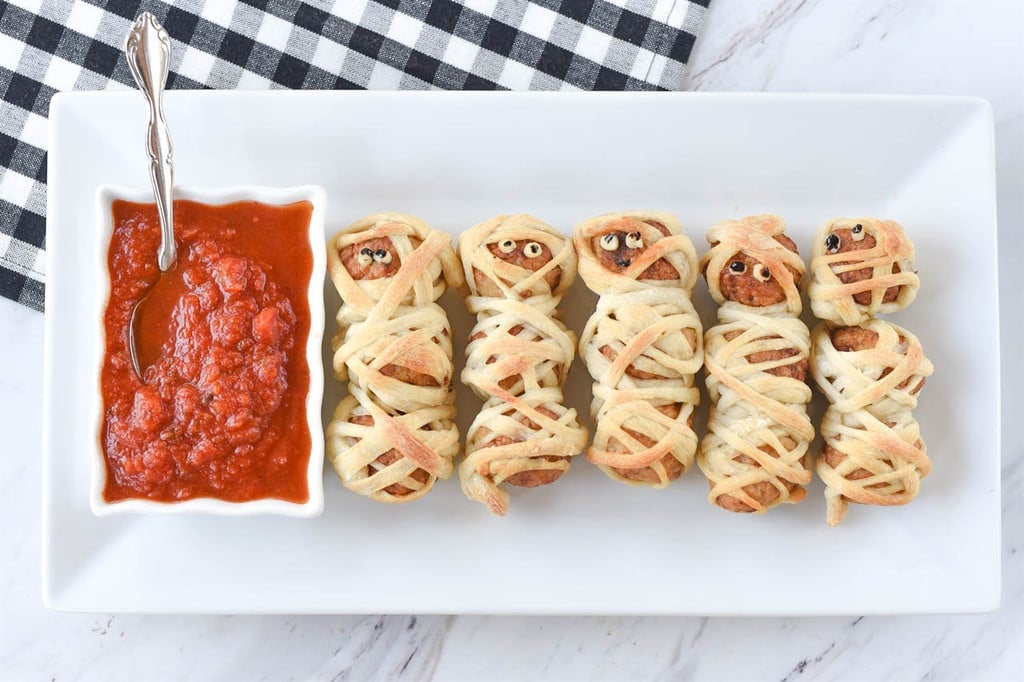
One of the most traditional Halloween meals are Mummy Dogs.  We make them every year, and this year I added the edible googley eyes to make them even more fun! But if you aren’t a fan of hot dogs, then try these Mummy Meatballs instead.

Meatball Mummies halloween appetizer

A quick and easy appetizer that doubles as a side to your Halloween dinner, these bony breadsticks are as delicious as they are fun!

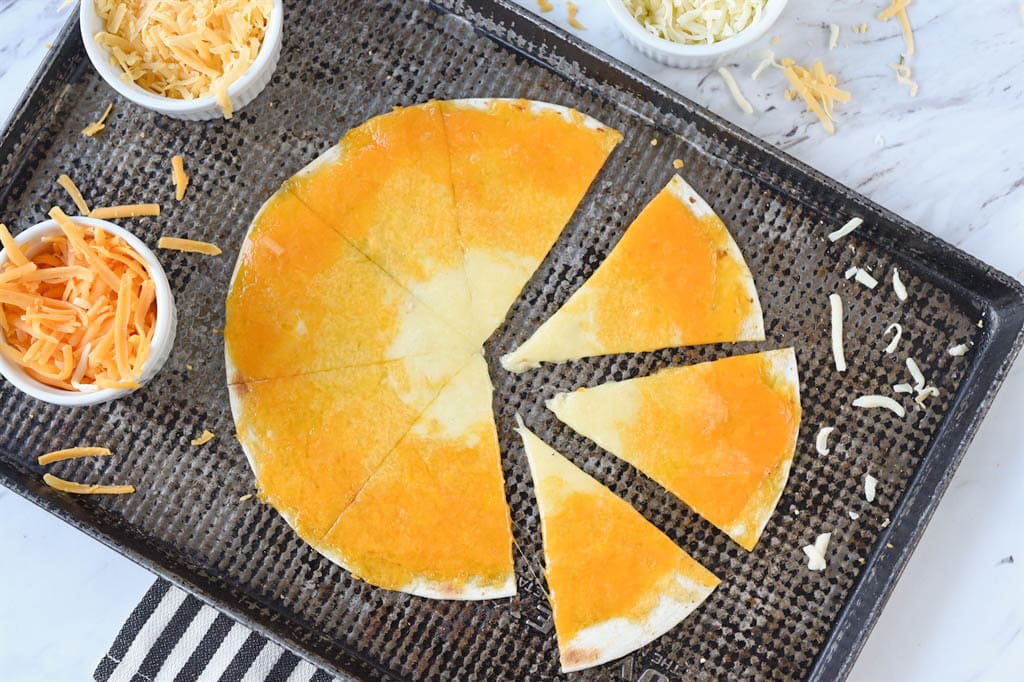
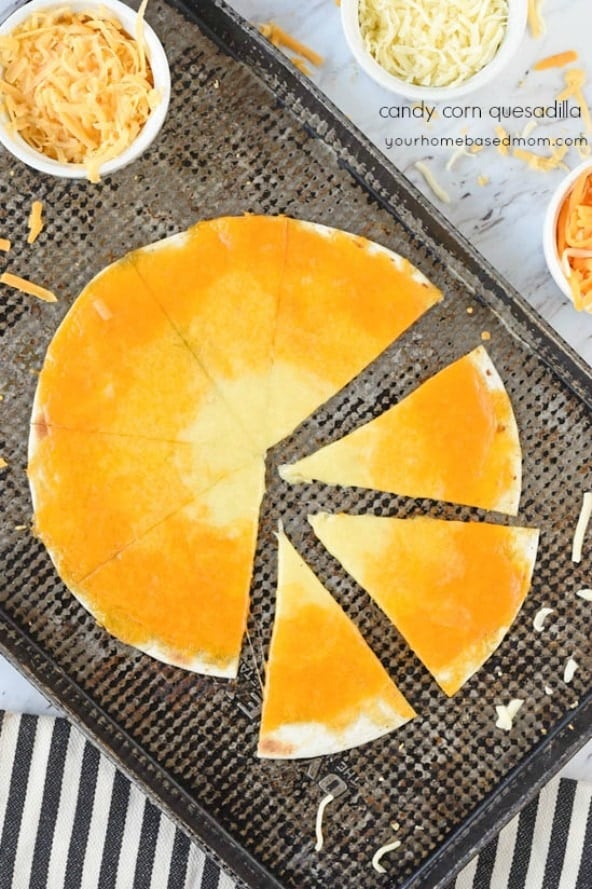
Looking for something fun, festive, and easy enough you can have the kids make it themselves?  You will love these candy corn quesadillas.  All you need is three varieties of cheeses and large flour tortillas!

Candy Corn Pizza appetizer

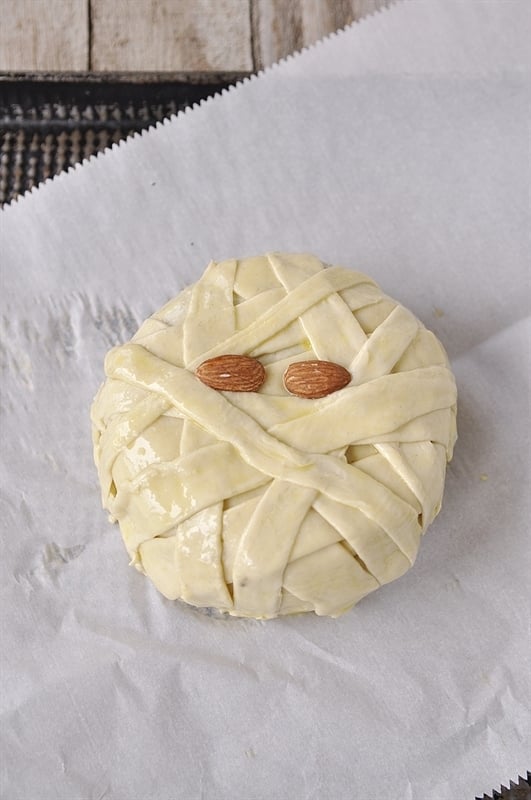
Looking for a Halloween Appetizer that the adults will love?  Look no further than Mummy Wrapped Brie.

brie wrapped to look like a mummy with almond eyes

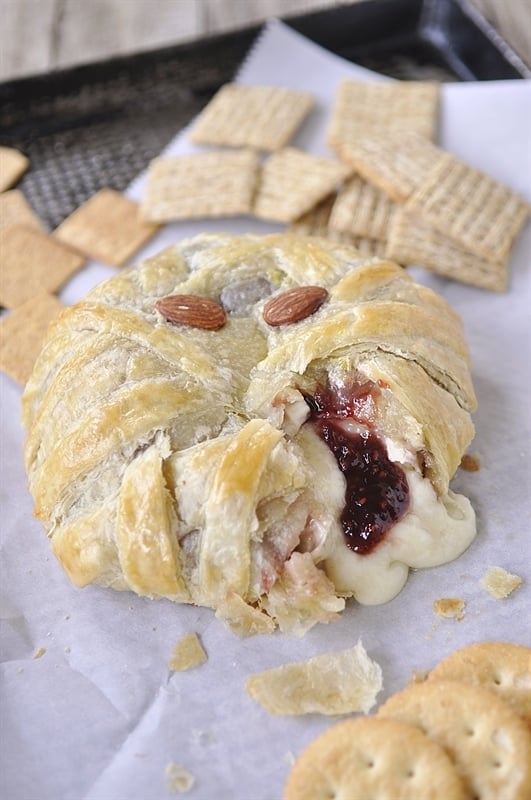
And for even more Halloween fun, add a layer of raspberry jelly for a spooky surprise when you cut into it.  Scary and delicious!

mummy wrapped brie halloween appetizer

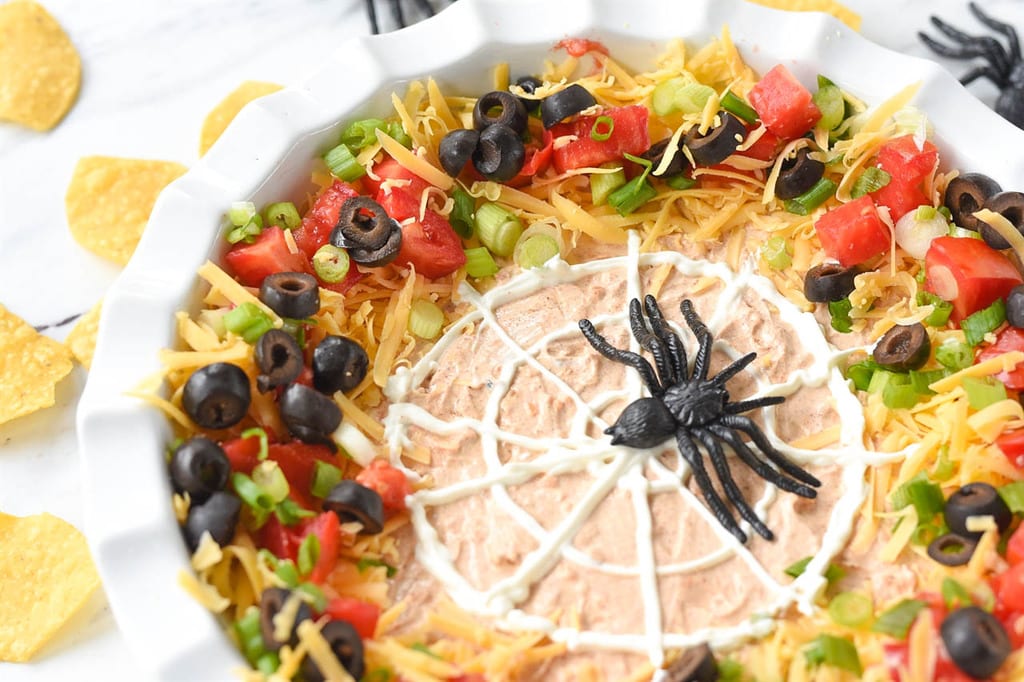
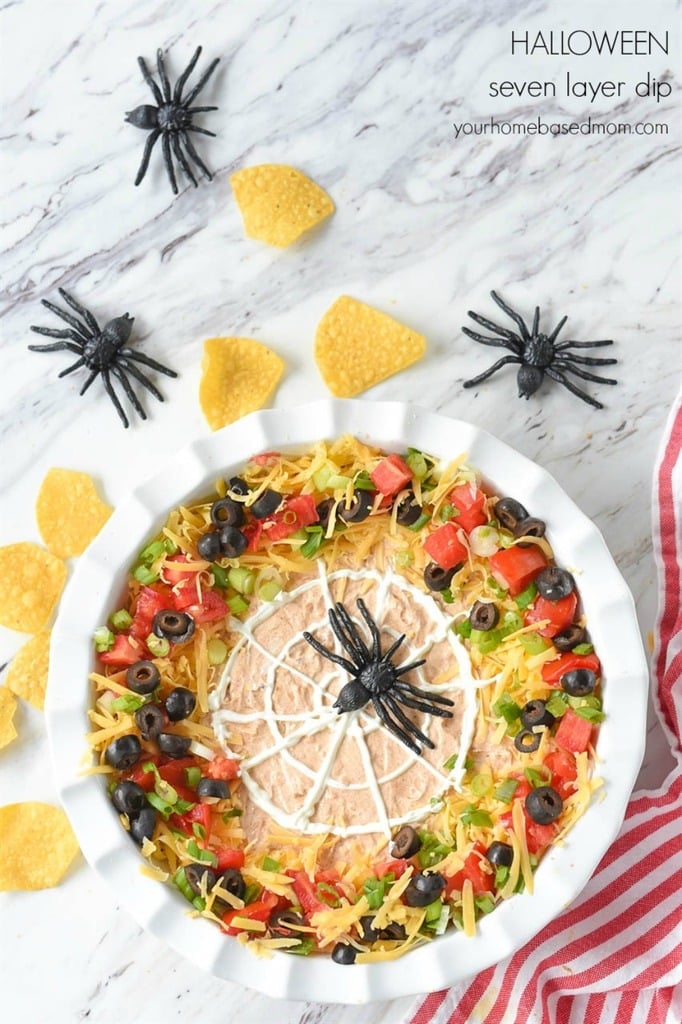
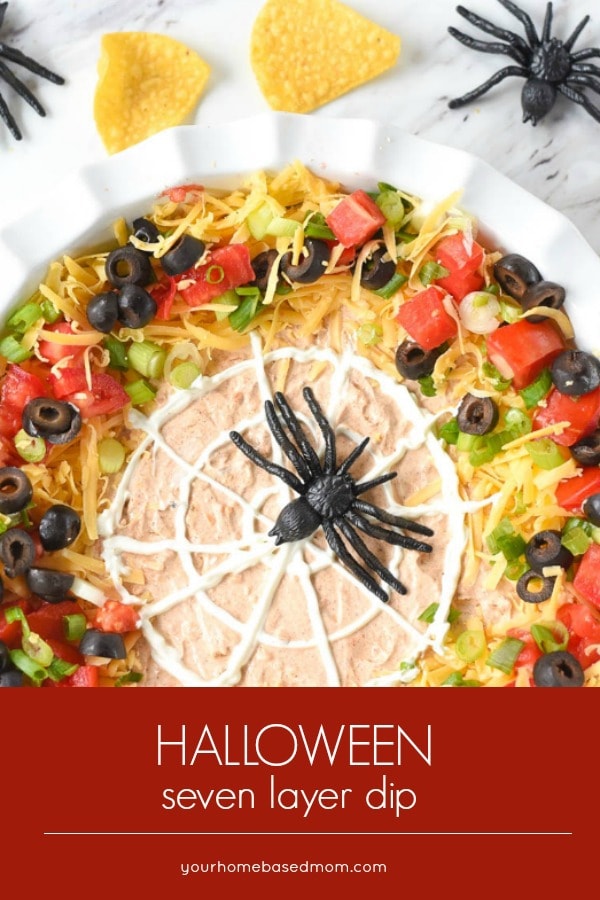
We love a good seven layer dip at our house, and with the help of some sour cream you have a perfectly spooky Spider 7 Layer Dip your Halloween guests will love.

halloween 7 layer dip

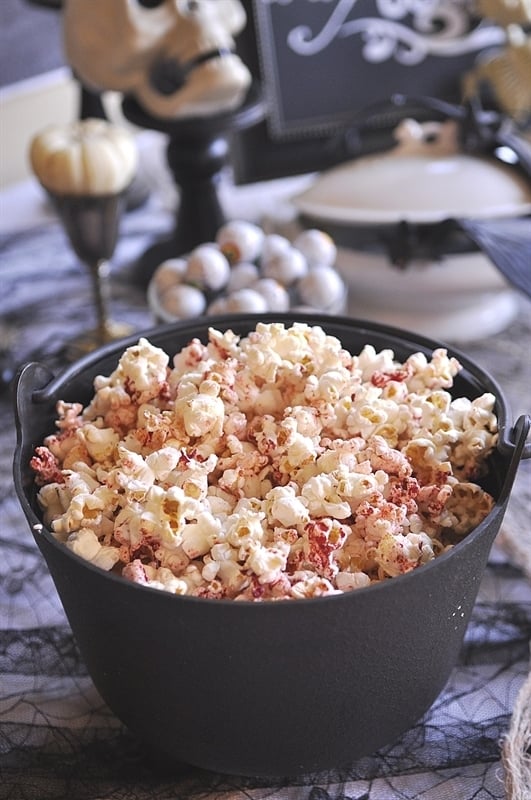
Fun for a party or just a night of scary Halloween movies, bloody Popcorn is quick an easy to make.  Pop up your favorite popcorn and add a little red food coloring to the butter before you toss the popcorn in it.

bloody popcorn in a black cauldron halloween party food

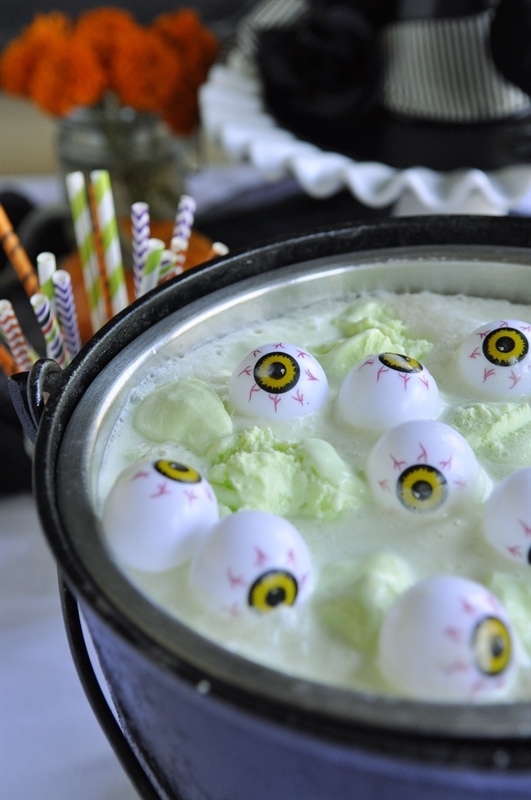
And what Halloween party would be complete without a little witch’s brew to drink.

witches brew halloween punch

No matter what your Halloween plans, have a little fun with one of these festive Halloween Appetizers!

Make sure to heck out these fun Halloween treats too!

Orange Chocolate Halloween Popcorn

Halloween Hot Chocolate

Witch’s Cauldron Halloween Sundae

Halloween Appetizers

Author information

Leigh Anne

Hi – I’m Leigh Anne! Food, family and friends are three of my favorite things. I love sharing easy, delicious recipes and entertaining ideas that everyone will love. When she started her blog, Your Homebased Mom, over 9 years ago she had no idea that it would one day house over 2,400 recipes and ideas! .

Continue reading Halloween Appetizers. This post is from Your Homebased Mom. If you are not reading it from our feed, it has been STOLEN. Please contact Leigh Anne to let us know. Enjoy the posts.


from Your Homebased Mom https://ift.tt/2yQGCgb
via IFTTThttps://ift.tt/2ypCvsm

jueves, 11 de octubre de 2018

Candy Corn Quesadilla Candy Corn Quesadilla is such a fun way to celebrate.  It is easy to make, delicious and will be the hit of the party.Whether you celebrate big or little on Halloween this candy corn quesadilla is the perfect way to do it.  We tend to celebrate Halloween big around here but even if you don’t celebrate big but want to do a little something to celebrate and make your meal a little festive this is the way to do it. The kids are going to love it too! This candy corn quesadilla is so easy to make, it’s the perfect thing to let the kids do.  All you need is some large flour tortillas and cheese.  I used mozzarella for the white center, and cheddar for the outer two layers.  Try and find different colors of cheddar so that one is darker than the other.  I found that the less expensive cheeses tend to be darker orange. Place it on a baking sheet and put it under the broiler for a few minutes until the cheese is melted.  Watch it closely so it doesn’t start to brown. Use your pizza cutter to cut it into eight equal pieces and you’ve got the perfect slice of candy corn quesadilla! Some of my other favorite Halloween party foods: Halloween 7 Layer Dip Witches Brew Candy Corn Floats For all of my other favorite kitchen products and tools visit my Amazon Store. Candy Corn Quesadilla Recipe Candy Corn Quesadilla Candy Corn Quesadilla is such a fun way to celebrate.  It is easy to make, delicious and will be the hit of the party. 1 large flour tortilla 1/4 cups mozzarella (grated) 1/2 cup cheddar cheese (grated) 1 cup cheddar cheese (grated) Place mozzarella (white cheese) in the middle of tortilla.  Add medium orange cheese around the white layer and then the dark orange cheese around the outer edge. Place under broiler and let cheese melt, don’t let it brown. Need some help figuring out what’s for dinner tonight? Come join our Facebook Group!  Join hundreds of others who love sharing dinner time ideas.  You don’t want to miss out on the fun! You’ll find lots of ideas for dinner from all our awesome members and you can share your ideas too!  Join the Family Dinner Table today.   Author information Leigh Anne Hi – I’m Leigh Anne! Food, family and friends are three of my favorite things. I love sharing easy, delicious recipes and entertaining ideas that everyone will love. When she started her blog, Your Homebased Mom, over 9 years ago she had no idea that it would one day house over 2,400 recipes and ideas! . | Facebook | Google+ | Pinterest | Continue reading Candy Corn Quesadilla. This post is from Your Homebased Mom. If you are not reading it from our feed, it has been STOLEN. Please contact Leigh Anne to let us know. Enjoy the posts.
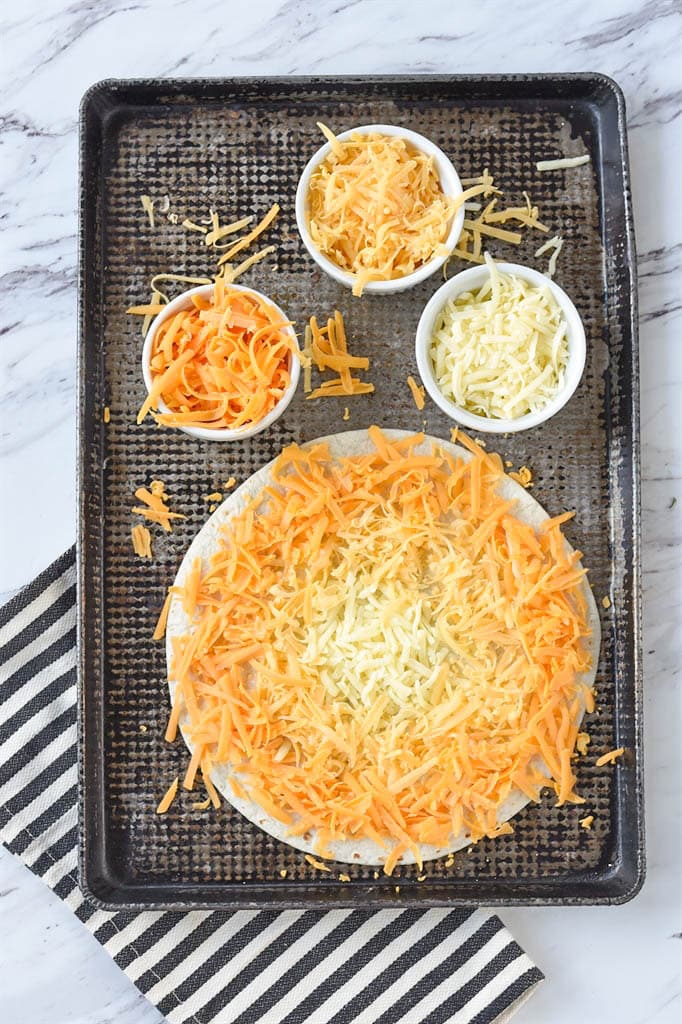
Candy Corn Quesadilla is such a fun way to celebrate.  It is easy to make, delicious and will be the hit of the party.Candy Corn QuesadillaWhether you celebrate big or little on Halloween this candy corn quesadilla is the perfect way to do it.  We tend to celebrate Halloween big around here but even if you don’t celebrate big but want to do a little something to celebrate and make your meal a little festive this is the way to do it. The kids are going to love it too!
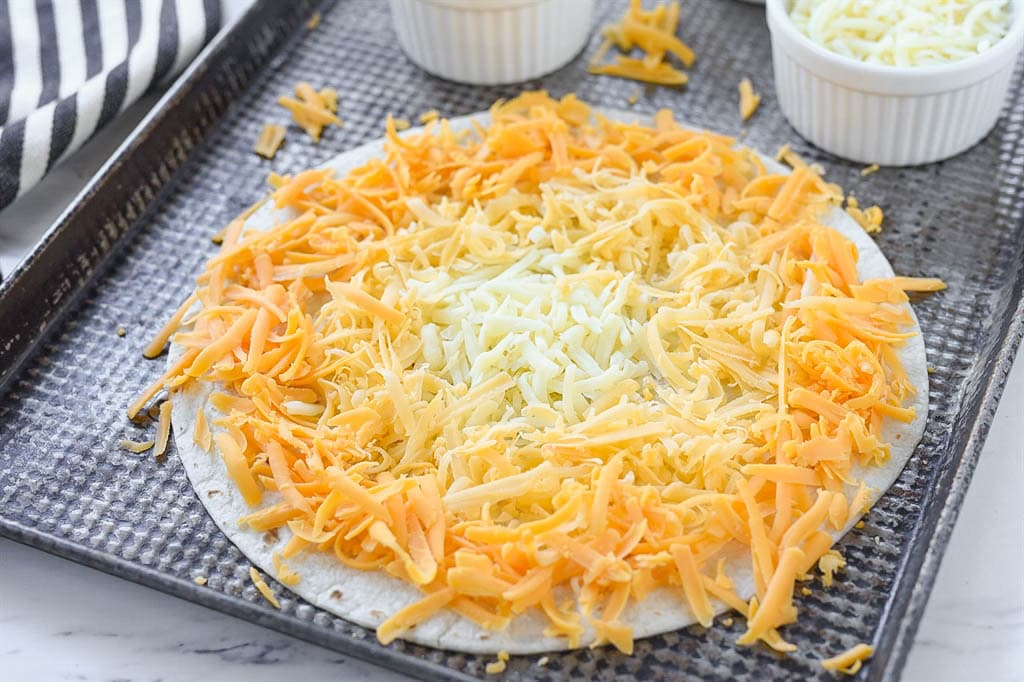
Candy Corn Quesadilla on a baking sheet with shredded cheese

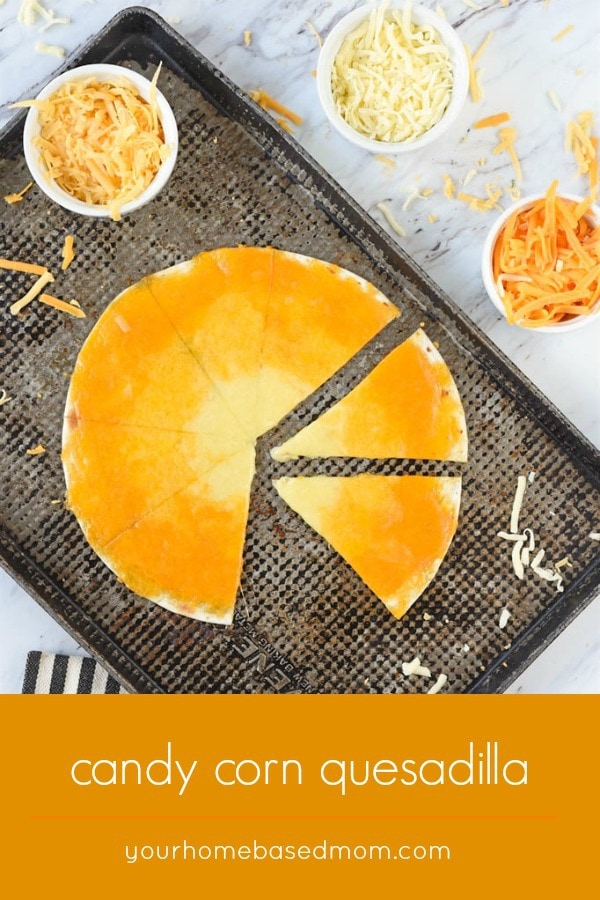
This candy corn quesadilla is so easy to make, it’s the perfect thing to let the kids do.  All you need is some large flour tortillas and cheese.  I used mozzarella for the white center, and cheddar for the outer two layers.  Try and find different colors of cheddar so that one is darker than the other.  I found that the less expensive cheeses tend to be darker orange.

candy corn colored cheese on a flour tortilla to create a candy corn quesadilla

Place it on a baking sheet and put it under the broiler for a few minutes until the cheese is melted.  Watch it closely so it doesn’t start to brown.

Candy Corn Quesadilla on a baking sheet

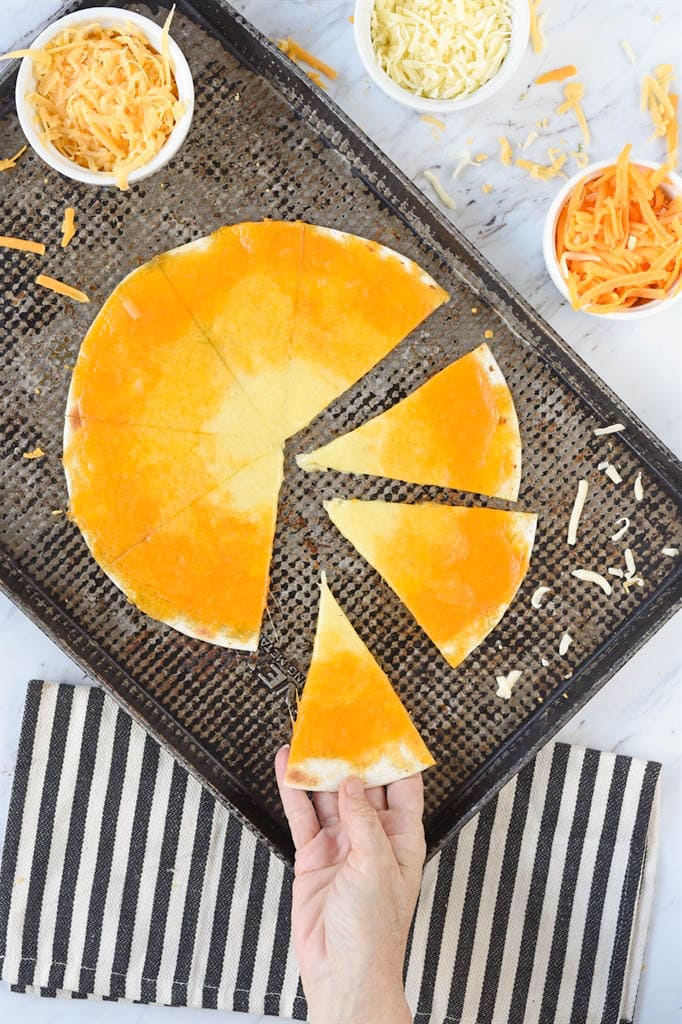
Use your pizza cutter to cut it into eight equal pieces and you’ve got the perfect slice of candy corn quesadilla!

a hand grabbing a slice of candy corn quesadilla

Some of my other favorite Halloween party foods:

Halloween 7 Layer Dip

Witches Brew

Candy Corn Floats

For all of my other favorite kitchen products and tools visit my Amazon Store.

Candy Corn Quesadilla Recipe

Candy Corn Quesadilla

Candy Corn Quesadilla is such a fun way to celebrate.  It is easy to make, delicious and will be the hit of the party.

  • 1 large flour tortilla
  • 1/4 cups mozzarella (grated)
  • 1/2 cup cheddar cheese (grated)
  • 1 cup cheddar cheese (grated)
  1. Place mozzarella (white cheese) in the middle of tortilla.  Add medium orange cheese around the white layer and then the dark orange cheese around the outer edge.

  2. Place under broiler and let cheese melt, don’t let it brown.

Need some help figuring out what’s for dinner tonight?

Come join our Facebook Group!  Join hundreds of others who love sharing dinner time ideas.  You don’t want to miss out on the fun!

You’ll find lots of ideas for dinner from all our awesome members and you can share your ideas too!  Join the Family Dinner Table today.


Candy Corn Quesadilla

Author information

Leigh Anne

Hi – I’m Leigh Anne! Food, family and friends are three of my favorite things. I love sharing easy, delicious recipes and entertaining ideas that everyone will love. When she started her blog, Your Homebased Mom, over 9 years ago she had no idea that it would one day house over 2,400 recipes and ideas! .

Continue reading Candy Corn Quesadilla. This post is from Your Homebased Mom. If you are not reading it from our feed, it has been STOLEN. Please contact Leigh Anne to let us know. Enjoy the posts.


from Your Homebased Mom https://ift.tt/2ycOdpQ
via IFTTThttps://ift.tt/2PqxJRF

martes, 9 de octubre de 2018

Profiterole Cake Profiterole Cake https://ift.tt/2OOVd5U Home Cooking Adventure RSS Feed


via Home Cooking Adventure RSS Feed https://ift.tt/2QxPwGK Profiterole Cake https://ift.tt/2OOVd5U

Halloween 7 Layer Dip Halloween 7 Layer Dip is a fun holiday twist on a favorite appetizer that is always a hit at every party.  Seven layers of deliciousness! This 7 Layer Dip is one of my boy’s most requested appetizers and this Halloween spider web version is just too much fun. It has been a repeat guest at our annual Halloweenie Roast for many years!  Turning a classic appetizer into a Halloween treat is easy to do with a little sour cream spider web and plastic spider! I always start with a round baking dish, this one is about 9-10 inches across.  The first layer is guacamole.  You can make your own guacamole using my favorite chipotle copycat guacamole recipe or buy it in the deli section of the grocery store. Seven Layer Dip traditionally has a layer of beans but I’m not a bean fan so I use a layer of sour cream mixed with taco seasoning mix.  Yum! Next, I took the other layers, the tomato, cheese, olives and green onions and put them around the edge of the dish, making a border with them. Now, the fun part!  I put some sour cream into a little zip lock baggie and snip off the corner, just a little bit.  Then pipe the sour cream into the shape of a spider web. Then all I did was add the spider, some tortilla chips and it’s ready to serve.  The kids and adults will love it. Not Halloween?  You can check out my regular version of 7 Layer Dip here. Some other fun Halloween appetizer ideas: Mummy Brie Bony Halloween Breadsticks For all of my other favorite kitchen products and tools visit my Amazon Store. Halloween 7 Layer Dip Recipe Halloween 7 Layer Dip Halloween 7 Layer Dip is a fun holiday twist on a classic appetizer that is always a hit at every party.  Seven layers of deliciousness! 1 1/2 cups guacamole 2 cups sour cream 2 1.25 oz. pkgs taco seasoning 4 Tbsp mayo 1 2.25 oz. sliced olives 3 green onions (sliced) 2 cups cheddar cheese (grated) 1 tomato (chopped) 1/2 cup sour cream (for web) Layer guacamole in bottom of 9-10 Inch round dish Mix together sour cream, taco seasoning and mayo.  Spread over top of guacamole Add olives, green onions, grated cheese and diced tomatoes around edge of dish. Put sour cream into a small zipper plastic bag and snip the corner off.  Pipe spider web shape onto the middle section of the dip.  Add plastic spider if desired Refrigerate until ready to serve.  Serve with chips Need some help figuring out what’s for dinner tonight? Come join our Facebook Group!  Join hundreds of others who love sharing dinner time ideas.  You don’t want to miss out on the fun! You’ll find lots of ideas for dinner from all our awesome members and you can share your ideas too!  Join the Family Dinner Table today.       Author information Leigh Anne Hi – I’m Leigh Anne! Food, family and friends are three of my favorite things. I love sharing easy, delicious recipes and entertaining ideas that everyone will love. When she started her blog, Your Homebased Mom, over 9 years ago she had no idea that it would one day house over 2,400 recipes and ideas! . | Facebook | Google+ | Pinterest | Continue reading Halloween 7 Layer Dip. This post is from Your Homebased Mom. If you are not reading it from our feed, it has been STOLEN. Please contact Leigh Anne to let us know. Enjoy the posts.

Halloween 7 Layer Dip is a fun holiday twist on a favorite appetizer that is always a hit at every party.  Seven layers of deliciousness!

Spider Web Seven Layer Dip in a white dish

This 7 Layer Dip is one of my boy’s most requested appetizers and this Halloween spider web version is just too much fun. It has been a repeat guest at our annual Halloweenie Roast for many years!  Turning a classic appetizer into a Halloween treat is easy to do with a little sour cream spider web and plastic spider!

layered dip with sour cream spider web and plastic black spiders

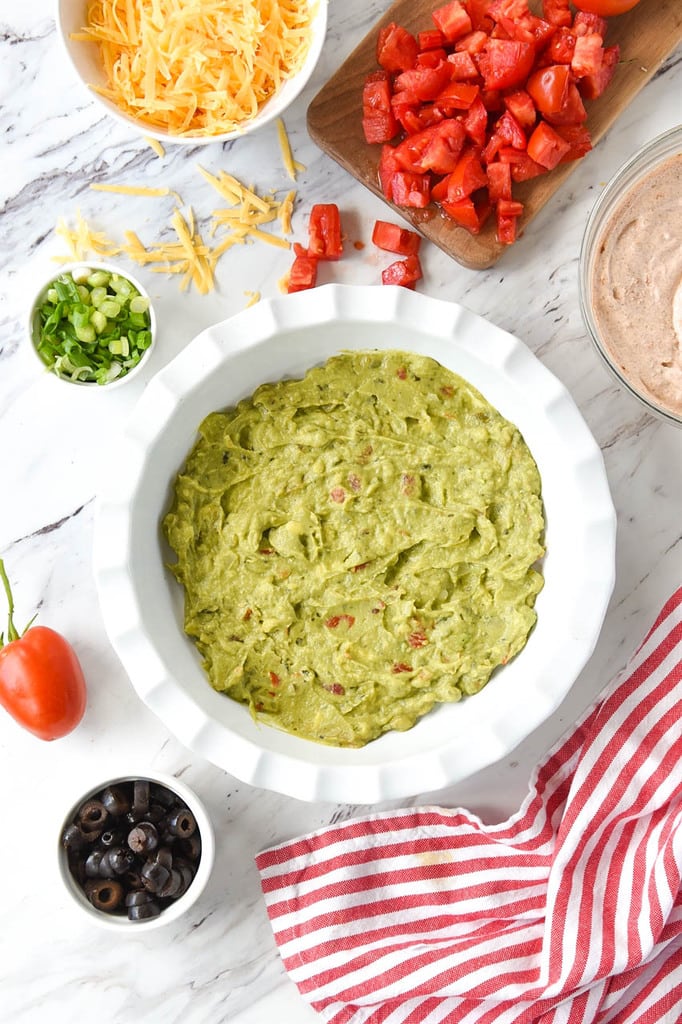
I always start with a round baking dish, this one is about 9-10 inches across.  The first layer is guacamole.  You can make your own guacamole using my favorite chipotle copycat guacamole recipe or buy it in the deli section of the grocery store.

Guacamole layer of seven layer dip

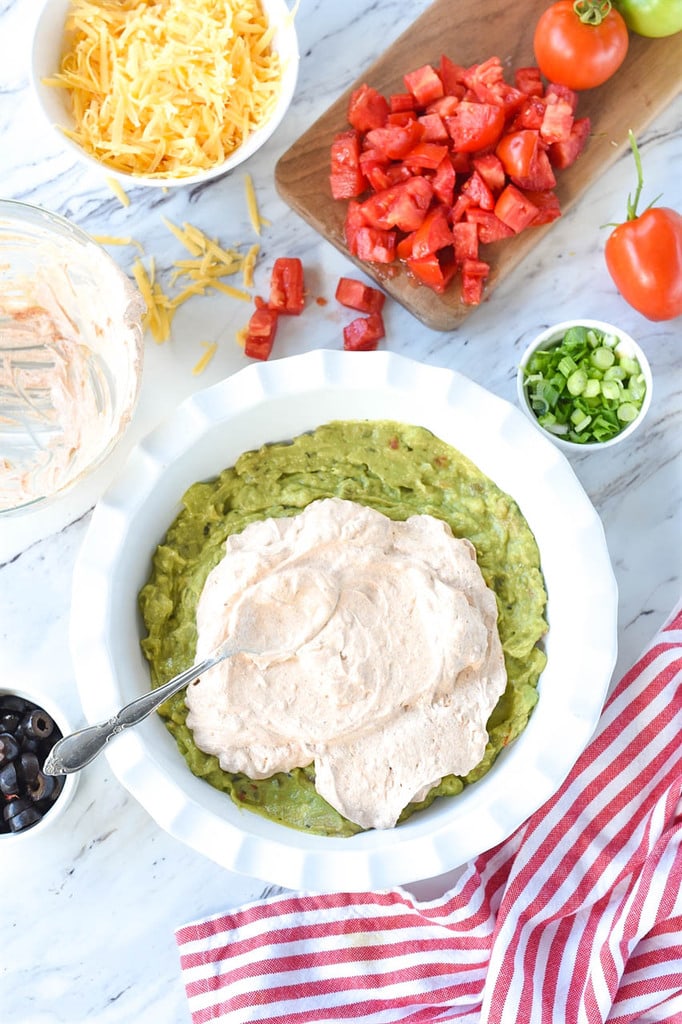
Seven Layer Dip traditionally has a layer of beans but I’m not a bean fan so I use a layer of sour cream mixed with taco seasoning mix.  Yum!

spreading sour cream over guacamole in 7 layer dip

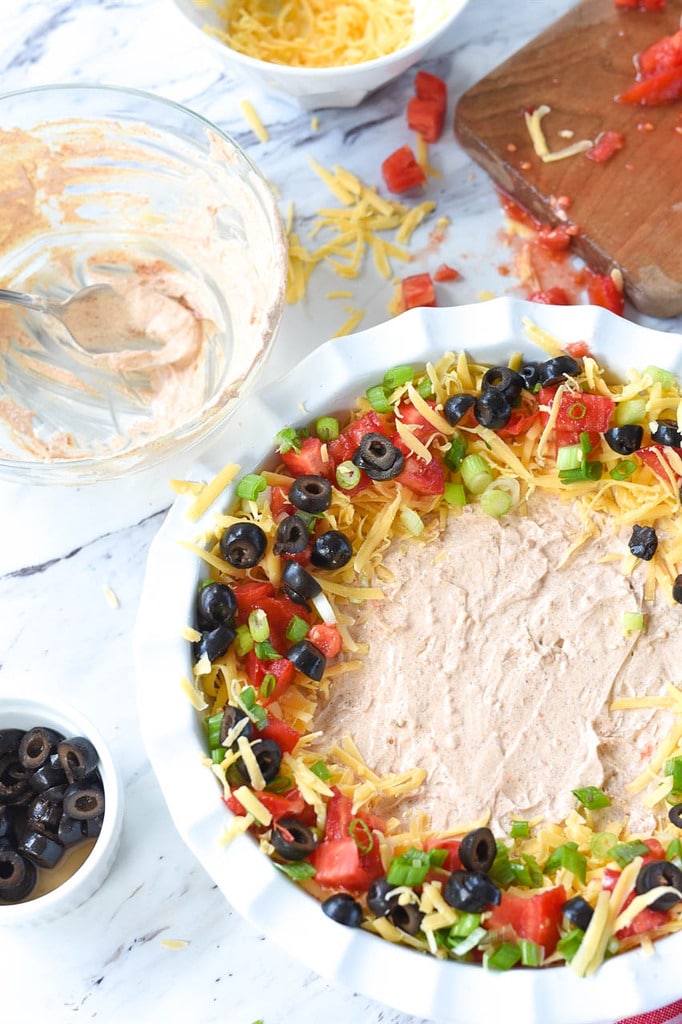
Next, I took the other layers, the tomato, cheese, olives and green onions and put them around the edge of the dish, making a border with them.

spider web seven layer dip recipe

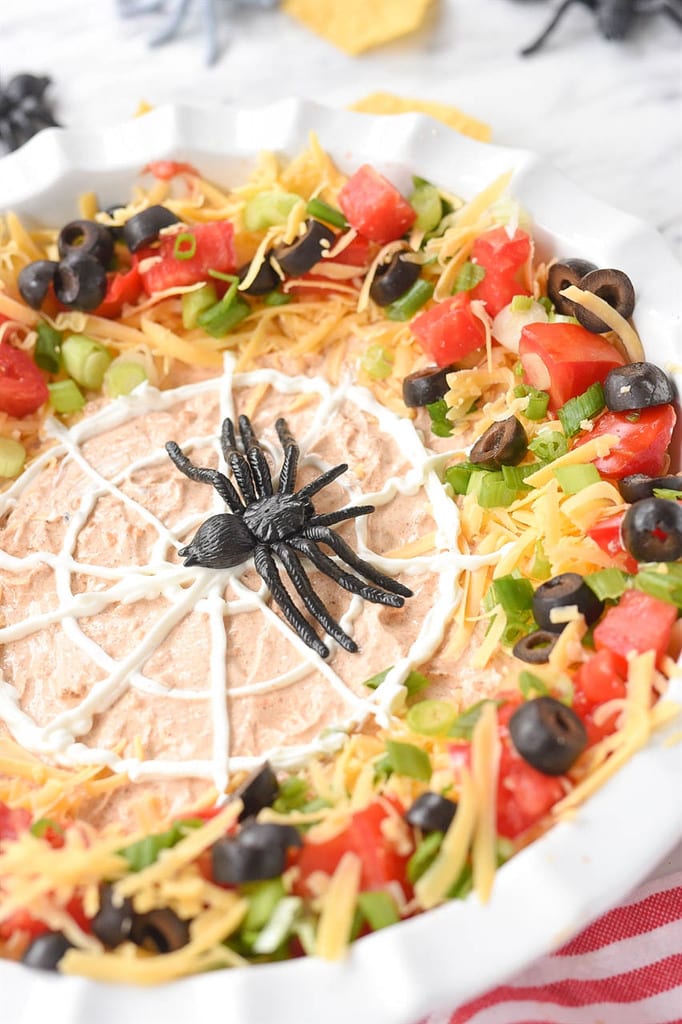
Now, the fun part!  I put some sour cream into a little zip lock baggie and snip off the corner, just a little bit.  Then pipe the sour cream into the shape of a spider web.

black plastic spider on a sour cream spider web 7 layer dip

Then all I did was add the spider, some tortilla chips and it’s ready to serve.  The kids and adults will love it. Not Halloween?  You can check out my regular version of 7 Layer Dip here.

Some other fun Halloween appetizer ideas:

Mummy Brie

Bony Halloween Breadsticks

For all of my other favorite kitchen products and tools visit my Amazon Store.

Halloween 7 Layer Dip Recipe

Halloween 7 Layer Dip

Halloween 7 Layer Dip is a fun holiday twist on a classic appetizer that is always a hit at every party.  Seven layers of deliciousness!

  • 1 1/2 cups guacamole
  • 2 cups sour cream
  • 2 1.25 oz. pkgs taco seasoning
  • 4 Tbsp mayo
  • 1 2.25 oz. sliced olives
  • 3 green onions (sliced)
  • 2 cups cheddar cheese (grated)
  • 1 tomato (chopped)
  • 1/2 cup sour cream (for web)
  1. Layer guacamole in bottom of 9-10 Inch round dish

  2. Mix together sour cream, taco seasoning and mayo.  Spread over top of guacamole

  3. Add olives, green onions, grated cheese and diced tomatoes around edge of dish.

  4. Put sour cream into a small zipper plastic bag and snip the corner off.  Pipe spider web shape onto the middle section of the dip.  Add plastic spider if desired

  5. Refrigerate until ready to serve.  Serve with chips

Need some help figuring out what’s for dinner tonight?

Come join our Facebook Group!  Join hundreds of others who love sharing dinner time ideas.  You don’t want to miss out on the fun!

You’ll find lots of ideas for dinner from all our awesome members and you can share your ideas too!  Join the Family Dinner Table today.

Halloween Seven Layer Dip


Author information

Leigh Anne

Hi – I’m Leigh Anne! Food, family and friends are three of my favorite things. I love sharing easy, delicious recipes and entertaining ideas that everyone will love. When she started her blog, Your Homebased Mom, over 9 years ago she had no idea that it would one day house over 2,400 recipes and ideas! .

Continue reading Halloween 7 Layer Dip. This post is from Your Homebased Mom. If you are not reading it from our feed, it has been STOLEN. Please contact Leigh Anne to let us know. Enjoy the posts.


from Your Homebased Mom https://ift.tt/2yaDDQn
via IFTTThttps://ift.tt/2Pp914c

martes, 2 de octubre de 2018

Pumpkin Bars with Cream Cheese Frosting Pumpkin Bars are a delicious fall dessert. This pumpkin bar recipe makes a nice moist pumpkin cake topped with a rich, cream cheese frosting. Today’s recipe for Pumpkin Bars comes from my friend Sherra.  This is one of their family’s  favorite holiday recipes. One year she made 20 batches of pumpkin bars for her kid’s school.  It was so popular, she printed off the recipe and left it in the school office for all the mom’s who kept asking for the recipe! A few weeks ago we hosted a get together at our house for the new families in our church congregation.  I needed a treat that I could make stretch as I had no idea how many people were coming. These pumpkin bars are made in a large 12 x 17 inch jelly roll pan and I knew I could cut them into whatever size I needed depending on how many people showed up! The cake is made with a yummy combination of fall flavors – cinnamon, nutmeg, cloves and ginger so it is the perfect treat for this time of year.  For me, the cream cheese frosting is the best part, just slather it on!! I like to sprinkle them with some pecans because it dresses them up a bit and makes them prettier.  Just cut the bars into any size you like – depending on how many you are feeding. Because of the cream cheese in the frosting be sure and keep the leftovers in the refrigerator – if you have any leftovers! Some of my other favorite pumpkin recipes: Pumpkin Cookies with Maple Frosting Chocolate Chip Pumpkin Bread Pumpkin Chili Some of my favorite kitchen tools I use to make Pumpkin Bars: SHEET PAN – I have at least six of these in my kitchen.  I use them everyday. The 13 x 18 size is perfect and I use them for everything! For all of my other favorite kitchen products and tools visit my Amazon Store. Did you know I wrote a cookbook?  Check out the Holiday Slow Cooker Cookbook for 100 delicious recipes Pumpkin Bars Recipe Pumpkin Bars Delicious pumpkin bars with cream cheese frosting.  Perfect for feeding a crowd! 4 eggs 2 C sugar 1 C oil 1 can pumpkin (15 oz.) 2 C flour 2 tsp baking powder 1 tsp baking soda 1/2 tsp salt 1/2 tsp cloves 1/2 tsp dried ginger 1/2 nutmeg 2 tsp cinnamon Cream Cheese Frosting 8 oz. cream cheese (softened) 3/4 stick of butter (softened) 1 Tbsp milk 1 tsp vanilla 4 C powdered sugar Mix together oil, eggs, sugar and pumpkin. Add in flour, baking powder, baking soda, salt and spices. Pour into a greased 12 x 17 jelly roll pan Bake at 350 for 25-30 minutes. Cream Cheese Frosting Mix together cream cheese, vanilla, butter, milk, powdered sugar until smooth Frost cooled cake with mixture Originally posted November 7, 2012 Author information Leigh Anne Hi – I’m Leigh Anne! Food, family and friends are three of my favorite things. I love sharing easy, delicious recipes and entertaining ideas that everyone will love. When she started her blog, Your Homebased Mom, over 9 years ago she had no idea that it would one day house over 2,400 recipes and ideas! . | Facebook | Google+ | Pinterest | Continue reading Pumpkin Bars with Cream Cheese Frosting. This post is from Your Homebased Mom. If you are not reading it from our feed, it has been STOLEN. Please contact Leigh Anne to let us know. Enjoy the posts.
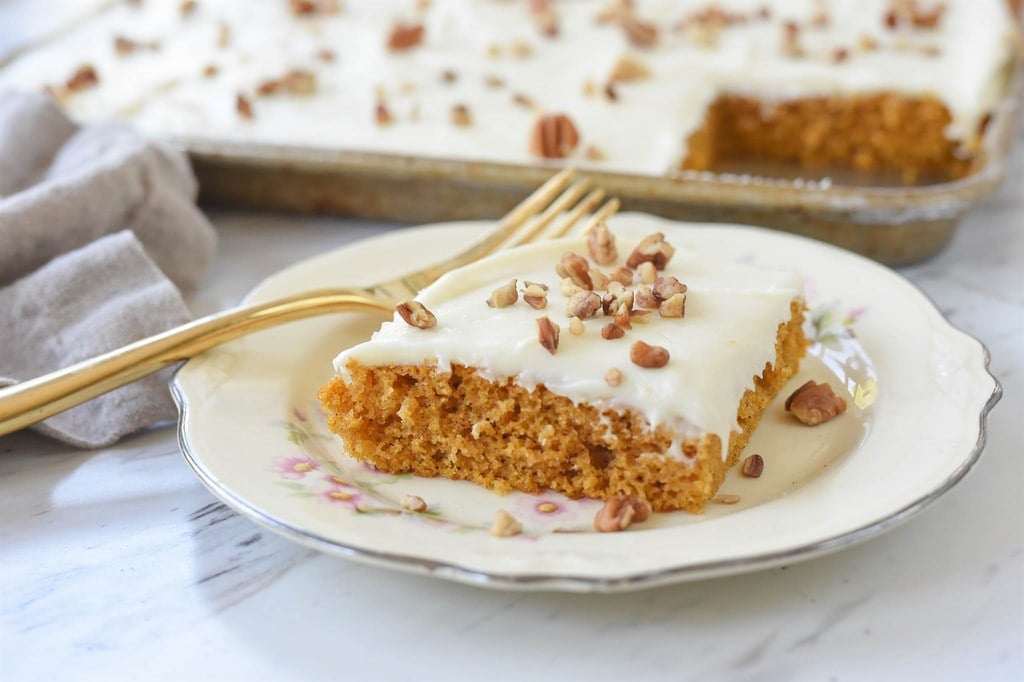
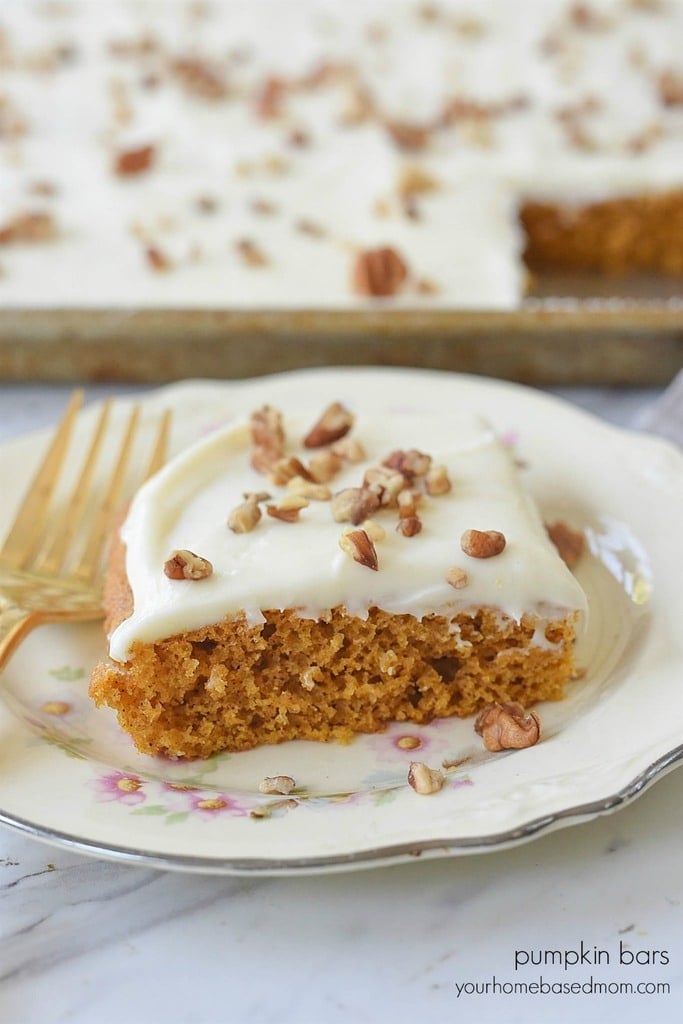
Pumpkin Bars are a delicious fall dessert. This pumpkin bar recipe makes a nice moist pumpkin cake topped with a rich, cream cheese frosting.

Pumpkin Bars Cream Cheese Frosting and pecans

Today’s recipe for Pumpkin Bars comes from my friend Sherra.  This is one of their family’s  favorite holiday recipes. One year she made 20 batches of pumpkin bars for her kid’s school.  It was so popular, she printed off the recipe and left it in the school office for all the mom’s who kept asking for the recipe!

Pumpkin Bars

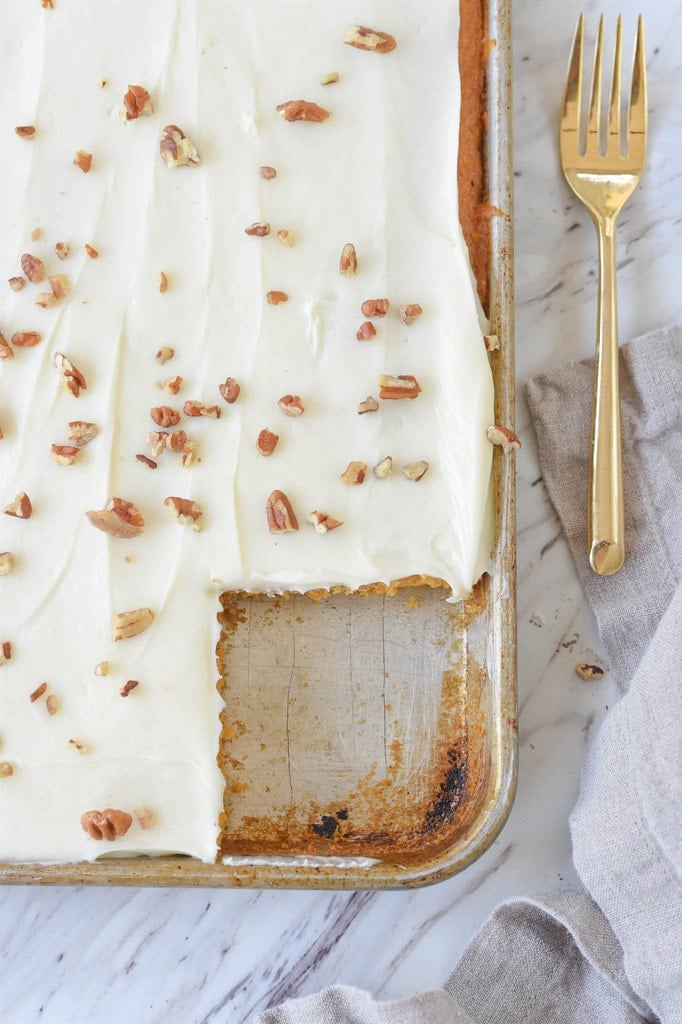
A few weeks ago we hosted a get together at our house for the new families in our church congregation.  I needed a treat that I could make stretch as I had no idea how many people were coming. These pumpkin bars are made in a large 12 x 17 inch jelly roll pan and I knew I could cut them into whatever size I needed depending on how many people showed up!

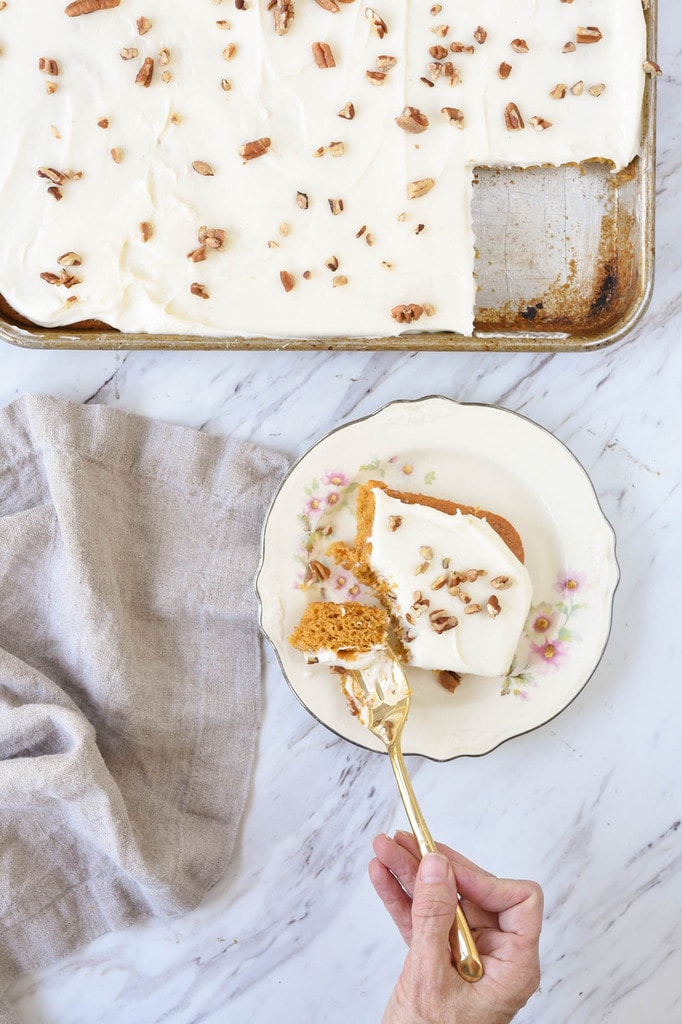
pumpkin bar sheet cake with slice missing
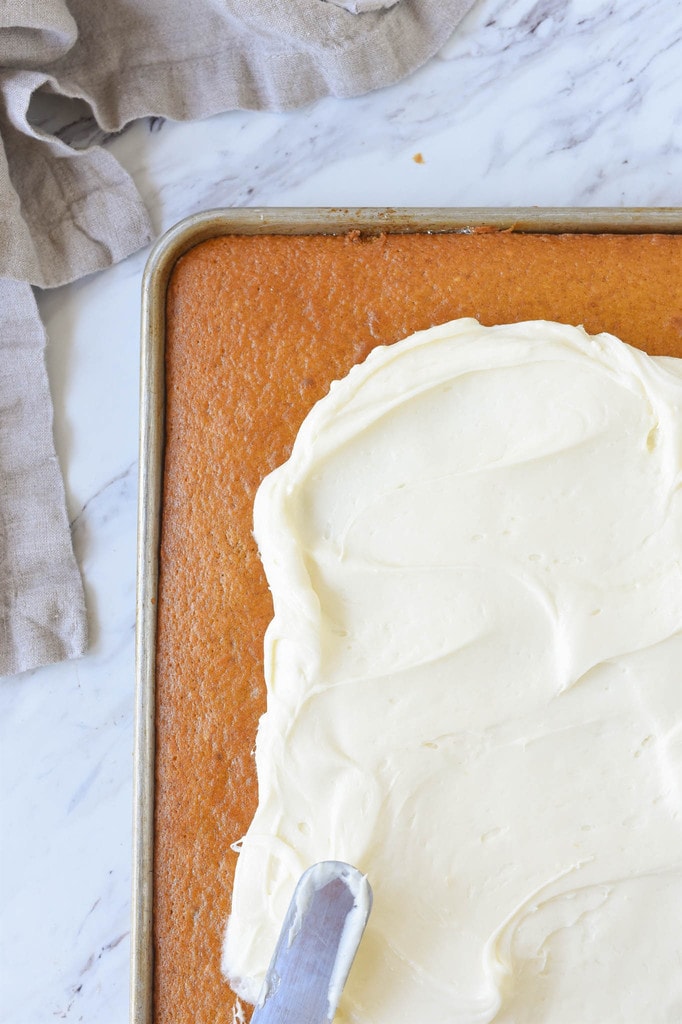
The cake is made with a yummy combination of fall flavors – cinnamon, nutmeg, cloves and ginger so it is the perfect treat for this time of year.  For me, the cream cheese frosting is the best part, just slather it on!!

Frosting pumpkin bars with Cream Cheese Frosting

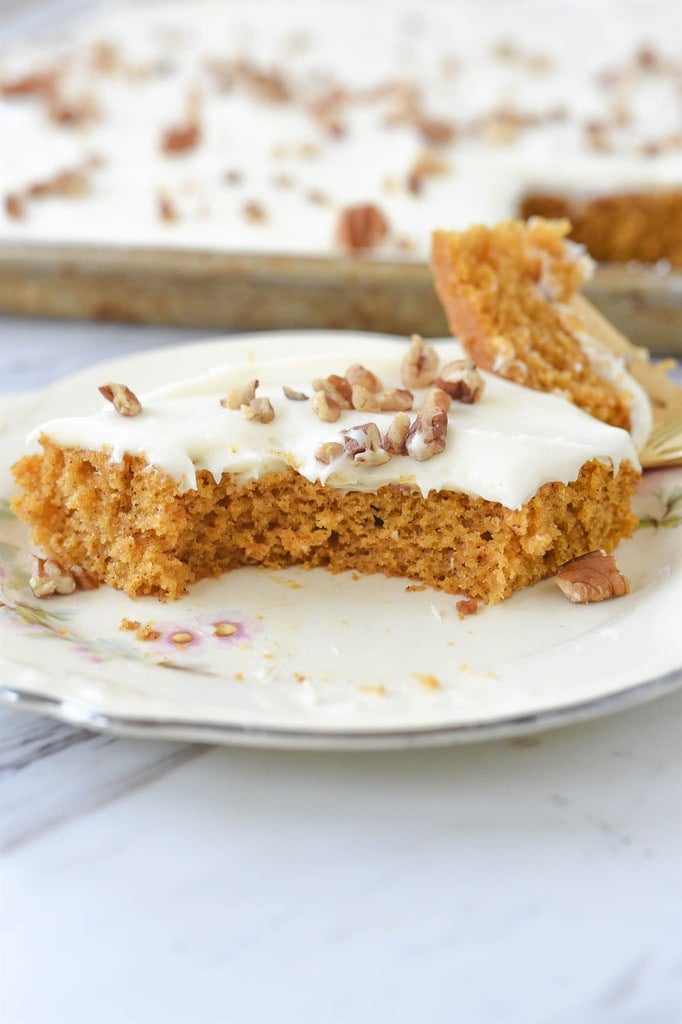
I like to sprinkle them with some pecans because it dresses them up a bit and makes them prettier.  Just cut the bars into any size you like – depending on how many you are feeding.

Piece of a pumpkin bar on a plateBecause of the cream cheese in the frosting be sure and keep the leftovers in the refrigerator – if you have any leftovers!

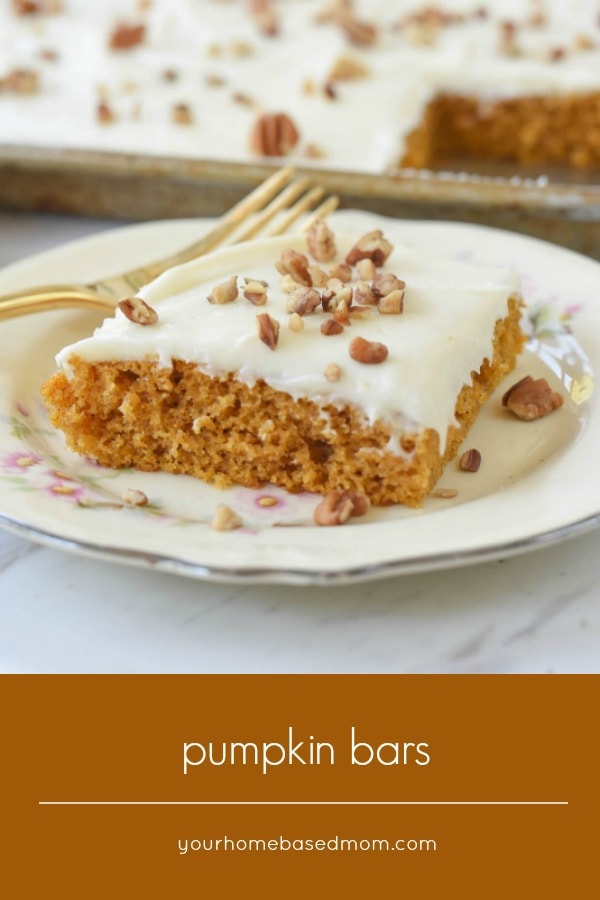
Pumpkin Bar frosted with cream cheese and pecans

Some of my other favorite pumpkin recipes:

Pumpkin Cookies with Maple Frosting

Chocolate Chip Pumpkin Bread

Pumpkin Chili

Some of my favorite kitchen tools I use to make Pumpkin Bars:

SHEET PAN – I have at least six of these in my kitchen.  I use them everyday. The 13 x 18 size is perfect and I use them for everything!

For all of my other favorite kitchen products and tools visit my Amazon Store.

Did you know I wrote a cookbook?  Check out the Holiday Slow Cooker Cookbook for 100 delicious recipes

Pumpkin Bars Recipe

Pumpkin Bars

Delicious pumpkin bars with cream cheese frosting.  Perfect for feeding a crowd!

  • 4 eggs
  • 2 C sugar
  • 1 C oil
  • 1 can pumpkin (15 oz.)
  • 2 C flour
  • 2 tsp baking powder
  • 1 tsp baking soda
  • 1/2 tsp salt
  • 1/2 tsp cloves
  • 1/2 tsp dried ginger
  • 1/2 nutmeg
  • 2 tsp cinnamon

Cream Cheese Frosting

  • 8 oz. cream cheese (softened)
  • 3/4 stick of butter (softened)
  • 1 Tbsp milk
  • 1 tsp vanilla
  • 4 C powdered sugar
  1. Mix together oil, eggs, sugar and pumpkin.
  2. Add in flour, baking powder, baking soda, salt and spices.
  3. Pour into a greased 12 x 17 jelly roll pan
  4. Bake at 350 for 25-30 minutes.

Cream Cheese Frosting

  1. Mix together cream cheese, vanilla, butter, milk, powdered sugar until smooth
  2. Frost cooled cake with mixture

Pumpkin Bars with Cream Cheese Frosting

Originally posted November 7, 2012

Author information

Leigh Anne

Hi – I’m Leigh Anne! Food, family and friends are three of my favorite things. I love sharing easy, delicious recipes and entertaining ideas that everyone will love. When she started her blog, Your Homebased Mom, over 9 years ago she had no idea that it would one day house over 2,400 recipes and ideas! .

Continue reading Pumpkin Bars with Cream Cheese Frosting. This post is from Your Homebased Mom. If you are not reading it from our feed, it has been STOLEN. Please contact Leigh Anne to let us know. Enjoy the posts.


from Your Homebased Mom https://ift.tt/2Rl19lt
via IFTTThttps://ift.tt/2P5GwZf