domingo, 29 de diciembre de 2019

Cinnamon Rice Krispie Treats Cinnamon Rice Krispie Treats are a fun twist on an old favorite. Use cinnamon flavored marshmallows or add cinnamon into the marshmallow mixture for a fun new taste. Rice Krispie treats are a staple around our house and over the years I have found all kinds of fun ways to dress them up including these Cookies and Cream version and this Malted Milk Ball version  and even a rice krispie treat ice cream!  But nothing beats a perfect rice krispie treat! Have you noticed all the fun different flavors of marshmallows that have been around lately? This summer I was buying strawberry, chocolate, caramel, swirl, and coconut. All kinds of deliciousness. This fall there is a new crop of marshmallow flavors. So far I have seen pumpkin, peppermint and my personal favorite cinnamon bun. So what do you do with a bag of cinnamon marshmallows? You make Rice Krispie treats of course and these Cinnamon Rice Krispie Treats are a dressed up version of an old favorite. Don’t worry if you can’t find the cinnamon bun marshmallows I’ve got another option for you. Tips for the Best Rice Krispie Treats  Don’t use the recipe on the back of the cereal box.  I always use more butter and more marshmallows (see recipe below).  It makes them a gooey and yummier treat! Use fresh marshmallows, it does make a difference.  Don’t overcook the marshmallows, it can cause them to harden. How to Make Cinnamon Roll Rice Krispie Treats  If you can’t find cinnamon marshmallows just use regular marshmallows and add a teaspoon of cinnamon to the mixture.  You can melt the marshmallows and butter on the stove top or in the microwave. Combine the marshmallow mixture with the rice krispie cereal along with the 1/2 cup of toffee bits.  Press into a greased 9 x 13 pan.  Do not press down on the mixture with  your hand.  I like them to be light and airier but if you prefer a more compacted rice krispie treat press down on them. Sprinkle the remaining 1/3 cup of toffee bits over the top and drizzle with the melted chocolate using a fork. You can place the treats into the refrigerator to speed up the cooling process and the hardening of the chocolate. Cut into squares after they have set up and chocolate has hardened. Can I Freeze Rice Krispie Treats? They can be frozen in an airtight container but I don’t think they are as good after being frozen.  I recommend wrapping them in plastic wrap and in foil to keep the moisture and air out. They can freeze for up to six weeks.   To thaw them allow them to sit at room temperature for 15-20 minutes before serving. Other delicious treats you may enjoy: Sugar Cookie Bars Apricot Jam Bars White Chocolate Raspberry Bars For all of my other favorite kitchen products and tools visit my Amazon Store.  Did you know I wrote a cookbook?  Check out the Holiday Slow Cooker Cookbook for 100 delicious recipes Cinnamon Rice Krispie Treats Cinnamon Rice Krispie Treats Cinnamon Rice Krispie Treats are a fun twist on an old favorite. Use cinnamon flavored marshmallows or add cinnamon into the marshmallow mixture for a fun new taste. 16 oz. marshmallows (omit cinnamon if using cinnamon marshmallows.) 1 tsp cinnamon 1/2 cup butter 12 oz Rice Krispie cereal 1/2 toffee bits 1/3 cup toffee bits 1 C milk chocolate chips (melted) In a pan on the stove top combine marshmallows and butter and melt. This can also be done in the microwave. Mix marshmallows and butter until butter melts and mixture is smooth. If you can’t find cinnamon marshmallows add in 1 tsp cinnamon into mixture. Pour Rice Krispie cereal into a large bowl. Pour in marshmallow mixture and mix well. Add in 1/2 cup of toffee bits. Once the marshmallow-butter mixture is evenly mixed in, pour into a greased 9 x 13 pan. Do not press down with your hand. Sprinkle top with 1/3 C more toffee bits and allow to set. Melt 1 cup of milk chocolate chips and then drizzle over the top Originally posted October 19, 2011 If you’ve tried these Cinnamon Rice Krispie Treats or any other recipe on Your Homebased Mom, then don’t forget to rate the recipe and let me know how it went in the comments below, I love hearing from you! You can also FOLLOW ME on FACEBOOK, INSTAGRAM and PINTEREST to see more delicious food, party ideas and travel tips and what I’m up to on a daily basis! Continue reading Cinnamon Rice Krispie Treats. This post is from Your Homebased Mom. If you are not reading it from our feed, it has been STOLEN. Please contact Leigh Anne to let us know. Enjoy the posts.
Cinnamon Rice Krispie Treats are a fun twist on an old favorite. Use cinnamon flavored marshmallows or add cinnamon into the marshmallow mixture for a fun new taste.

Rice Krispie treats are a staple around our house and over the years I have found all kinds of fun ways to dress them up including these Cookies and Cream version and this Malted Milk Ball version  and even a rice krispie treat ice cream!  But nothing beats a perfect rice krispie treat!

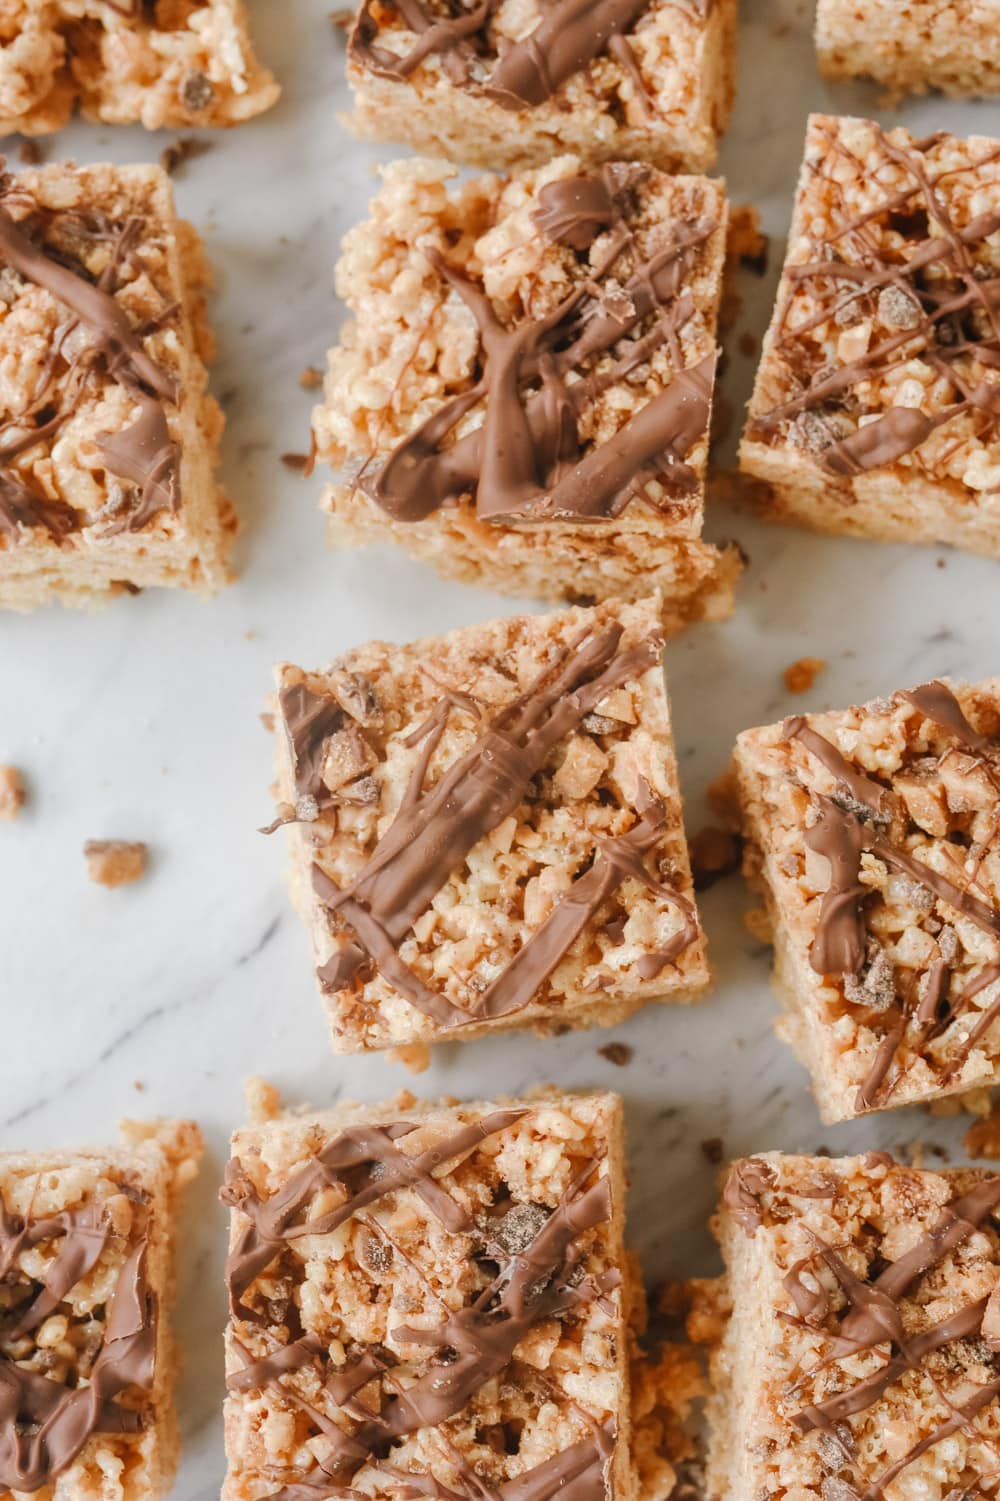
overhead shot of cinnamon rice krispie treats

Have you noticed all the fun different flavors of marshmallows that have been around lately? This summer I was buying strawberry, chocolate, caramel, swirl, and coconut. All kinds of deliciousness. This fall there is a new crop of marshmallow flavors. So far I have seen pumpkin, peppermint and my personal favorite cinnamon bun.

So what do you do with a bag of cinnamon marshmallows? You make Rice Krispie treats of course and these Cinnamon Rice Krispie Treats are a dressed up version of an old favorite. Don’t worry if you can’t find the cinnamon bun marshmallows I’ve got another option for you.
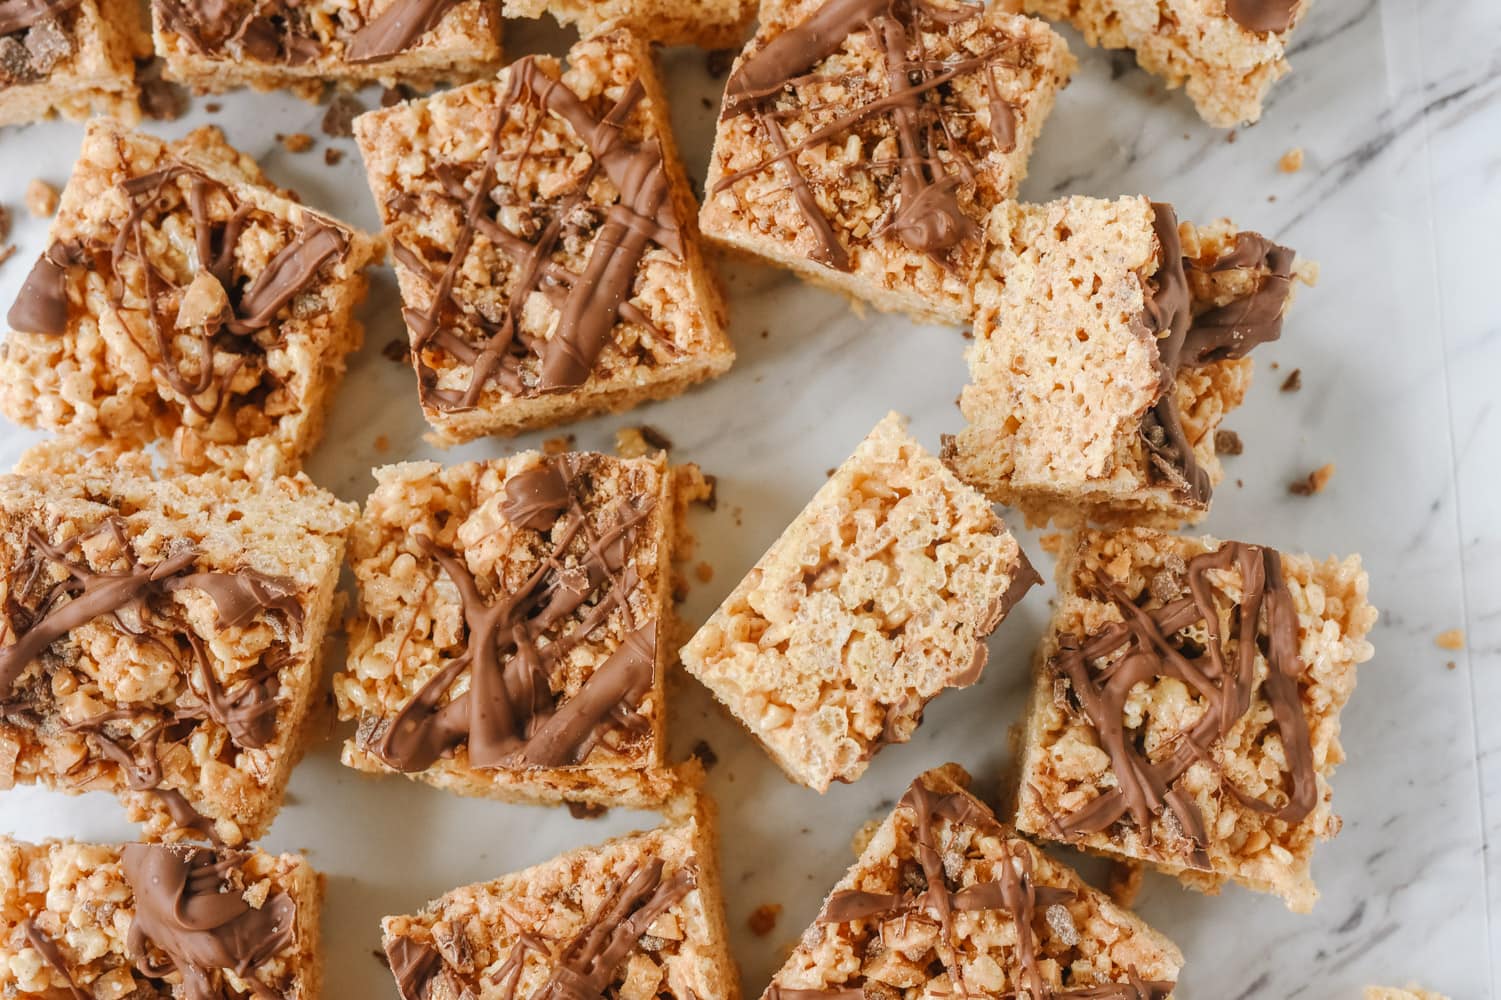
cinnamon rice krispie treats cut into squares

Tips for the Best Rice Krispie Treats

  1.  Don’t use the recipe on the back of the cereal box.  I always use more butter and more marshmallows (see recipe below).  It makes them a gooey and yummier treat!
  2. Use fresh marshmallows, it does make a difference.
  3.  Don’t overcook the marshmallows, it can cause them to harden.
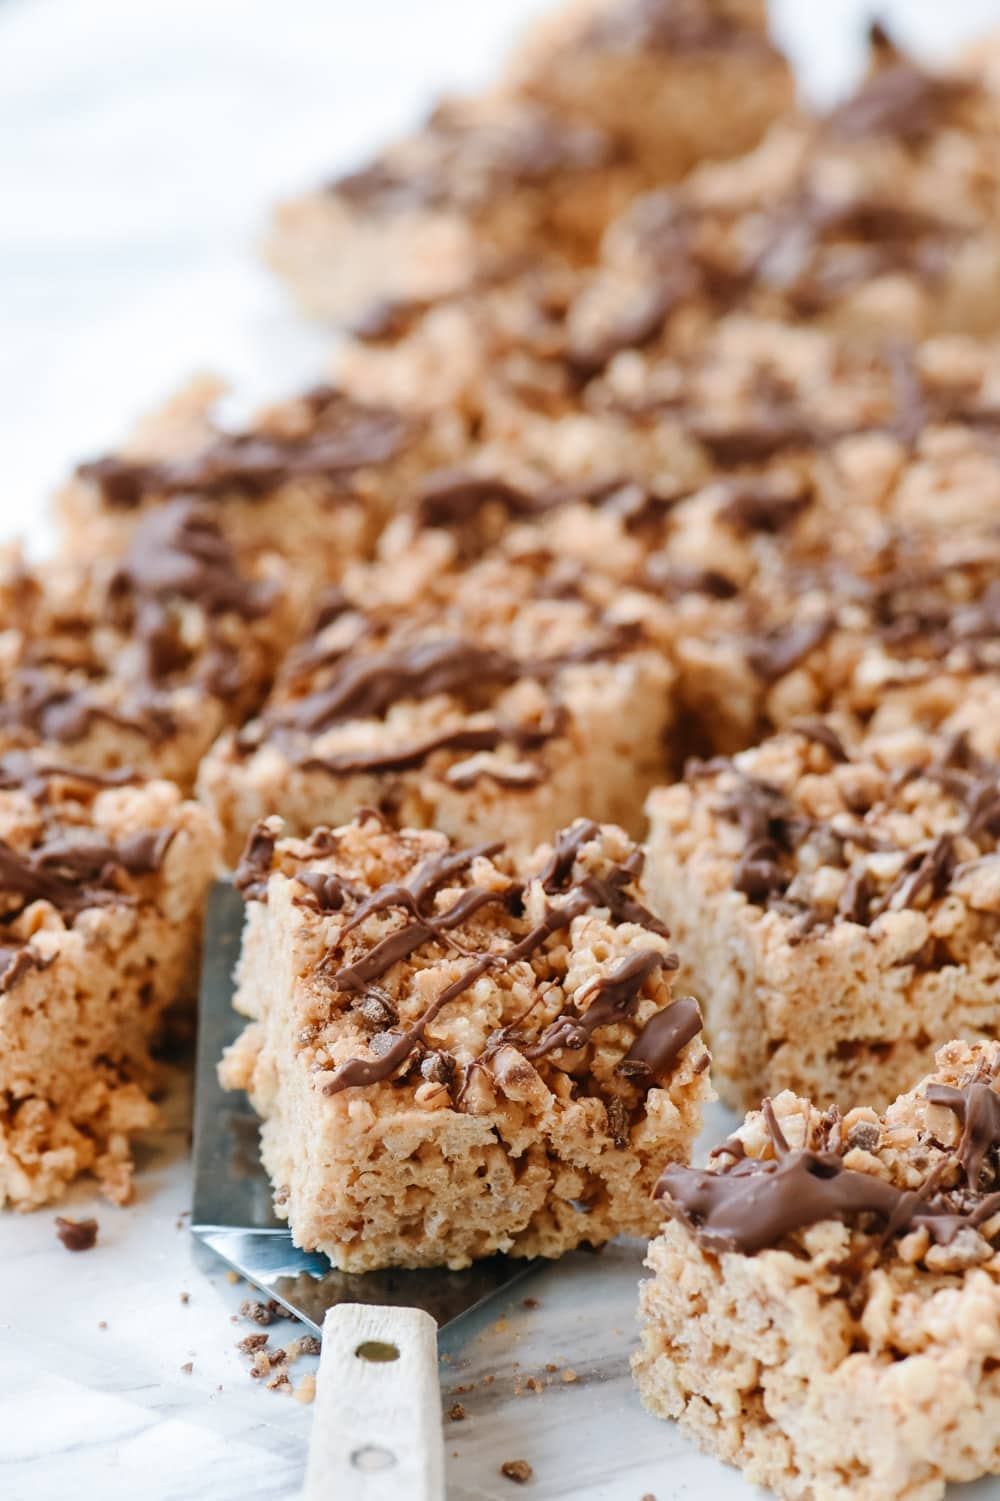
rice krispie treats on a spatula

How to Make Cinnamon Roll Rice Krispie Treats

  •  If you can’t find cinnamon marshmallows just use regular marshmallows and add a teaspoon of cinnamon to the mixture.
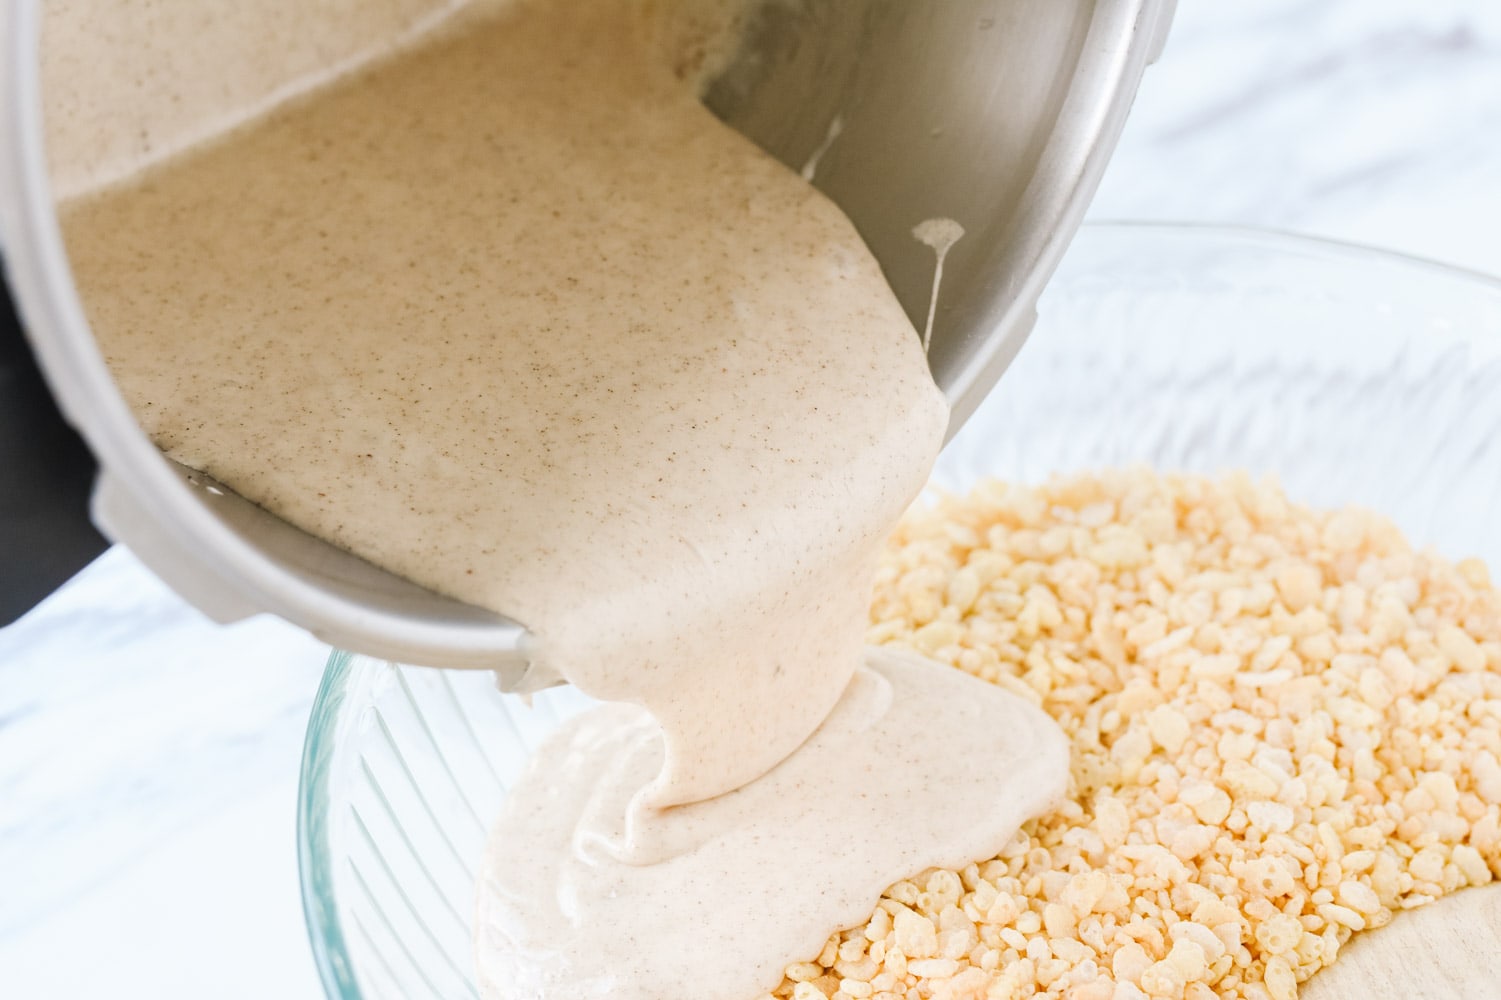
  •  You can melt the marshmallows and butter on the stove top or in the microwave.Pouring marshmallow over cinnamon rice krispie treats
  • Combine the marshmallow mixture with the rice krispie cereal along with the 1/2 cup of toffee bits.  Press into a greased 9 x 13 pan.  Do not press down on the mixture with  your hand.  I like them to be light and airier but if you prefer a more compacted rice krispie treat press down on them.
  • Sprinkle the remaining 1/3 cup of toffee bits over the top and drizzle with the melted chocolate
    using a fork.
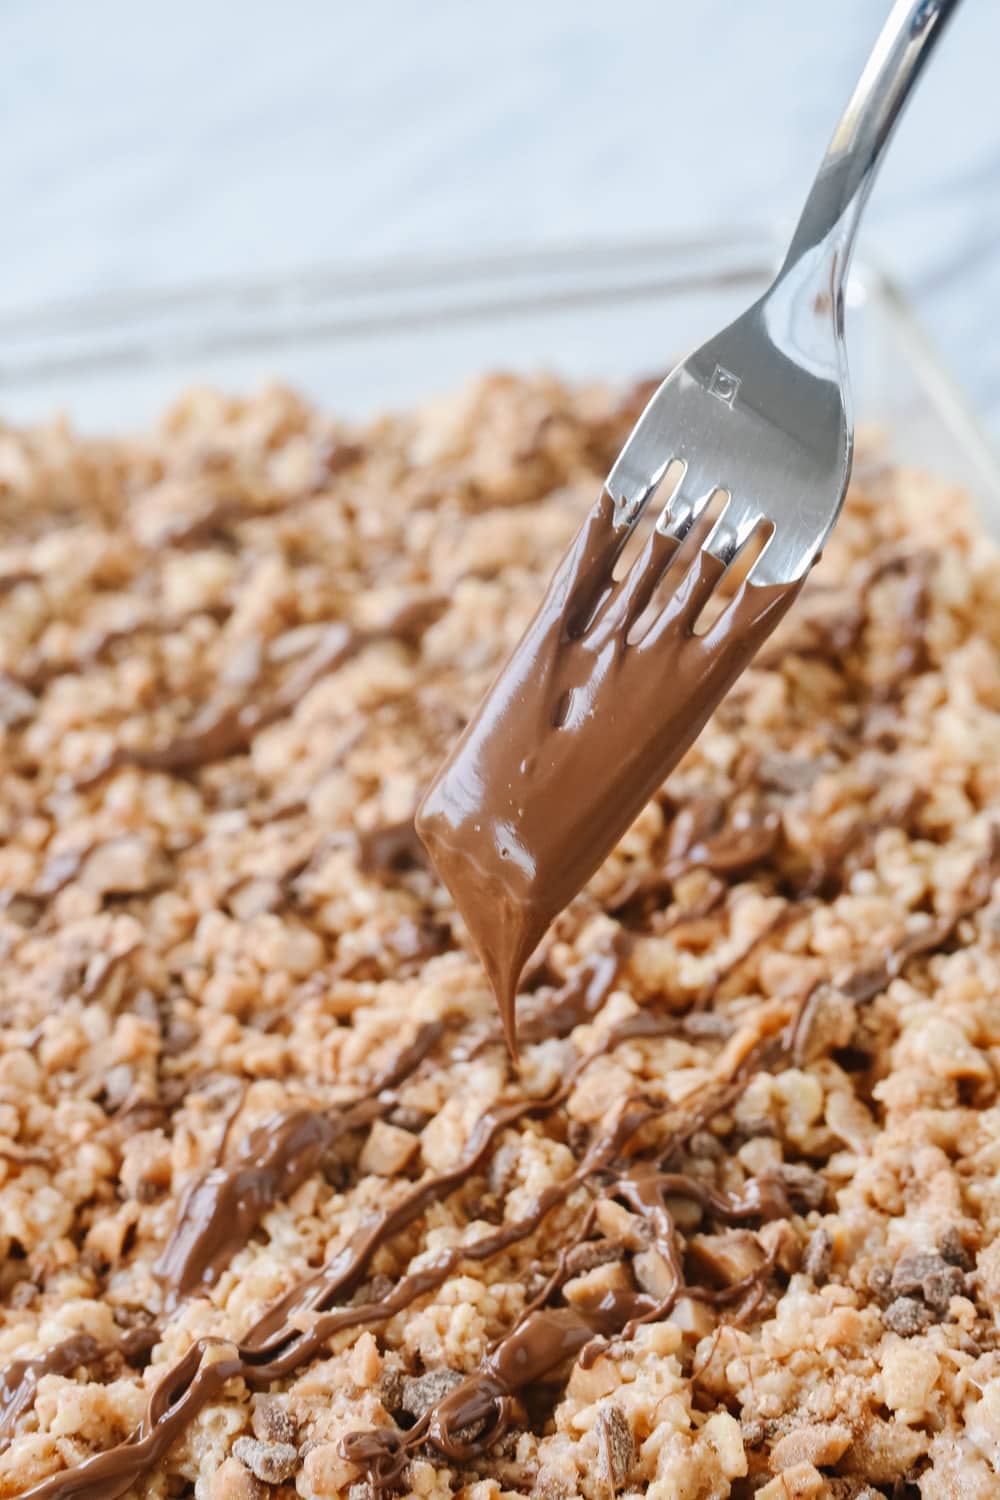
drizzling chocolate over rice krispie treats

  • You can place the treats into the refrigerator to speed up the cooling process and the hardening of the chocolate.
  • Cut into squares after they have set up and chocolate has hardened.
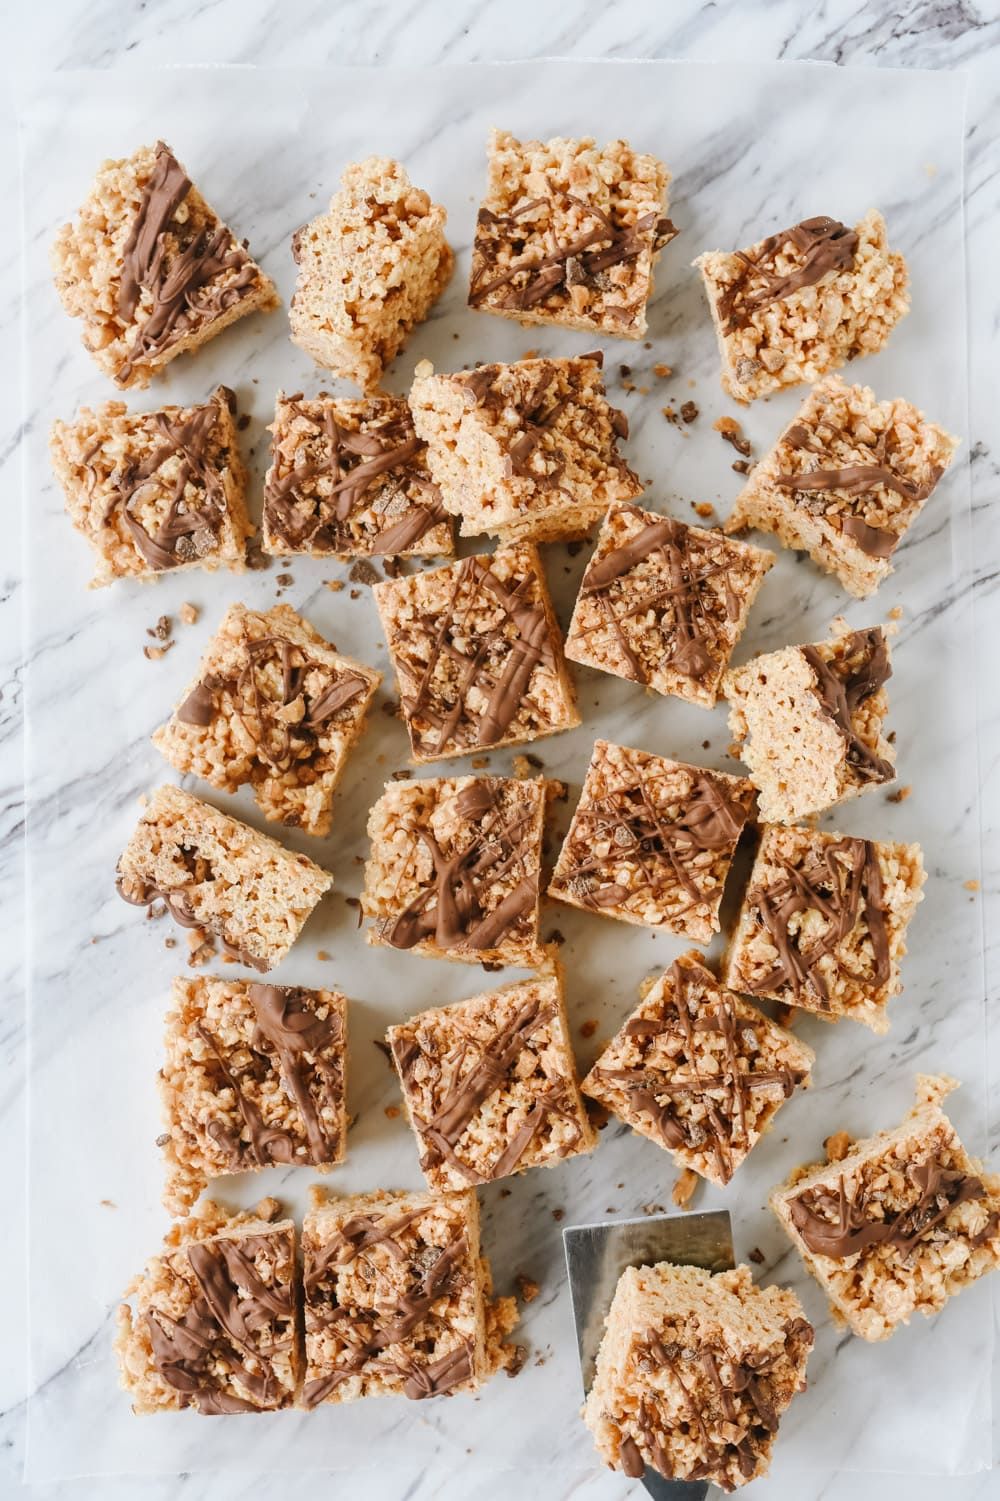
squares of cinnamon rice krispie treats

Can I Freeze Rice Krispie Treats?

They can be frozen in an airtight container but I don’t think they are as good after being frozen.  I recommend wrapping them in plastic wrap and in foil to keep the moisture and air out. They can freeze for up to six weeks.   To thaw them allow them to sit at room temperature for 15-20 minutes before serving.
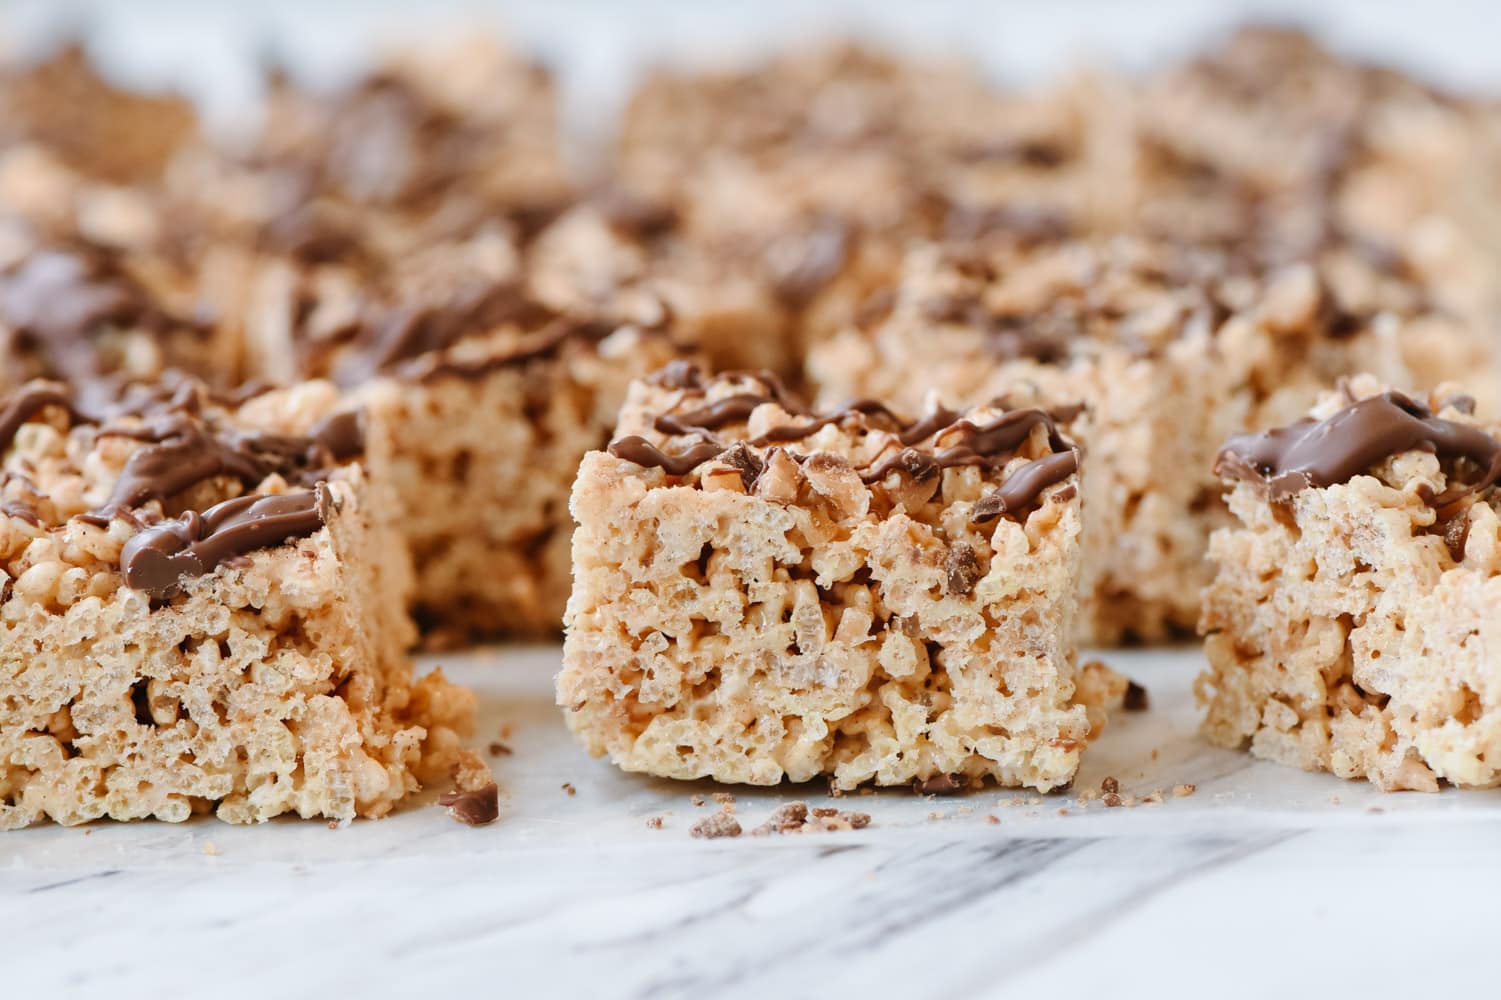
side view of a cinnamon rice krispie treat

Other delicious treats you may enjoy:

For all of my other favorite kitchen products and tools visit my Amazon Store. 

Did you know I wrote a cookbook?  Check out the Holiday Slow Cooker Cookbook for 100 delicious recipes

Cinnamon Rice Krispie Treats

Cinnamon Rice Krispie Treats

Cinnamon Rice Krispie Treats are a fun twist on an old favorite. Use cinnamon flavored marshmallows or add cinnamon into the marshmallow mixture for a fun new taste.

  • 16 oz. marshmallows (omit cinnamon if using cinnamon marshmallows.)
  • 1 tsp cinnamon
  • 1/2 cup butter
  • 12 oz Rice Krispie cereal
  • 1/2 toffee bits
  • 1/3 cup toffee bits
  • 1 C milk chocolate chips (melted)
  1. In a pan on the stove top combine marshmallows and butter and melt. This can also be done in the microwave.

  2. Mix marshmallows and butter until butter melts and mixture is smooth. If you can’t find cinnamon marshmallows add in 1 tsp cinnamon into mixture.
  3. Pour Rice Krispie cereal into a large bowl. Pour in marshmallow mixture and mix well. Add in 1/2 cup of toffee bits.

  4. Once the marshmallow-butter mixture is evenly mixed in, pour into a greased 9 x 13 pan.
  5. Do not press down with your hand.
  6. Sprinkle top with 1/3 C more toffee bits and allow to set.
  7. Melt 1 cup of milk chocolate chips and then drizzle over the top

Originally posted October 19, 2011

If you’ve tried these Cinnamon Rice Krispie Treats or any other recipe on Your Homebased Mom, then don’t forget to rate the recipe and let me know how it went in the comments below, I love hearing from you!

You can also FOLLOW ME on FACEBOOK, INSTAGRAM and PINTEREST to see more delicious food, party ideas and travel tips and what I’m up to on a daily basis!

Cinnamon rice krispie treats cut into squares

Continue reading Cinnamon Rice Krispie Treats. This post is from Your Homebased Mom. If you are not reading it from our feed, it has been STOLEN. Please contact Leigh Anne to let us know. Enjoy the posts.


from Your Homebased Mom https://ift.tt/2MD3WpK
via IFTTThttps://ift.tt/2MC1H5S
viernes, 20 de diciembre de 2019

Jalapeno Poppers Jalapeno Poppers are stuffed with a creamy cheese mixture, wrapped in bacon and topped with a BBQ sauce.  They are a definite crowd pleaser and add a fun little kick to your party! You can find lots more delicious appetizers here on the blog and if you like your appetizers with a little kick you will want to check out this delicious Easy Queso Dip and Buffalo Chicken Dip. I am typically not a pepper fan and tend to shy away from anything too spicy.  After I got up the courage to try a jalapeno popper at a party, I was excited to discover I liked them! The spiciness level will vary according to your peppers, but a jalapeno is typically a pretty mild pepper and the addition of the cheese mixture, bacon and BBQ sauce help lower the heat level. How can anything wrapped in bacon not be delicious!? Add a Little Kick to Your Party The crowd that really liked them were the men!  Jalapeno Poppers are definitely a man pleasing food! They may be a little bit of work to make but your guests are going to thank you . How to Make Jalapeno Poppers Be sure to wash your hands well after handling jalapenos and don’t touch your eyes or face while working with them.  If you have sensitive skin, you may want to wear gloves when working with peppers.  If you don’t have gloves, I have put plastic sandwich bags over my hands while cutting and cleaning the peppers. Cut the peppers in half, leave the stems on and clean out the seeds.  The heat is in the seeds so if you want extra heat, leave some of the seeds in. Mix together cheese, softened cream cheese, green onion, cilantro and garlic powder. Mix together filling and stuff each pepper with a tablespoon or so of filling.  You want the filling to be even with the top of the pepper. Wrap each half of a pepper in a half slice of bacon.  Use a toothpick to secure the bacon. To shorten the baking time of the poppers, precook the bacon, cooking it about half way and then wrap around the pepper.  This allows the bacon to get nice and crisp and not overcook the pepper. Bake at 375 degrees F for about 20-30 minutes or until bacon is crispy and cheese is melted. Precooking the bacon will speed up this process.  Without precooking the bacon they may take up to an hour to bake. I serve them with a bowl of BBQ sauce for dipping but they are also delicious served with some Ranch dressing for dipping. Can I Make Jalapeno Poppers Ahead of Time? You can make them the morning of the party, up to eight hours ahead of time.  Fill and wrap the peppers and then cover with plastic wrap and keep in the refrigerator until ready to bake. [eno poppers” src=”https://ift.tt/36SAqDW; alt=”jalapeno poppers with BBq sauce” width=”1000″ height=”1501″ data-pin-description=”Jalapeno Poppers are stuffed with a creamy cheese mixture, wrapped in bacon and topped with a BBQ sauce.  They are a definite crowd pleaser and add a fun little kick to your party! #wrappedinbacon #baked #easy #creamcheese #recipe #pioneerwoman” data-pin-id=”Jalapeno Poppers are stuffed with a creamy cheese mixture, wrapped in bacon and topped with a BBQ sauce.  They are a definite crowd pleaser and add a fun little kick to your party! #wrappedinbacon #baked #easy #creamcheese #recipe #pioneerwoman” /> For all of my other favorite kitchen products and tools visit my Amazon Store.  Did you know I wrote a cookbook?  Check out the Holiday Slow Cooker Cookbook for 100 delicious recipes. Some other delicious appetizers: The Best Cheeseball Lemon Garlic Chicken Drumettes Baked Brie with Fruit Jalapeno Poppers Recipe Jalapeno Poppers Jalapeno Peppers are stuffed with a creamy cheese mixture, wrapped in bacon and topped with a BBQ sauce.  They are a definite crowd pleaser and add a fun little kick to your party! 18 jalapenos 1 8 oz. cream cheese 1/2 cup cheddar cheese (grated) 1 green onion (sliced) 1 tsp garlic powder 18 slices thin bacon (cut into halves) BBQ sauce toothpicks rubber gloves. Preheat oven to 375 degrees F Cut peppers in half lengthwise (wear gloves) . I like to keep the stems on the peppers as they look prettier that way. With a spoon, scrape out the seeds and light colored membranes Remember: the heat comes from the seeds and the membranes so if you can handle the heat, leave some of them intact. In a bowl combine the cream cheese, cheddar cheese, garlic powder and chopped green onion and mix together Stuff the hollowed out pepper half with the cream cheese mixture. make sure filling is even with top of pepper. Wrap bacon slices around each half, covering as much of the surface as you can. You can precook the bacon about half way for crisper bacon and to shorten the cooking time. Secure the bacon with toothpicks and place on a baking sheet. Bake in the oven for about 1 hour if you haven't precooked bacon or 20-30 minutes if bacon is precooked. Brush lightly with BBQ sauce and serve with additional sauce for dipping. Serve hot or at room temperature If you’ve tried these Jalapeno Poppers or any other recipe on Your Homebased Mom, then don’t forget to rate the recipe and let me know how it went in the comments below, I love hearing from you! You can also FOLLOW ME on FACEBOOK, INSTAGRAM and PINTEREST to see more delicious food, party ideas and travel tips and what I’m up to on a daily basis! Continue reading Jalapeno Poppers. This post is from Your Homebased Mom. If you are not reading it from our feed, it has been STOLEN. Please contact Leigh Anne to let us know. Enjoy the posts.

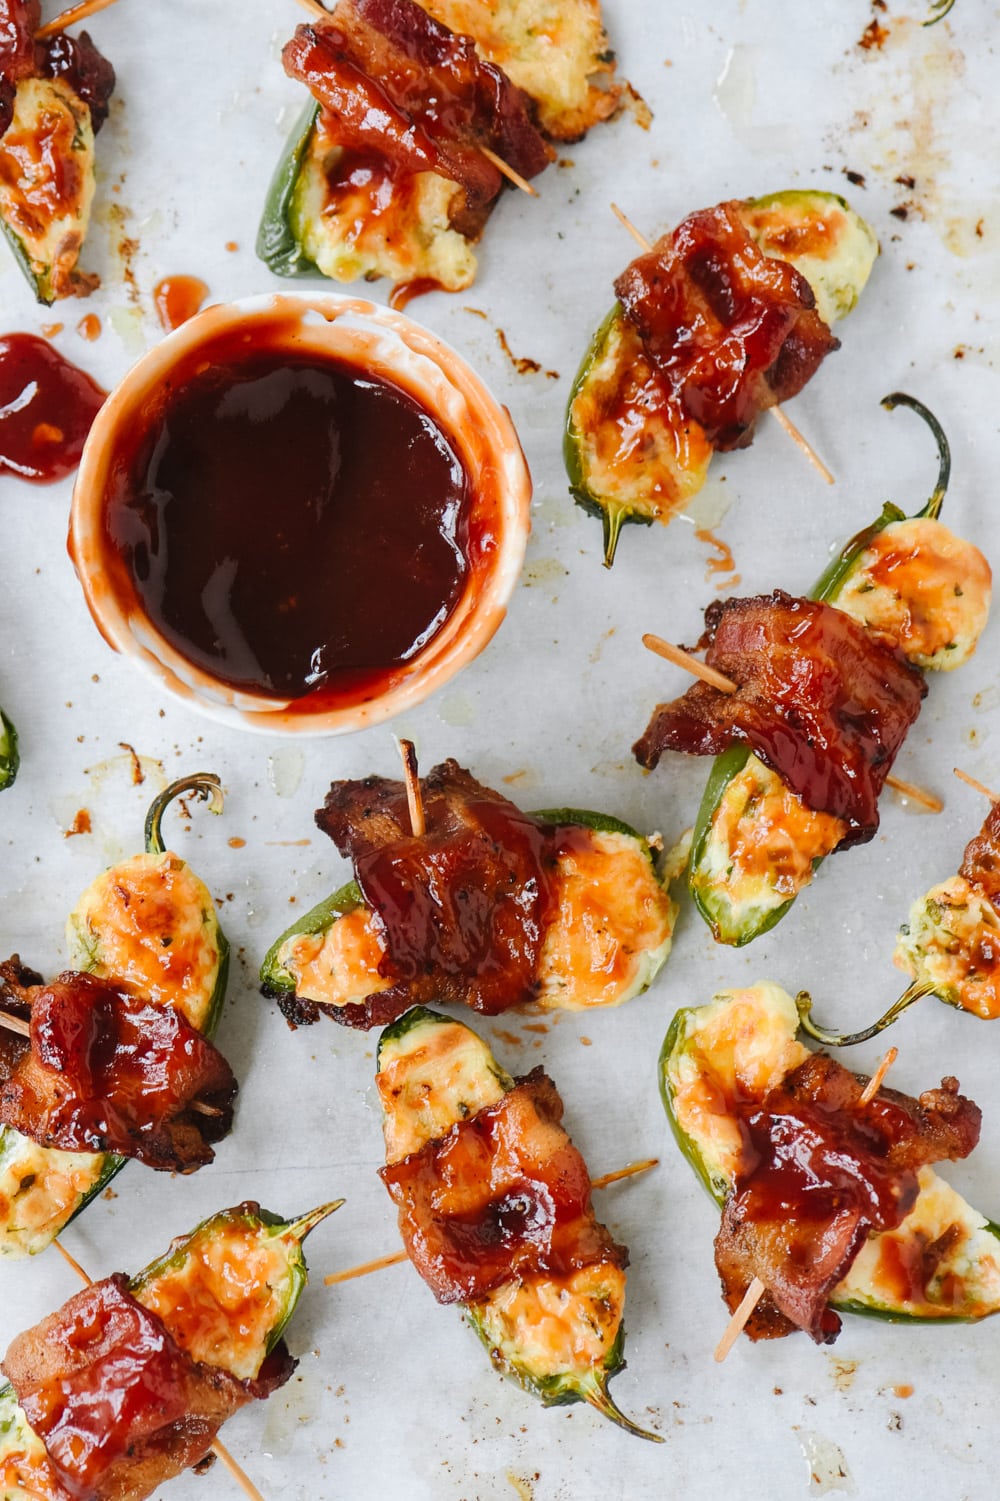
Jalapeno Poppers are stuffed with a creamy cheese mixture, wrapped in bacon and topped with a BBQ sauce.  They are a definite crowd pleaser and add a fun little kick to your party!

You can find lots more delicious appetizers here on the blog and if you like your appetizers with a little kick you will want to check out this delicious Easy Queso Dip and Buffalo Chicken Dip.

overhead shot of jalapeno poppers

I am typically not a pepper fan and tend to shy away from anything too spicy.  After I got up the courage to try a jalapeno popper at a party, I was excited to discover I liked them!

The spiciness level will vary according to your peppers, but a jalapeno is typically a pretty mild pepper and the addition of the cheese mixture, bacon and BBQ sauce help lower the heat level.

How can anything wrapped in bacon not be delicious!?

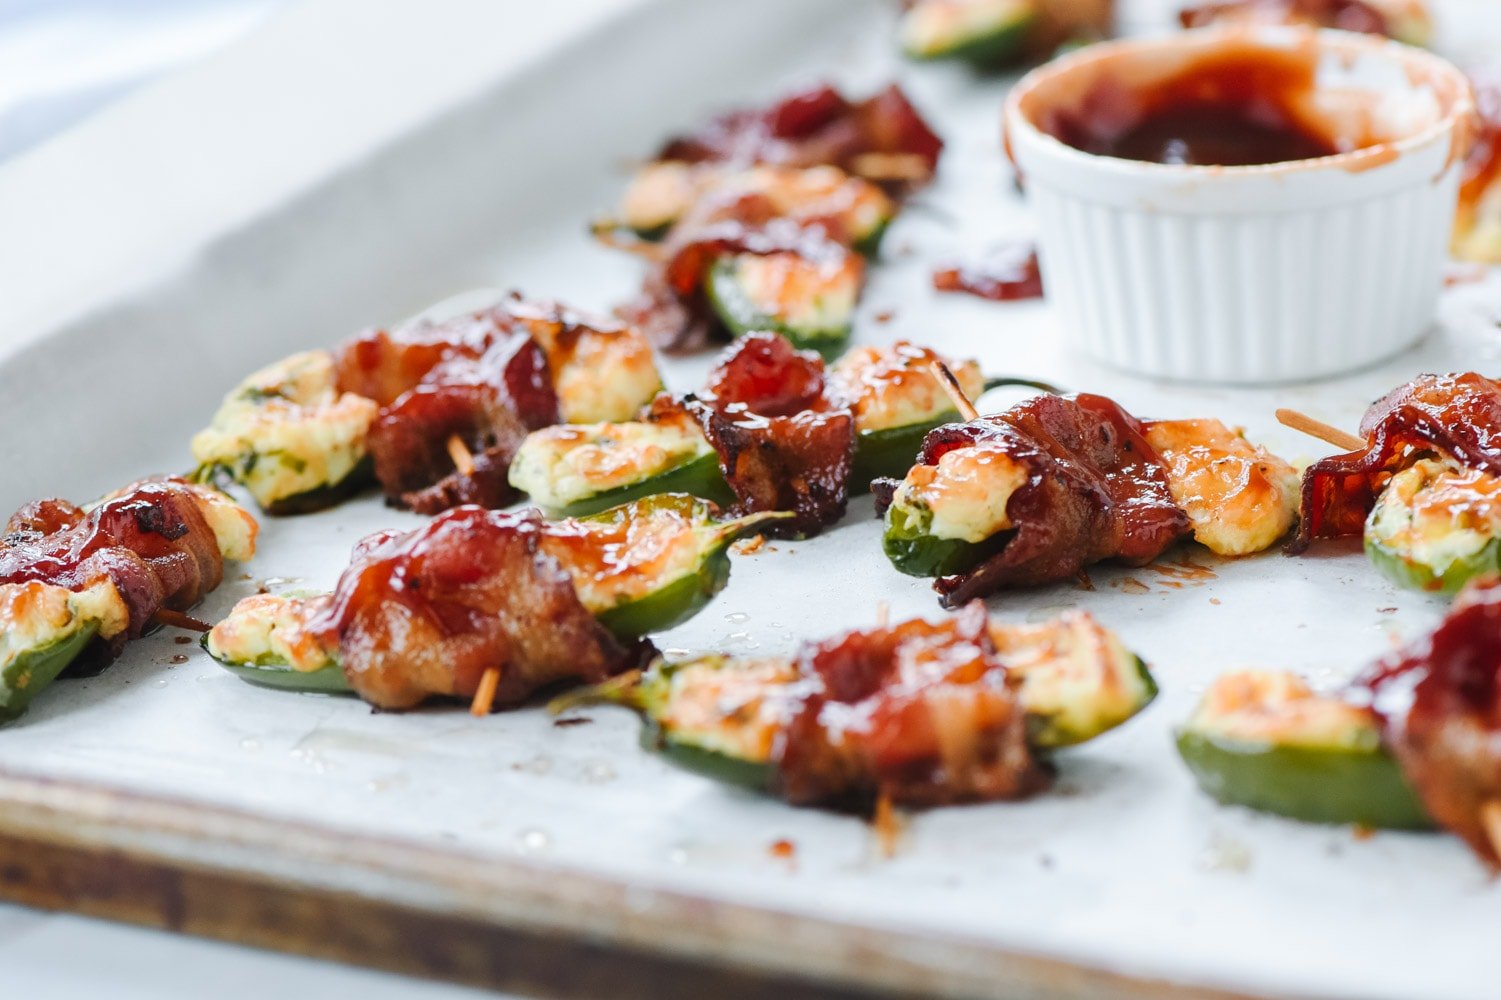
tray of jalapeno poppers

Add a Little Kick to Your Party

The crowd that really liked them were the men!  Jalapeno Poppers are definitely a man pleasing food! They may be a little bit of work to make but your guests are going to thank you .

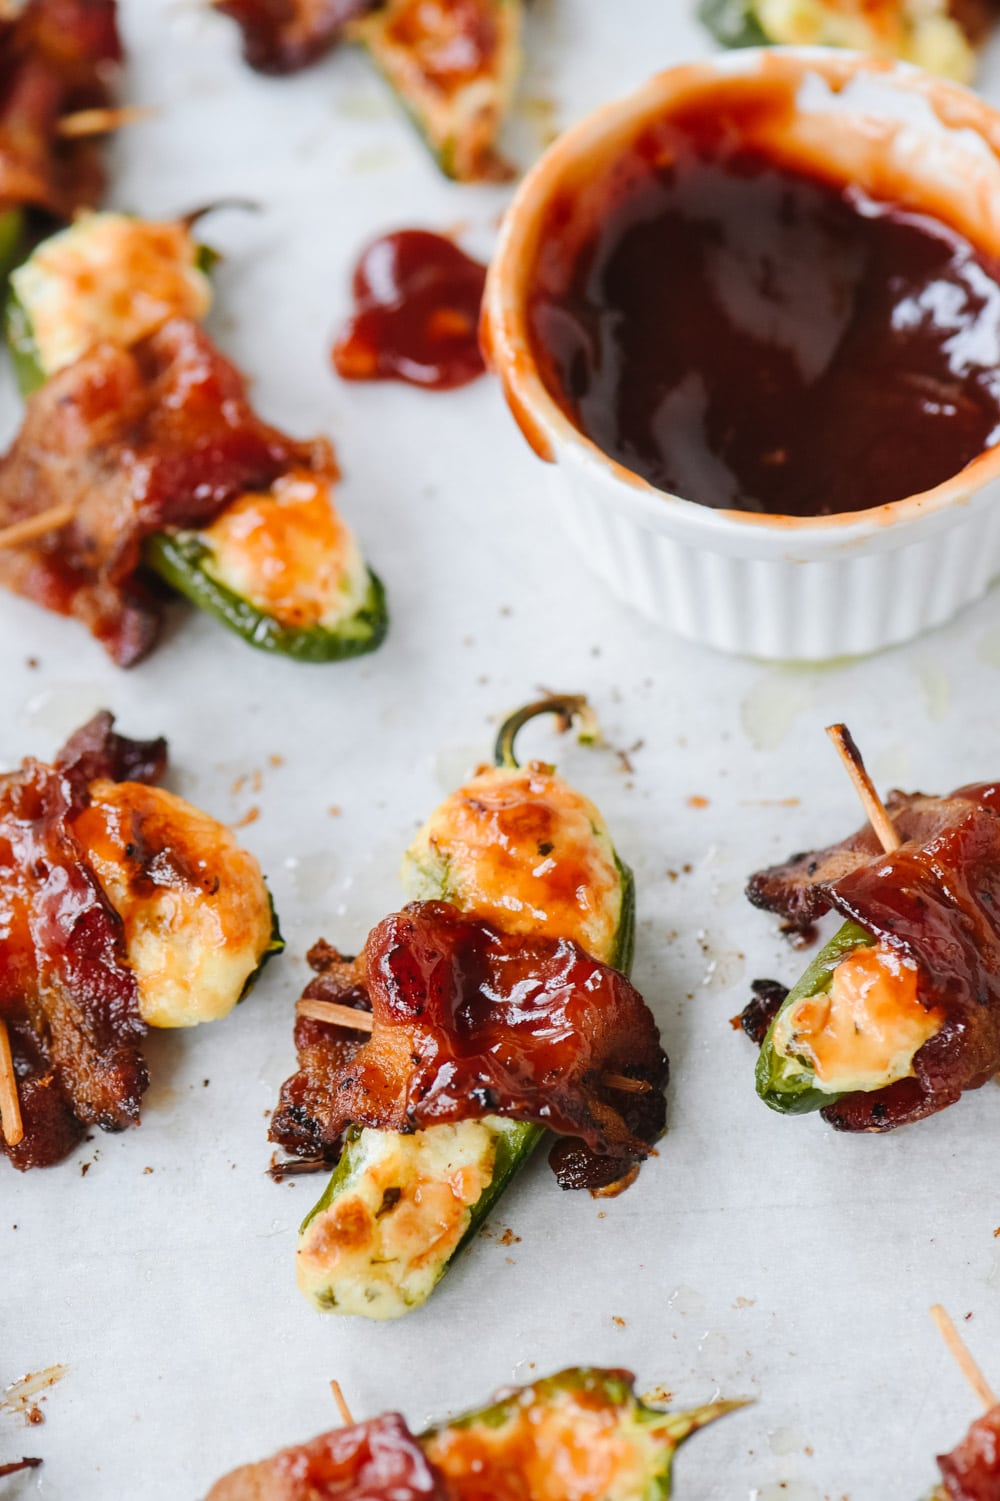
jalapeno poppers with BBQ sauce

How to Make Jalapeno Poppers

  • Be sure to wash your hands well after handling jalapenos and don’t touch your eyes or face while working with them.  If you have sensitive skin, you may want to wear gloves when working with peppers.  If you don’t have gloves, I have put plastic sandwich bags over my hands while cutting and cleaning the peppers.
  • Cut the peppers in half, leave the stems on and clean out the seeds.  The heat is in the seeds so if you want extra heat, leave some of the seeds in.
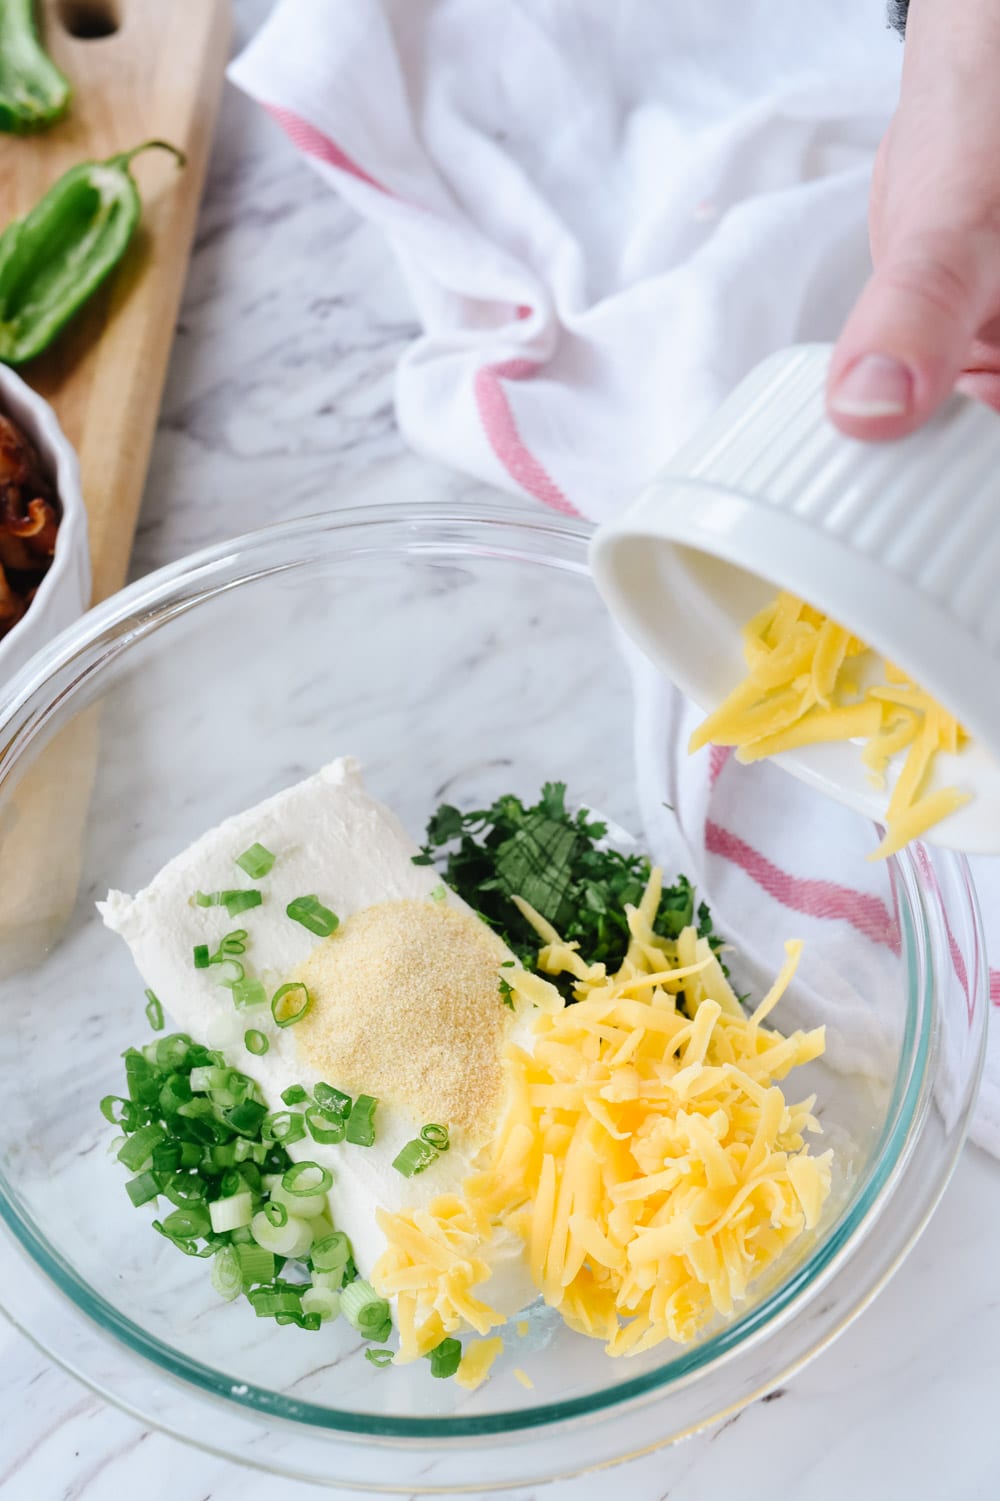
  • Mix together cheese, softened cream cheese, green onion, cilantro and garlic powder.

jalapeno popper ingredients in a bowl

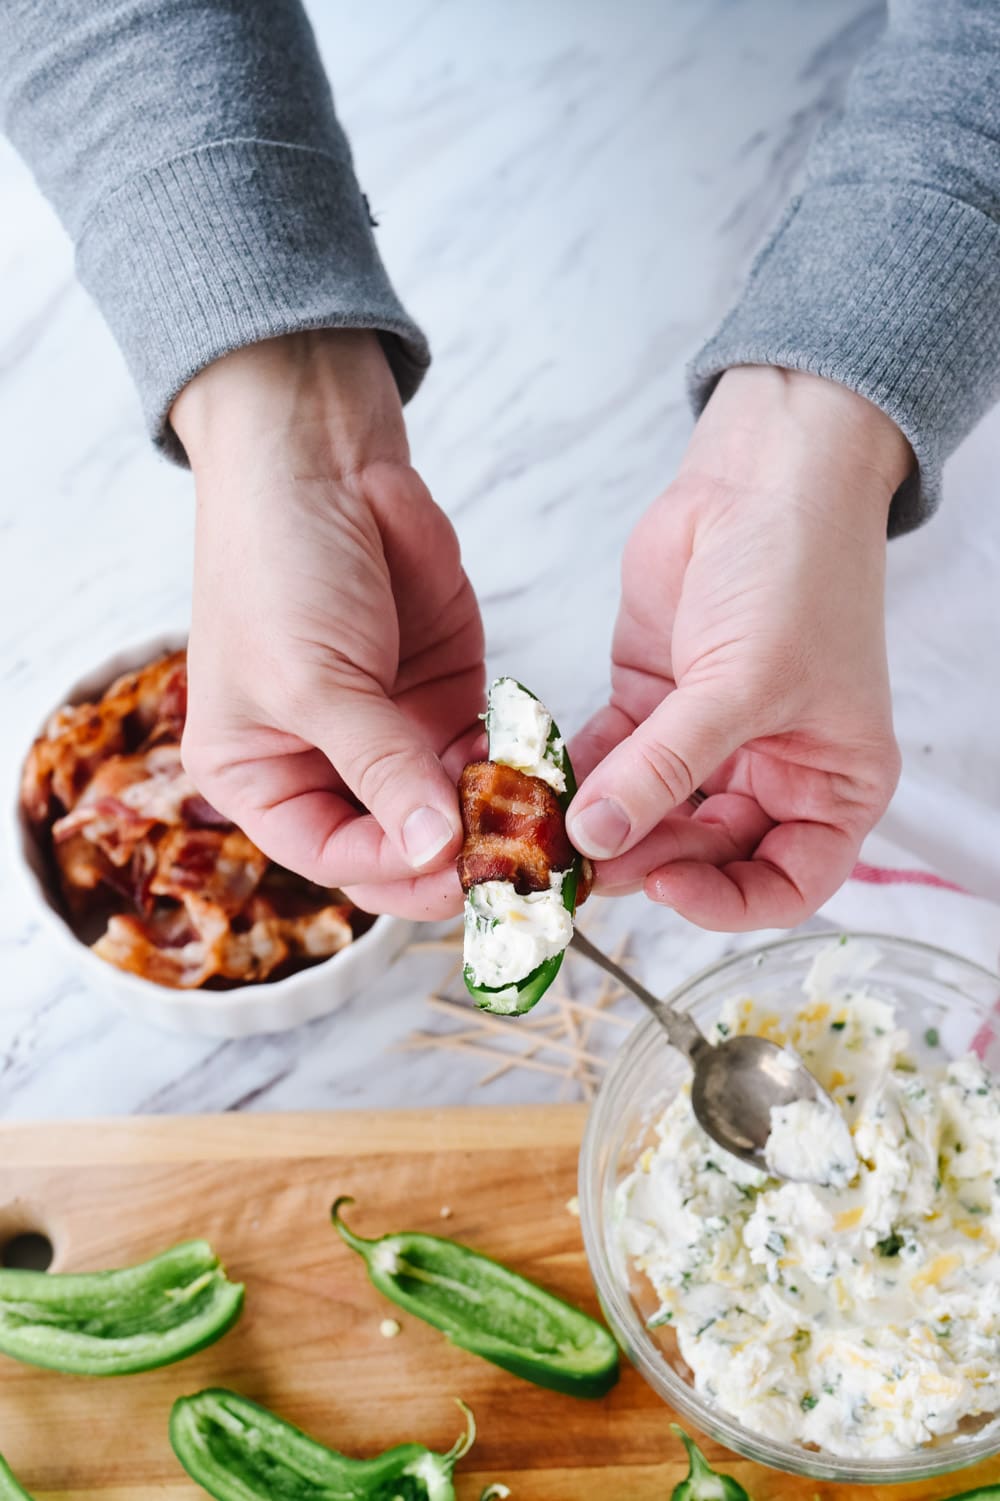
  • Mix together filling and stuff each pepper with a tablespoon or so of filling.  You want the filling to be even with the top of the pepper.

stuffing a jalapeno popper

  • Wrap each half of a pepper in a half slice of bacon.  Use a toothpick to secure the bacon. To shorten the baking time of the poppers, precook the bacon, cooking it about half way and then wrap around the pepper.  This allows the bacon to get nice and crisp and not overcook the pepper.

wrapping bacon on a jalapeno popper

  • Bake at 375 degrees F for about 20-30 minutes or until bacon is crispy and cheese is melted. Precooking the bacon will speed up this process.  Without precooking the bacon they may take up to an hour to bake.

jalapeno poppers on a baking sheet

I serve them with a bowl of BBQ sauce for dipping but they are also delicious served with some Ranch dressing for dipping.

Can I Make Jalapeno Poppers Ahead of Time?

You can make them the morning of the party, up to eight hours ahead of time.  Fill and wrap the peppers and then cover with plastic wrap and keep in the refrigerator until ready to bake.

[eno poppers” src=”https://ift.tt/36SAqDW; alt=”jalapeno poppers with BBq sauce” width=”1000″ height=”1501″ data-pin-description=”Jalapeno Poppers are stuffed with a creamy cheese mixture, wrapped in bacon and topped with a BBQ sauce.  They are a definite crowd pleaser and add a fun little kick to your party! #wrappedinbacon #baked #easy #creamcheese #recipe #pioneerwoman” data-pin-id=”Jalapeno Poppers are stuffed with a creamy cheese mixture, wrapped in bacon and topped with a BBQ sauce.  They are a definite crowd pleaser and add a fun little kick to your party! #wrappedinbacon #baked #easy #creamcheese #recipe #pioneerwoman” />

For all of my other favorite kitchen products and tools visit my Amazon Store. 

Did you know I wrote a cookbook?  Check out the Holiday Slow Cooker Cookbook for 100 delicious recipes.

Some other delicious appetizers:

Jalapeno Poppers Recipe

Jalapeno Poppers

Jalapeno Peppers are stuffed with a creamy cheese mixture, wrapped in bacon and topped with a BBQ sauce.  They are a definite crowd pleaser and add a fun little kick to your party!

  • 18 jalapenos
  • 1 8 oz. cream cheese
  • 1/2 cup cheddar cheese (grated)
  • 1 green onion (sliced)
  • 1 tsp garlic powder
  • 18 slices thin bacon (cut into halves)
  • BBQ sauce
  • toothpicks
  • rubber gloves.
  1. Preheat oven to 375 degrees F

  2. Cut peppers in half lengthwise (wear gloves) . I like to keep the stems on the peppers as they look prettier that way.

  3. With a spoon, scrape out the seeds and light colored membranes
  4. Remember: the heat comes from the seeds and the membranes so if you can handle the heat, leave some of them intact.
  5. In a bowl combine the cream cheese, cheddar cheese, garlic powder and chopped green onion and mix together

  6. Stuff the hollowed out pepper half with the cream cheese mixture. make sure filling is even with top of pepper.

  7. Wrap bacon slices around each half, covering as much of the surface as you can. You can precook the bacon about half way for crisper bacon and to shorten the cooking time.

  8. Secure the bacon with toothpicks and place on a baking sheet. Bake in the oven for about 1 hour if you haven't precooked bacon or 20-30 minutes if bacon is precooked.

  9. Brush lightly with BBQ sauce and serve with additional sauce for dipping.

  10. Serve hot or at room temperature

If you’ve tried these Jalapeno Poppers or any other recipe on Your Homebased Mom, then don’t forget to rate the recipe and let me know how it went in the comments below, I love hearing from you!

You can also FOLLOW ME on FACEBOOK, INSTAGRAM and PINTEREST to see more delicious food, party ideas and travel tips and what I’m up to on a daily basis!

tray of jalapeno poppers

Continue reading Jalapeno Poppers. This post is from Your Homebased Mom. If you are not reading it from our feed, it has been STOLEN. Please contact Leigh Anne to let us know. Enjoy the posts.


from Your Homebased Mom https://ift.tt/2riuNzW
via IFTTThttps://ift.tt/2Z8kM4N

sábado, 14 de diciembre de 2019

Orange Cranberry Cheese Ball You usually think of a cheese ball as a savory appetizer but this Christmas Cheeseball can be dessert!  This cranberry orange cheese ball has all the holiday flavors including chunks of white chocolate and sugary pecans. A sweet cheese ball is perfect for any holiday meal or party. The kids are especially going to love the flavor combination of orange, cranberry and white chocolate. Be sure and check out these other sweet appetizers, Chocolate Chip Cookie Dough Dip and S’mores Dip. Christmas Cheese Ball I think the cheeseball is a misunderstood and often overlooked holiday treat.  Typically a savory treat, it is often part of a relish tray or a cheeseboard.   I love a good cheeseball! Watch your guests delightful surprise when they bite into this cheeseball and discover that it’s sweet!  Serve it as an appetizer or as dessert.  This dessert cheeseball starts with a base of cream cheese and powdered sugar with some orange zest, orange juice, chopped craisins, white chocolate and pecans added in. How to Make a Dessert Cheese Ball Be sure your cream cheese is softened, let it sit at room temperature for at least an hour. Use a hand or stand mixer to cream your softened cream cheese and sugar, you don’t want any lumps! Mix in your other ingredients, including the orange zest, orange juice, white chocolate and part of the craisinets.  Place the mixture into the fridge for a quick 20 minute chill.  This will make it easier to shape into a ball. Put the chilled cheese mixture onto some plastic wrap and form it into a ball.  Chill for 1-2 hours. The cheeseball can be made a day ahead. Keep it wrapped in plastic and in the refrigerator and then before serving, roll the ball into the mixture of chopped craisins and sugared pecans, pressing them into the cheeseball. To learn how to sugar the pecans follow my tutorial here. What to Serve with a Orange Cranberry Cheese Ball Crackers Apple Slices – to keep your apple slices from turning brown, submerge them in a bowl of cold water with salt in it.  Just cover them with the water and then take them out and pat dry.  It’s like magic, they don’t turn brown! Pretzels Vanilla Wafers Graham Crackers Now sit back, and watch your guests faces as they take their first bite of this delicious Christmas cheese ball.  If you prefer a savory cheese ball, be sure and check out my recipe for the BEST cheese ball ever! Some other sweet appetizer treats: Apple Toffee Dip Peanut Butter Dip Fall Snack Board For all of my other favorite kitchen products and tools visit my Amazon Store.  Did you know I wrote a cookbook?  Check out the Holiday Slow Cooker Cookbook for 100 delicious recipes Orange Cranberry Cheese Ball Recipe Cranberry Orange Cheese Ball You usually think of a cheese ball as a savory appetizer but this Christmas Cheeseball can be dessert! This cranberry orange cheeseball has all the holiday flavors including chunks of white chocolate and sugary pecans. 1 8 oz cream cheese (softened) 1/4 cup powdered sugar 1 Tbsp orange juice 1/2 Tbsp orange zest 1/2 cup Craisins (chopped) 1/2 cup sugared pecans (chopped) 1/4 cup Craisins Mix together cream cheese and sugar until smooth. Mix in orange juice, zest and 1/2 cup Craisins until well blended. Chill mixture in bowl for 30 minutes in refrigerator Place mixture onto plastic wrap and form into a ball. Cover in plastic wrap and chill for 1-2 hours. Mix together sugared pecans and 1/4 cup Craisins and roll cheeseball in it before serving. Serve with crackers, apples or pretzels If you’ve tried this dessert cheese ball or any other recipe on Your Homebased Mom, then don’t forget to rate the recipe and let me know how it went in the comments below, I love hearing from you! You can also FOLLOW ME on FACEBOOK, INSTAGRAM and PINTEREST to see more delicious food, party ideas and travel tips and what I’m up to on a daily basis! Continue reading Orange Cranberry Cheese Ball. This post is from Your Homebased Mom. If you are not reading it from our feed, it has been STOLEN. Please contact Leigh Anne to let us know. Enjoy the posts.

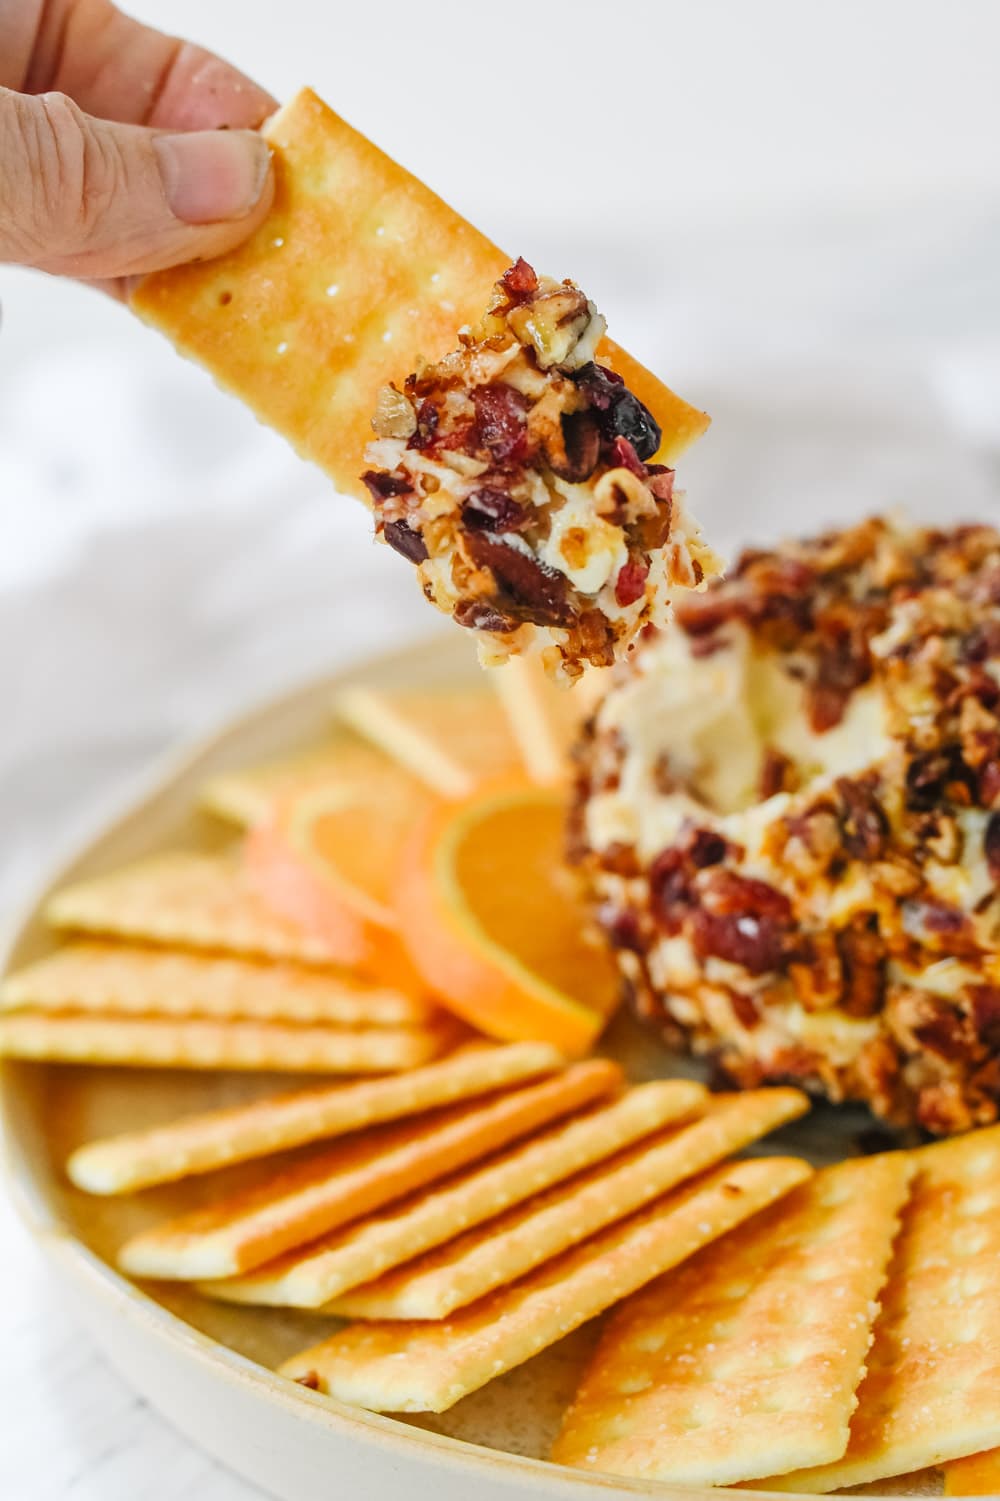
You usually think of a cheese ball as a savory appetizer but this Christmas Cheeseball can be dessert!  This cranberry orange cheese ball has all the holiday flavors including chunks of white chocolate and sugary pecans.

A sweet cheese ball is perfect for any holiday meal or party. The kids are especially going to love the flavor combination of orange, cranberry and white chocolate. Be sure and check out these other sweet appetizers, Chocolate Chip Cookie Dough Dip and S’mores Dip.

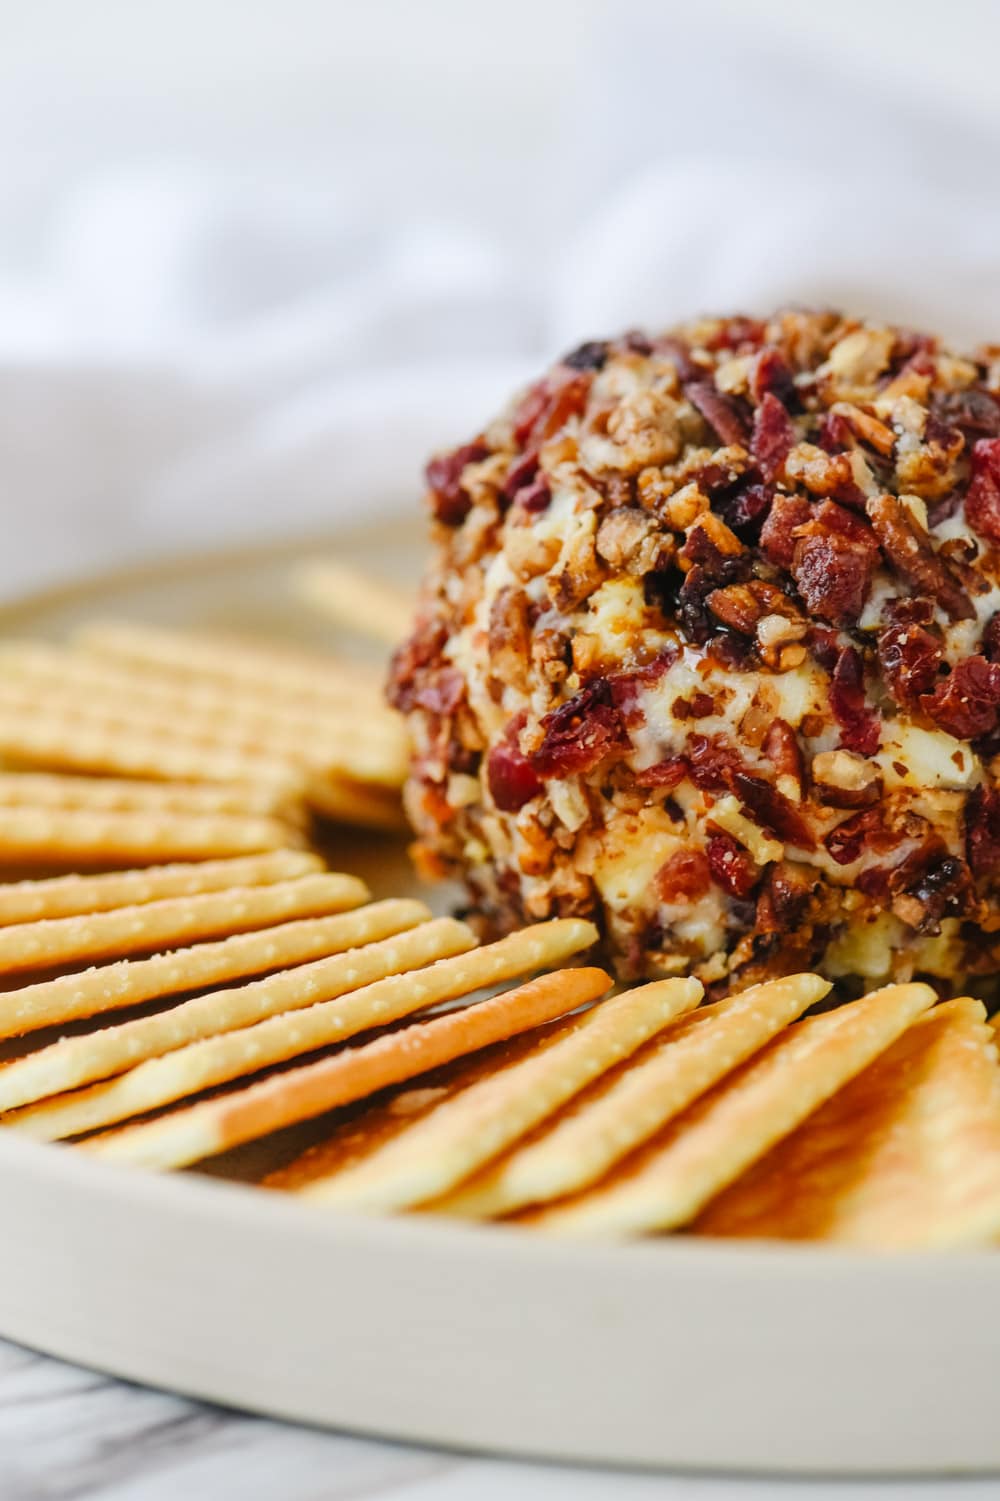
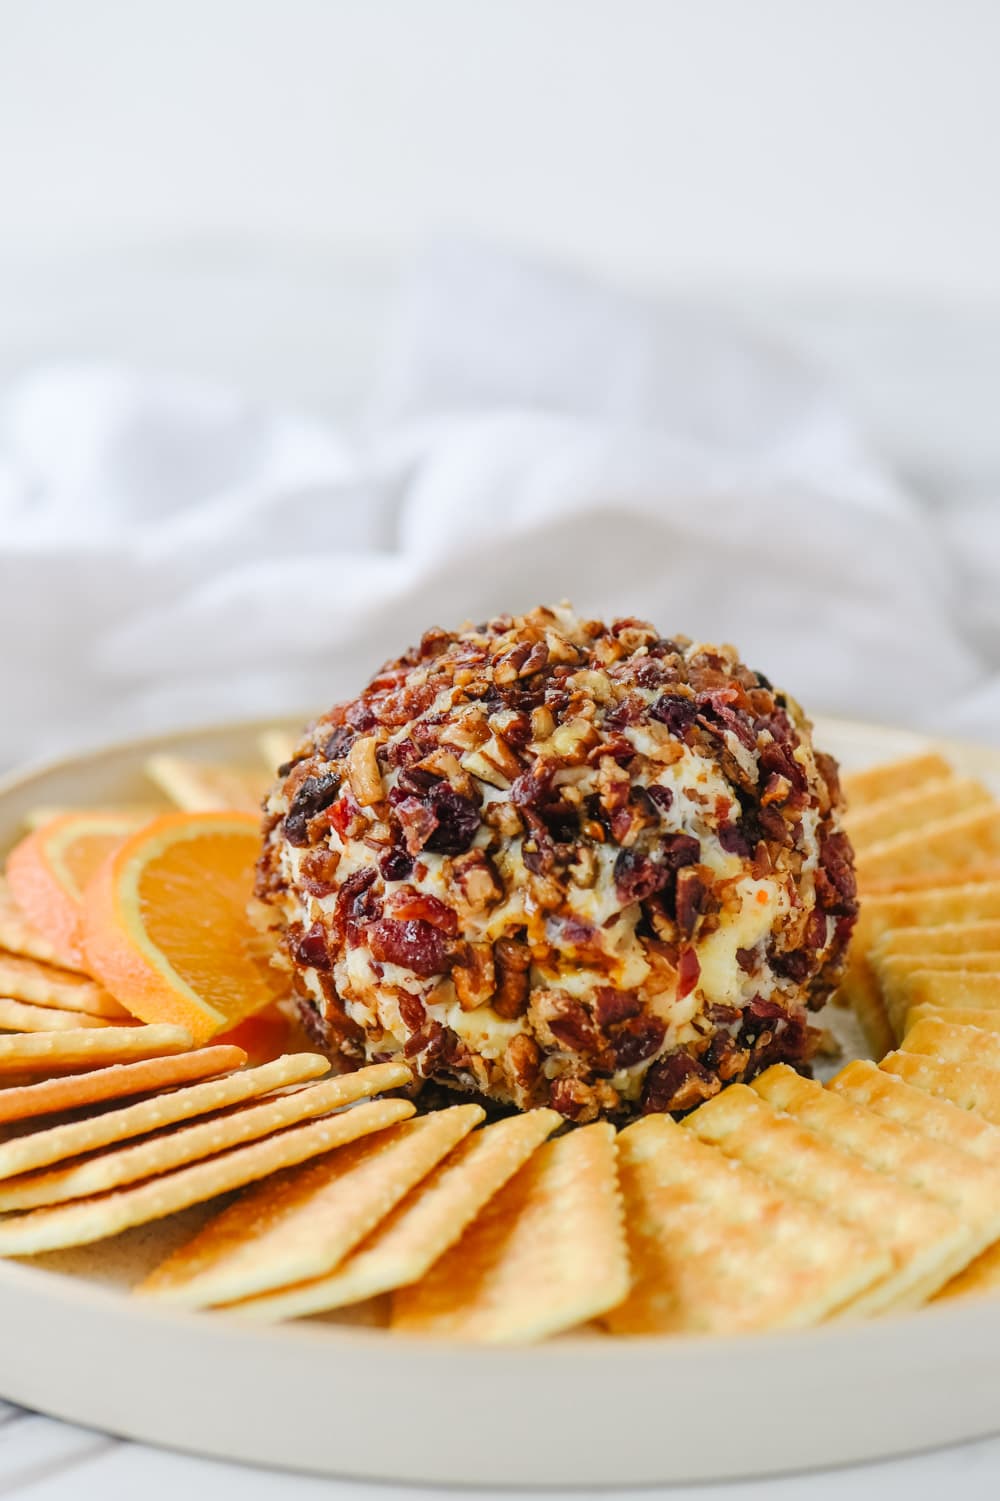
cheeseball with crackers

Christmas Cheese Ball

I think the cheeseball is a misunderstood and often overlooked holiday treat.  Typically a savory treat, it is often part of a relish tray or a cheeseboard.   I love a good cheeseball!

Watch your guests delightful surprise when they bite into this cheeseball and discover that it’s sweet!  Serve it as an appetizer or as dessert.  This dessert cheeseball starts with a base of cream cheese and powdered sugar with some orange zest, orange juice, chopped craisins, white chocolate and pecans added in.

orange cranberry cheese ball

How to Make a Dessert Cheese Ball

  • Be sure your cream cheese is softened, let it sit at room temperature for at least an hour.
  • Use a hand or stand mixer to cream your softened cream cheese and sugar, you don’t want any lumps! Mix in your other ingredients, including the orange zest, orange juice, white chocolate and part of the craisinets.  Place the mixture into the fridge for a quick 20 minute chill.  This will make it easier to shape into a ball.
  • Put the chilled cheese mixture onto some plastic wrap and form it into a ball.  Chill for 1-2 hours.
  • The cheeseball can be made a day ahead. Keep it wrapped in plastic and in the refrigerator and then before serving, roll the ball into the mixture of chopped craisins and sugared pecans, pressing them into the cheeseball.
  • To learn how to sugar the pecans follow my tutorial here.

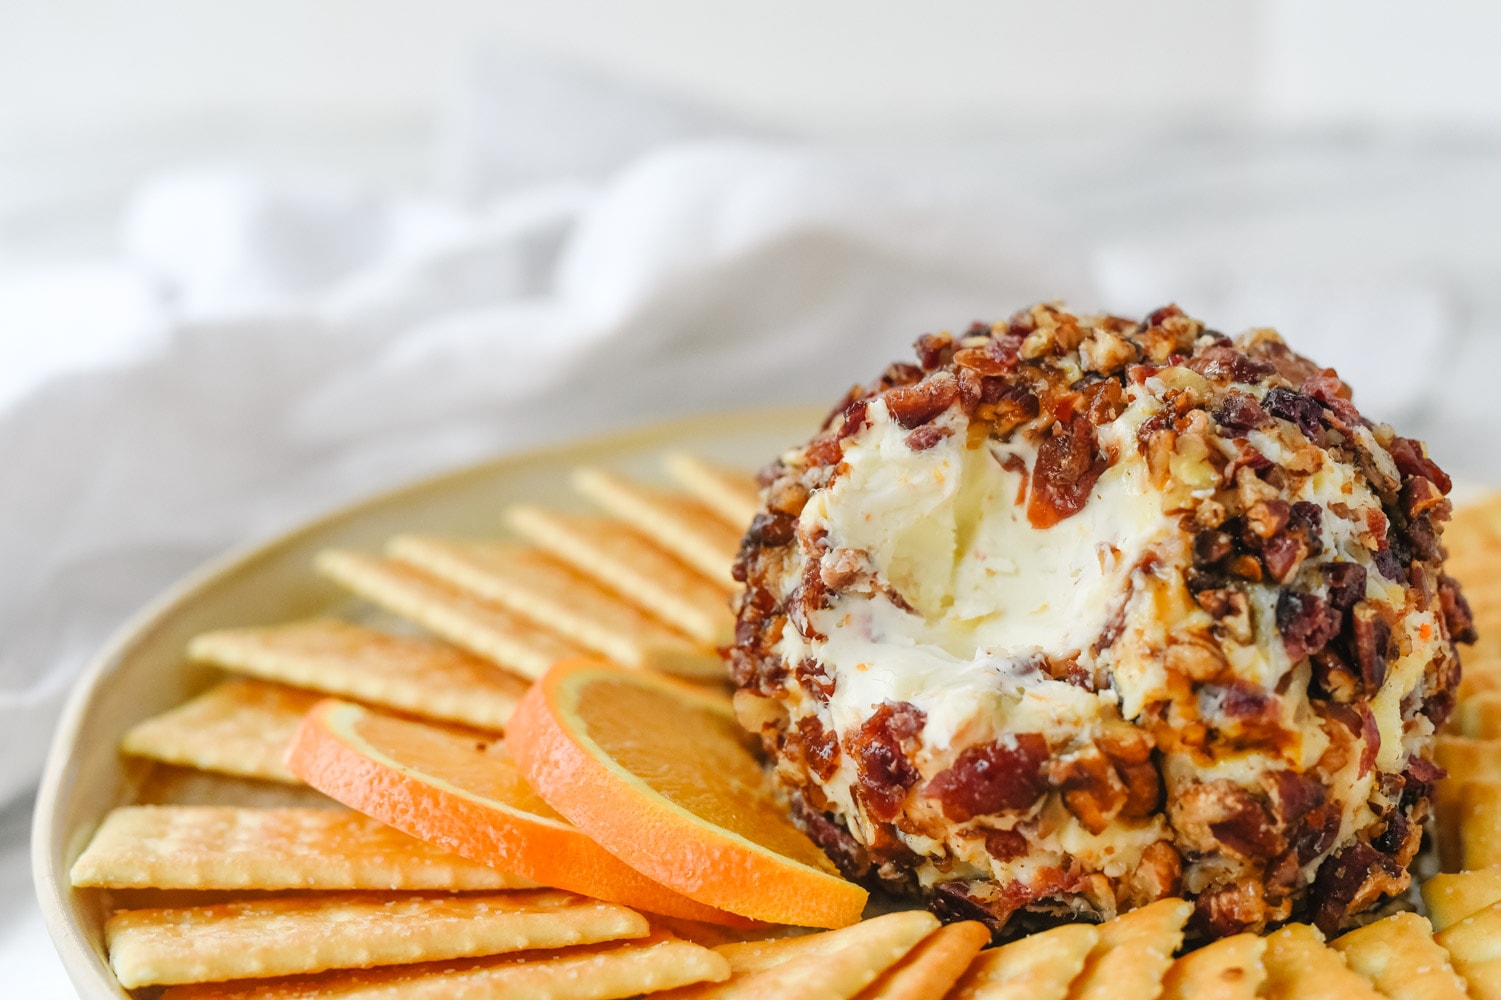
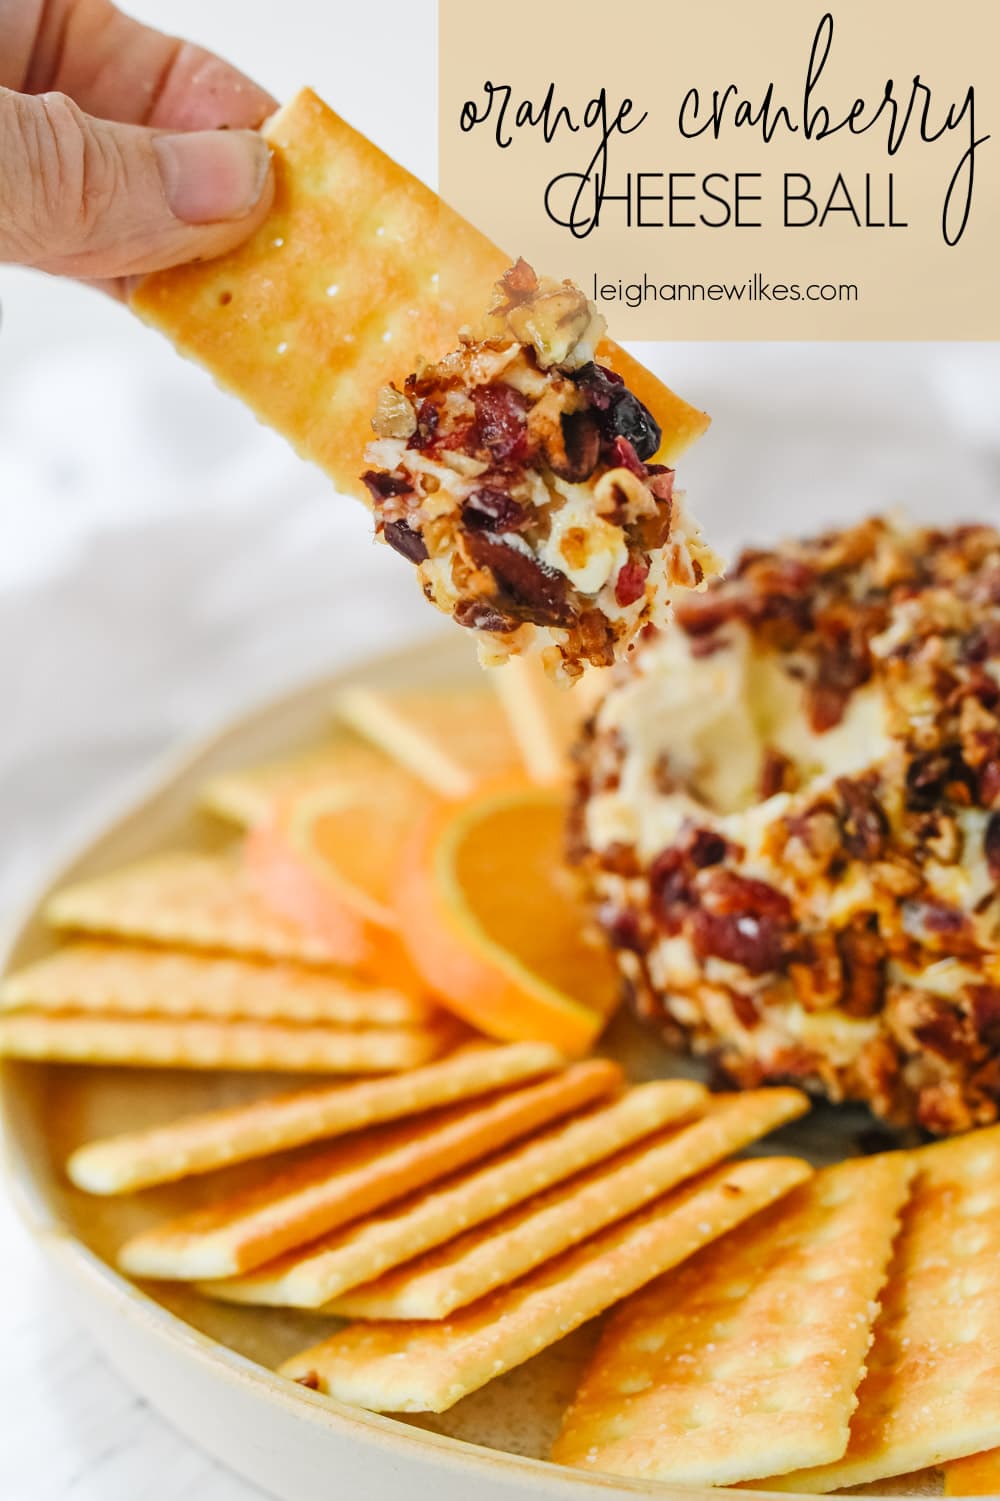
bite out of a orange cranberry cheese ball

What to Serve with a Orange Cranberry Cheese Ball

  • Crackers
  • Apple Slices – to keep your apple slices from turning brown, submerge them in a bowl of cold water with salt in it.  Just cover them with the water and then take them out and pat dry.  It’s like magic, they don’t turn brown!
  • Pretzels
  • Vanilla Wafers
  • Graham Crackerscracker with orange cranberry cheese ball

Now sit back, and watch your guests faces as they take their first bite of this delicious Christmas cheese ball.  If you prefer a savory cheese ball, be sure and check out my recipe for the BEST cheese ball ever!

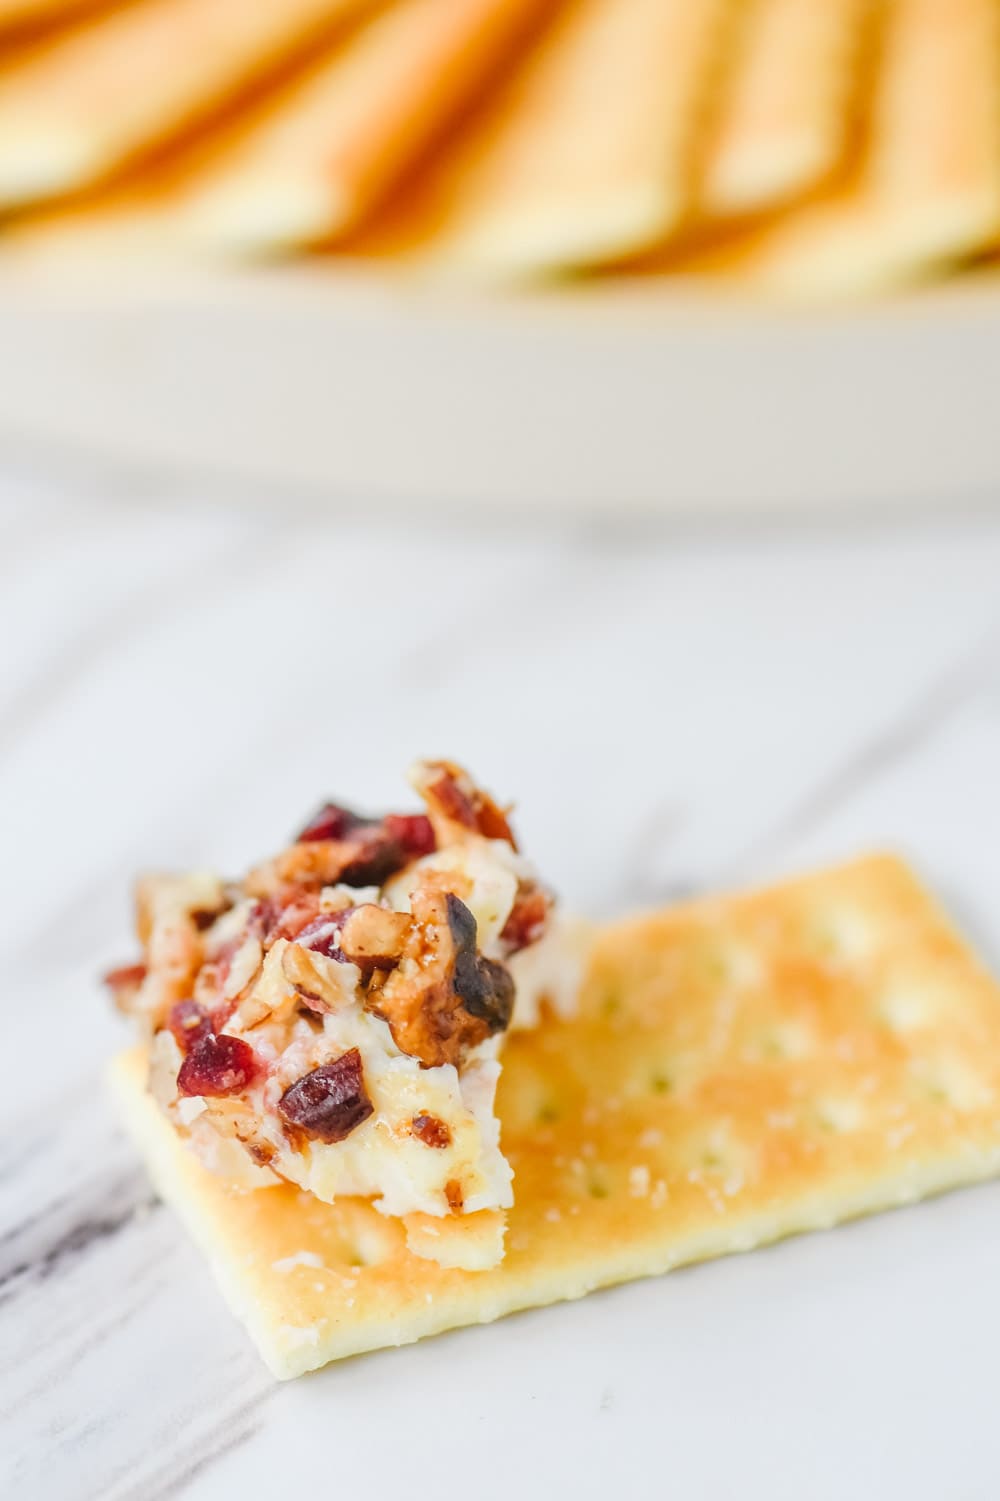
cheeseball on a cracker

Some other sweet appetizer treats:

For all of my other favorite kitchen products and tools visit my Amazon Store. 

Did you know I wrote a cookbook?  Check out the Holiday Slow Cooker Cookbook for 100 delicious recipes

Orange Cranberry Cheese Ball Recipe

Cranberry Orange Cheese Ball

You usually think of a cheese ball as a savory appetizer but this Christmas Cheeseball can be dessert! This cranberry orange cheeseball has all the holiday flavors including chunks of white chocolate and sugary pecans.

  • 1 8 oz cream cheese (softened)
  • 1/4 cup powdered sugar
  • 1 Tbsp orange juice
  • 1/2 Tbsp orange zest
  • 1/2 cup Craisins (chopped)
  • 1/2 cup sugared pecans (chopped)
  • 1/4 cup Craisins
  1. Mix together cream cheese and sugar until smooth.

  2. Mix in orange juice, zest and 1/2 cup Craisins until well blended.

  3. Chill mixture in bowl for 30 minutes in refrigerator

  4. Place mixture onto plastic wrap and form into a ball. Cover in plastic wrap and chill for 1-2 hours.

  5. Mix together sugared pecans and 1/4 cup Craisins and roll cheeseball in it before serving.

  6. Serve with crackers, apples or pretzels

If you’ve tried this dessert cheese ball or any other recipe on Your Homebased Mom, then don’t forget to rate the recipe and let me know how it went in the comments below, I love hearing from you!

You can also FOLLOW ME on FACEBOOK, INSTAGRAM and PINTEREST to see more delicious food, party ideas and travel tips and what I’m up to on a daily basis!

Continue reading Orange Cranberry Cheese Ball. This post is from Your Homebased Mom. If you are not reading it from our feed, it has been STOLEN. Please contact Leigh Anne to let us know. Enjoy the posts.


from Your Homebased Mom https://ift.tt/2PjYuK4
via IFTTThttps://ift.tt/2sp4Rmg

jueves, 12 de diciembre de 2019

Santa Claus Gingerbread Cookie This Santa Claus gingerbread cookie is entirely edible but I don’t have the heart to eat him! He did a good job of watching over the dessert table at Thanksgiving and is now on display in the showroom at my … Continue reading → The post Santa Claus Gingerbread Cookie appeared first on SweetAmbs. https://ift.tt/eA8V8J SweetAmbs


via SweetAmbs https://ift.tt/2YDK2zE Santa Claus Gingerbread Cookie https://ift.tt/eA8V8J SweetAmbs

Peppermint Ganache Cupcakes  Peppermint Ganache Cupcakes are filled and dipped in chocolate ganache, topped with peppermint cream cheese frosting and have a sprinkle of candy cane on top. These cupcakes  are perfect for the holidays or just about any time! If you love the chocolate and peppermint combo check out this chocolate peppermint ice cream cake roll or chocolate peppermint sugar cookies The Perfect Holiday Dessert I love serving cupcakes for dessert at a party.  They are the perfect serving size and they look so pretty on a serving plate.  These peppermint ganache cupcakes are the perfect holiday dessert.  What says Christmas better than peppermint?   Chocolate and peppermint is a near perfect combination. These chocolate cupcakes are rich and moist and the best part is the peppermint chocolate ganache on top of and inside the cupcake!  It turns the cupcake into a chocolately, fudgy piece of heaven.  Every time I have served these they have met with rave reviews.  And if you end up with any leftovers,  they taste even better the second day. How to Make Peppermint Ganache Cupcakes Prepare. Preheat oven to 350 degrees F and line muffin tin with cupcake liners. Combine.  Mix together  wet ingredients and then gently mix in cake mix and sour cream. Fold until combined. Fill.  Using a scoop, fill each muffin tin 2/3 full and bake for 15-20 minutes or until a toothpick comes out clean. Ganache.  While the cupcakes are baking prepare your ganache. Frosting and Filling.  After the cupcakes bake, while they are still warm , use a wooden spoon to poke a hole in the middle.  Fill the hole with ganache and then dip the top of the cupcake into the ganache If your ganache is a little thin, add a bit more sugar or let it sit for a few minutes and it will thicken as it sits.  To prevent the ganache from running off the sides of the cupcake, just dip the middle of the cupcake into the ganache. The crowning glory on the cupcakes though is the peppermint cream cheese frosting.  Be sure to allow your cream cheese to sit at room temperature to soften up before making frosting.   Use a decorating bag and a large star tip to pipe frosting onto cupcake. The addition of the crushed candy cane adds a pretty touch and some extra peppermint flavor. They also look great with candy cane kisses on top. As my friend Alison said, “These are SO worth the calories!” For more peppermint treats try: White Chocolate Peppermint Pretzel Bites Peppermint Bark Dip Peppermint Chocolate Chip Milkshake For all of my other favorite kitchen products and tools visit my Amazon Store.  Did you know I wrote a cookbook?  Check out my Holiday Slow Cooker Cookbook for 100 delicious recipes Peppermint Ganache Cupcake Recipe Chocolate Peppermint Ganache Cupcakes Chocolate Peppermint Cupcakes are filled and dipped in chocolate ganache, topped with peppermint cream cheese frosting and have a sprinkle of candy cane on top.  They are perfect for the holidays or just about any time! 3 eggs ½ cup water ¼ cup milk ½ cup oil 1 tsp vanilla extract 1 box devil’s food cake mix 1 cup sour cream Peppermint Ganache: 1/2 cup butter 5 Tbsp unsweetened cocoa 6 Tbsp buttermilk (or 5 ½ T milk, ½ T lemon juice) 3 cups powdered sugar 1 tsp peppermint extract Peppermint Buttercream: 8 oz cream cheese ½ cup butter (softened) 2 cup powdered sugar ½- 1 tsp peppermint extract Preheat oven to 350 degrees Mix the eggs, water, milk, oil and vanilla together Add in cake cake mix and sour cream until well blended Fill cupcake liner ¾ full and bake for 15-20 minutes or until a toothpick comes out clean While cupcakes are baking, make the peppermint ganache In a bowl, sift 3 cups powdered sugar In a small pan, melt butter and add cocoa and buttermilk and bring to a boil Pour mixture over powdered sugar and, add peppermint extract and stir until smooth Dip the tops of the warm cupcakes into the warm ganache and let cool before frosting You can also poke a hole in the middle of the cupcake with a wooden spoon and fill the whole with ganache Frosting: Beat cream cheese and butter until light and fluffy Gradually add powdered sugar Add extra sugar if needed for right consistency Add peppermint extract and beat again Pipe frosting onto cupcake and then top with candy cane kisses, crushed candy cane or even mint M & M’s If you’ve tried these cupcakes or any other recipe on Your Homebased Mom, then don’t forget to rate the recipe and let me know how it went in the comments below, I love hearing from you! You can also FOLLOW ME on FACEBOOK, INSTAGRAM and PINTEREST to see more delicious food, party ideas and travel tips and what I’m up to on a daily basis!   Continue reading Peppermint Ganache Cupcakes. This post is from Your Homebased Mom. If you are not reading it from our feed, it has been STOLEN. Please contact Leigh Anne to let us know. Enjoy the posts.

 Peppermint Ganache Cupcakes are filled and dipped in chocolate ganache, topped with peppermint cream cheese frosting and have a sprinkle of candy cane on top.

These cupcakes  are perfect for the holidays or just about any time! If you love the chocolate and peppermint combo check out this chocolate peppermint ice cream cake roll or chocolate peppermint sugar cookies

chocolate cupcake with cream cheese frosting

The Perfect Holiday Dessert

I love serving cupcakes for dessert at a party.  They are the perfect serving size and they look so pretty on a serving plate.  These peppermint ganache cupcakes are the perfect holiday dessert.  What says Christmas better than peppermint?   Chocolate and peppermint is a near perfect combination.

row of chocolate cupcakes

These chocolate cupcakes are rich and moist and the best part is the peppermint chocolate ganache on top of and inside the cupcake!  It turns the cupcake into a chocolately, fudgy piece of heaven.  Every time I have served these they have met with rave reviews.  And if you end up with any leftovers,  they taste even better the second day.

peppermint ganache cupcakes with candy cane on top

How to Make Peppermint Ganache Cupcakes

Prepare. Preheat oven to 350 degrees F and line muffin tin with cupcake liners.

Combine.  Mix together  wet ingredients and then gently mix in cake mix and sour cream. Fold until combined.

Fill.  Using a scoop, fill each muffin tin 2/3 full and bake for 15-20 minutes or until a toothpick comes out clean.

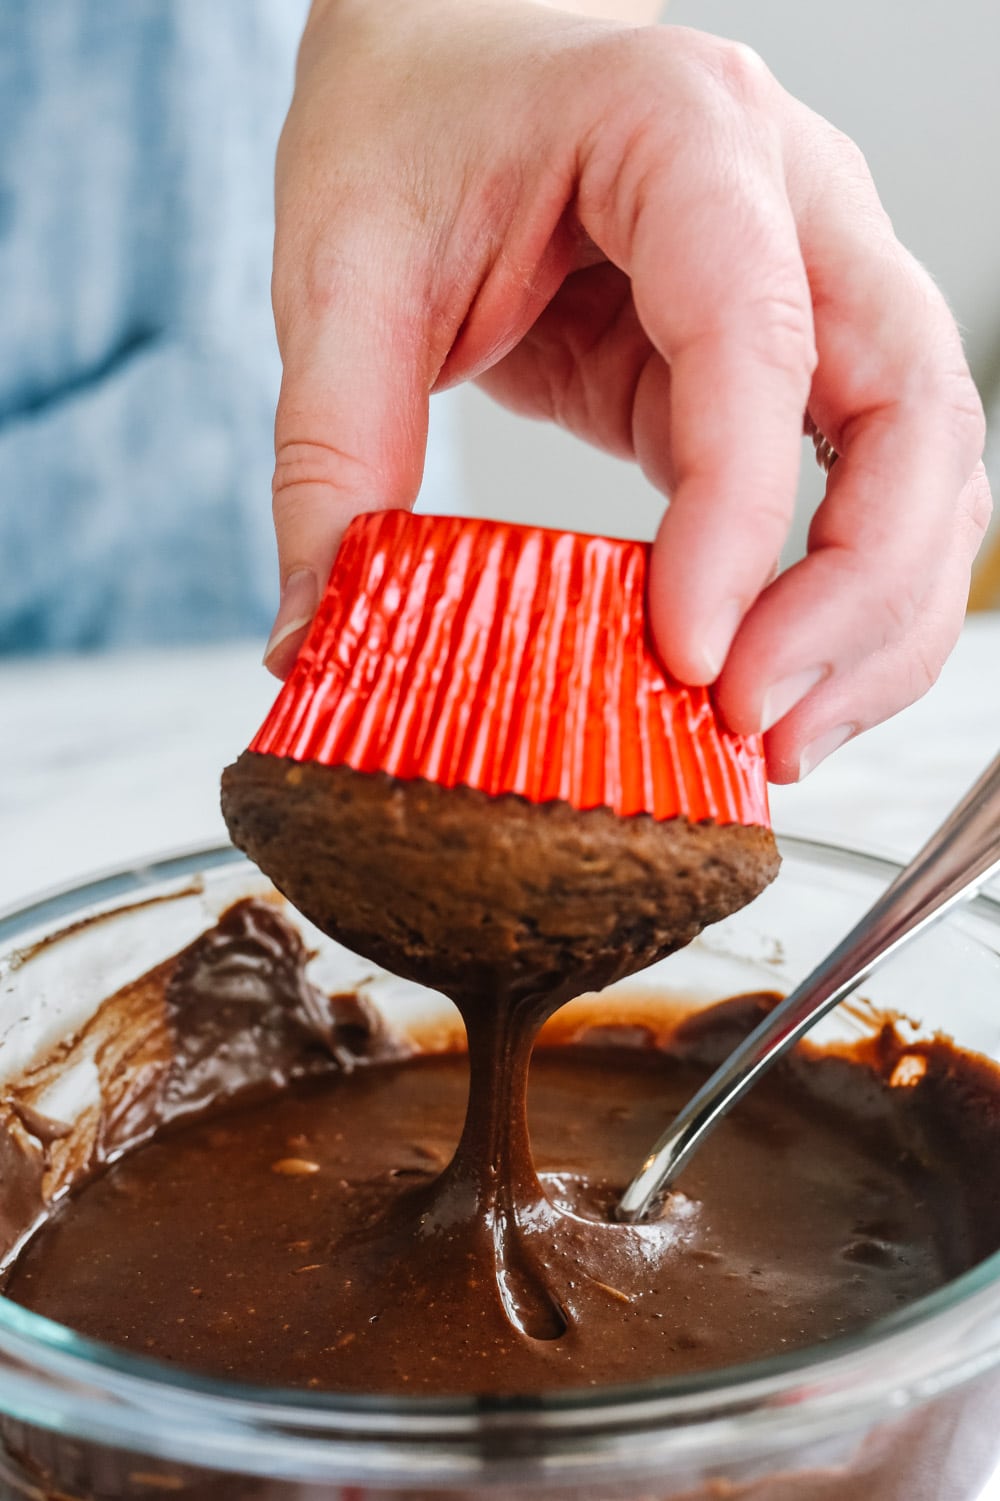
dipping cupcake into chocolate ganache

Ganache.  While the cupcakes are baking prepare your ganache.

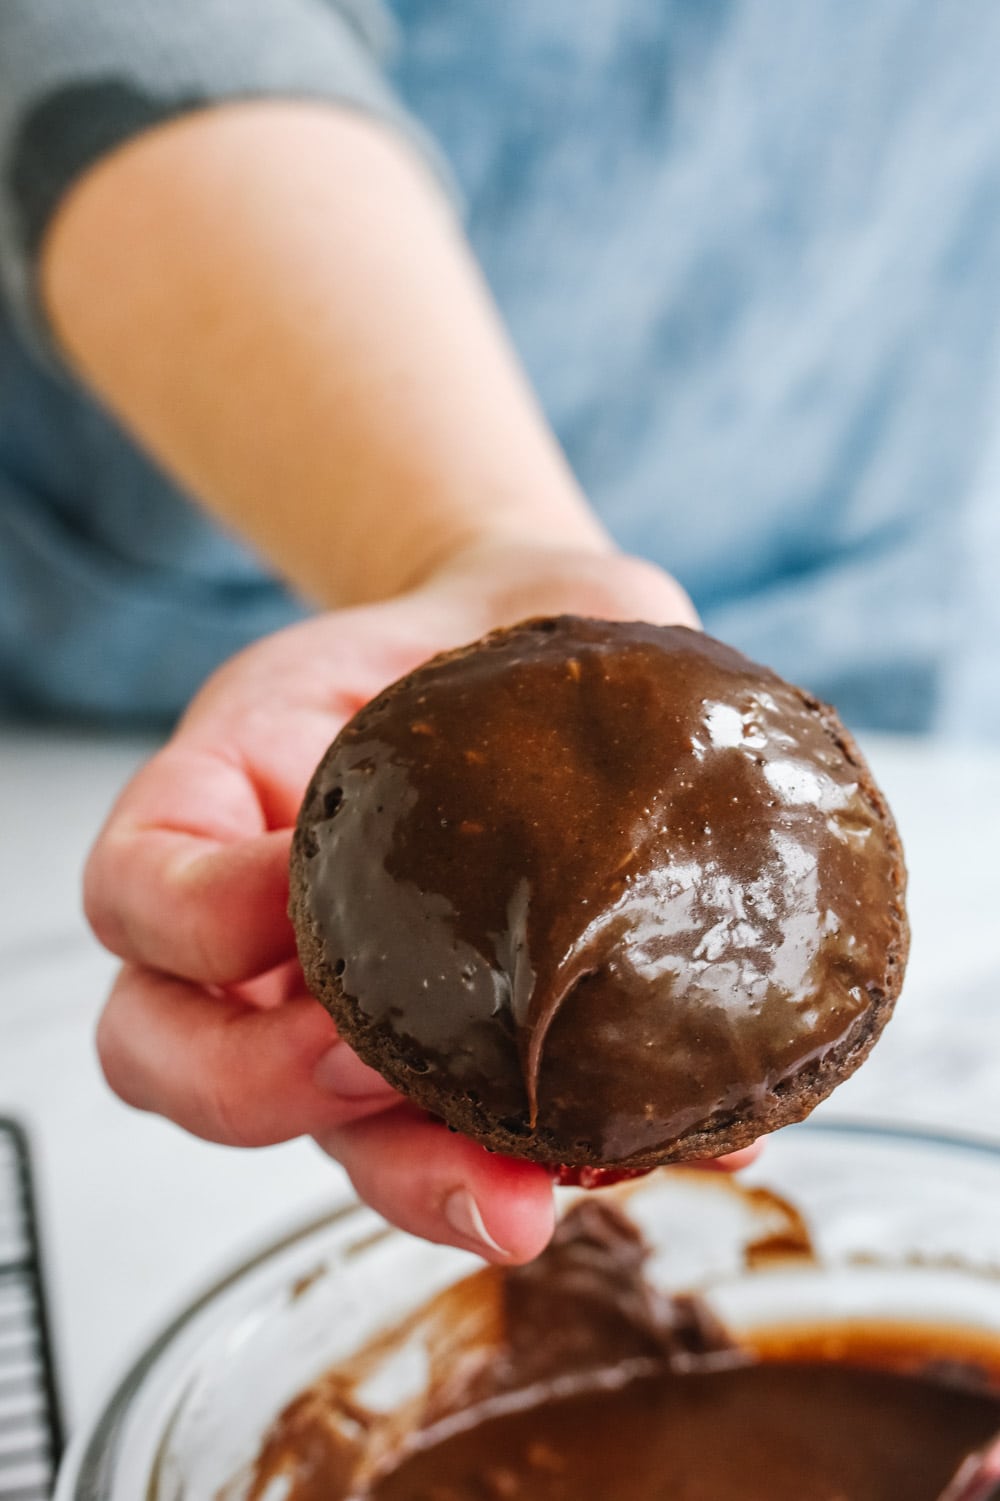
Frosting and Filling.  After the cupcakes bake, while they are still warm , use a wooden spoon to poke a hole in the middle.  Fill the hole with ganache and then dip the top of the cupcake into the ganache

chocolate cupcake dipped in chocolate

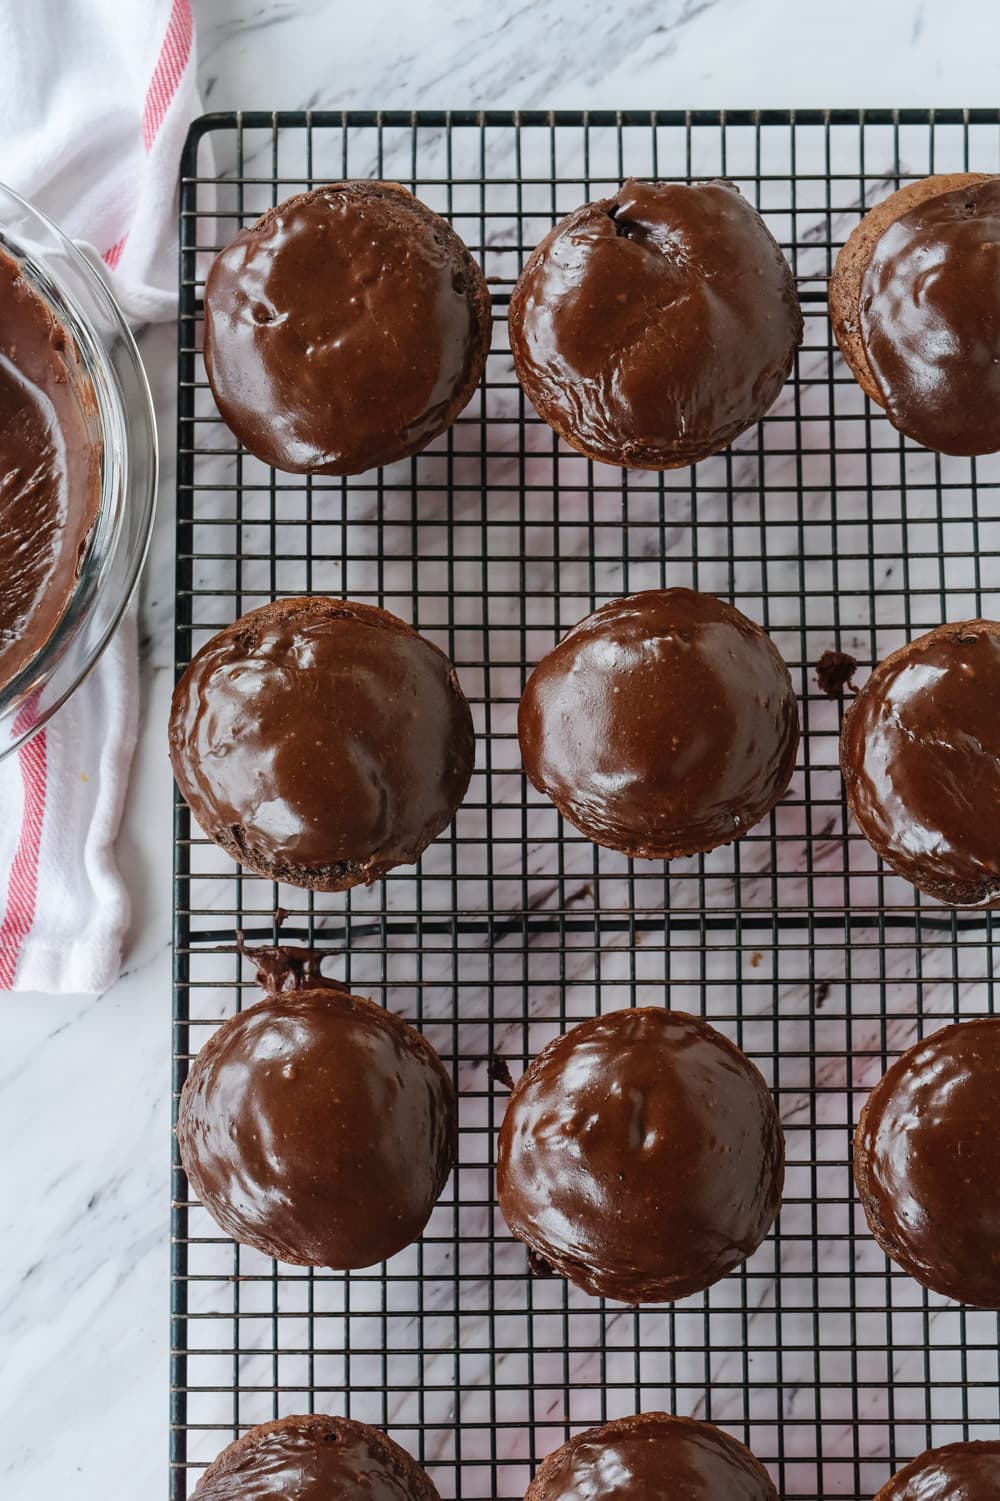
If your ganache is a little thin, add a bit more sugar or let it sit for a few minutes and it will thicken as it sits.  To prevent the ganache from running off the sides of the cupcake, just dip the middle of the cupcake into the ganache.

chocolate cupcakes on a cooling rack

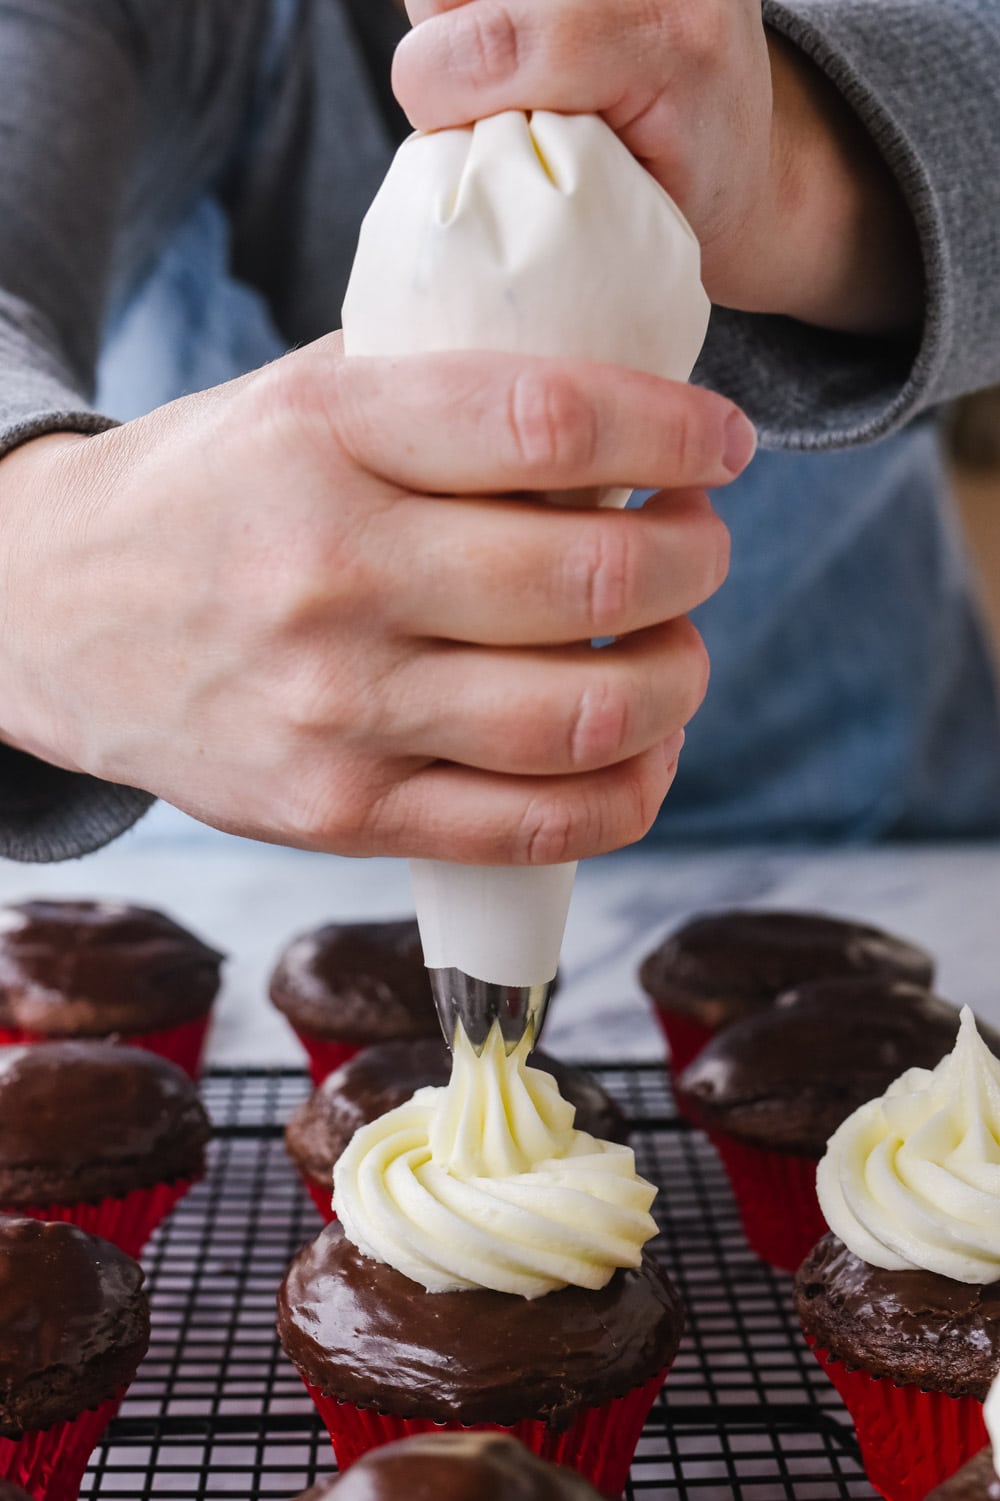
The crowning glory on the cupcakes though is the peppermint cream cheese frosting.  Be sure to allow your cream cheese to sit at room temperature to soften up before making frosting.   Use a decorating bag and a large star tip to pipe frosting onto cupcake.

frosting a chocolate cupcake

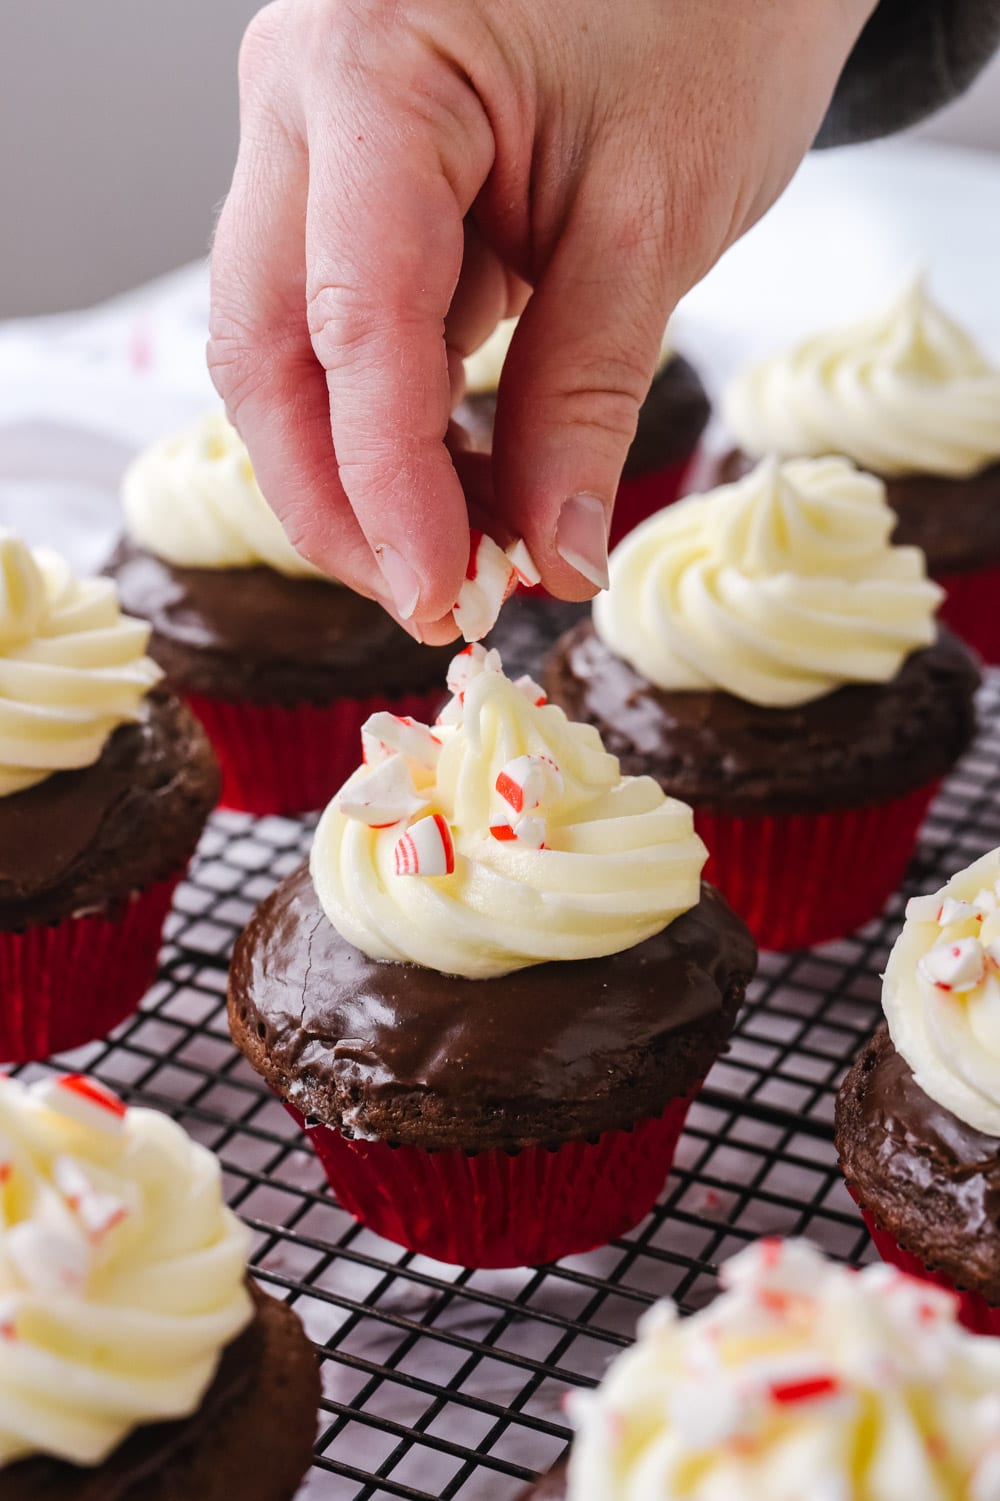
The addition of the crushed candy cane adds a pretty touch and some extra peppermint flavor. They also look great with candy cane kisses on top.

As my friend Alison said, “These are SO worth the calories!”

peppermint on top of cupcake

For more peppermint treats try:

White Chocolate Peppermint Pretzel Bites

Peppermint Bark Dip

Peppermint Chocolate Chip Milkshake

For all of my other favorite kitchen products and tools visit my Amazon Store. 

Did you know I wrote a cookbook?  Check out my Holiday Slow Cooker Cookbook for 100 delicious recipes

Peppermint Ganache Cupcake Recipe

Chocolate Peppermint Ganache Cupcakes

Chocolate Peppermint Cupcakes are filled and dipped in chocolate ganache, topped with peppermint cream cheese frosting and have a sprinkle of candy cane on top.  They are perfect for the holidays or just about any time!

  • 3 eggs
  • ½ cup water
  • ¼ cup milk
  • ½ cup oil
  • 1 tsp vanilla extract
  • 1 box devil’s food cake mix
  • 1 cup sour cream

Peppermint Ganache:

  • 1/2 cup butter
  • 5 Tbsp unsweetened cocoa
  • 6 Tbsp buttermilk (or 5 ½ T milk, ½ T lemon juice)
  • 3 cups powdered sugar
  • 1 tsp peppermint extract

Peppermint Buttercream:

  • 8 oz cream cheese
  • ½ cup butter (softened)
  • 2 cup powdered sugar
  • ½- 1 tsp peppermint extract
  1. Preheat oven to 350 degrees
  2. Mix the eggs, water, milk, oil and vanilla together
  3. Add in cake cake mix and sour cream until well blended
  4. Fill cupcake liner ¾ full and bake for 15-20 minutes or until a toothpick comes out clean
  5. While cupcakes are baking, make the peppermint ganache
  6. In a bowl, sift 3 cups powdered sugar
  7. In a small pan, melt butter and add cocoa and buttermilk and bring to a boil
  8. Pour mixture over powdered sugar and, add peppermint extract and stir until smooth
  9. Dip the tops of the warm cupcakes into the warm ganache and let cool before frosting

  10. You can also poke a hole in the middle of the cupcake with a wooden spoon and fill the whole with ganache

Frosting:

  1. Beat cream cheese and butter until light and fluffy
  2. Gradually add powdered sugar
  3. Add extra sugar if needed for right consistency
  4. Add peppermint extract and beat again
  5. Pipe frosting onto cupcake and then top with candy cane kisses, crushed candy cane or even mint M & M’s

If you’ve tried these cupcakes or any other recipe on Your Homebased Mom, then don’t forget to rate the recipe and let me know how it went in the comments below, I love hearing from you!

You can also FOLLOW ME on FACEBOOK, INSTAGRAM and PINTEREST to see more delicious food, party ideas and travel tips and what I’m up to on a daily basis!

peppermint cupcakes with cream cheese frosting


Continue reading Peppermint Ganache Cupcakes. This post is from Your Homebased Mom. If you are not reading it from our feed, it has been STOLEN. Please contact Leigh Anne to let us know. Enjoy the posts.


from Your Homebased Mom https://ift.tt/2t49nH4
via IFTTThttps://ift.tt/2PDvz2t

Croque en Bouche or Croquembouche Croque en Bouche or Croquembouche https://ift.tt/2LLBEbY Home Cooking Adventure RSS Feed


via Home Cooking Adventure RSS Feed https://ift.tt/2RLMZwG Croque en Bouche or Croquembouche https://ift.tt/2LLBEbY

miércoles, 11 de diciembre de 2019

Bacon Wrapped Dates These bacon wrapped dates will fly off the plate at your  next party!  There is a special surprise waiting inside of them too! I think appetizers are my favorite part of any holiday party and I often make meal just off the appetizers.  Be sure and check out the great collection of appetizer recipes here on the blog.  Two of my favorites are phyllo wrapped asparagus and bloomin onion bread. So I thought I didn’t like dates.  But I was wrong.  At least when it comes to Bacon Wrapped Dates Drizzled with Maple Syrup I was wrong. I first enjoyed this lovely little morsels at a Halloween party hosted by my neighbor Denise.  Jim found them first and fell in love.  He brought one to me and insisted that I try it, without telling me what it was.  I knew he thought I wouldn’t try it if I knew what it was and he was probably right.  I’m glad he didn’t tell me what it was.  It tasted like candy. These bacon wrapped dates would make a lovely addition to any New Year’s Eve party or just about any party! How to Make Bacon Wrapped Dates The dates I bought came pitted which means they had a slit cut into them already.  If your dates aren’t pitted, you will need to make a slit into the date (not all the way through) and remove the pit. Remember I mentioned there was surprise inside the date?  It’s a pistachio!  Open up the slit and place 1-2 pistachios inside of the date and then press the date closed.   Cut each strip of bacon into 3-4 pieces.  If you are using larger dates you will cut it into 3 pieces. Use thin bacon as thicker bacon takes longer to cook. You want the bacon piece to be long enough to wrap around the date with a little bit of overlap and thin enough that it will cook fairly quickly.  Place the bacon seam side down on a parchment paper lined baking sheet.  Some of your bacon may come slightly unwrapped during the baking process but that’s o.k. For that added little touch and extra sweetness and goodness give them a nice little brush of real maple syrup (none of that fake stuff!) Bake them at 350 degrees until crisp.  The length of time will depend on the thickness of your bacon.  I baked mine about 5 minutes and then flipped them over with a fork for another 5 minutes. The dates can also be stuffed and rolled and then frozen for a quick make a head appetizer.  They will just take a bit longer to bake if they are frozen. Before serving, I like to drizzle just a little bit more maple syrup over the top.  You can serve them with the tooth picks in or without the tooth picks, which ever you prefer.  The toothpicks make it a little easier for your guests to grab one, or two or three! Some other favorite appetizers: California Ripe Olive Artichoke Dip Hummus Pita Chips For all of my other favorite kitchen products and tools visit my Amazon Store.  Did you know I wrote a cookbook?  Check out the Holiday Slow Cooker Cookbook for 100 delicious recipes Bacon Wrapped Date Recipe Bacon Wrapped Dates These bacon wrapped dates will fly off the plate at your  next party!  There is a special surprise waiting inside of them too! 32 pitted dates (or however many you want to make) 32 shelled pistachios ((32-64) 1-2 per date) 1 lb. lean (thin bacon, each strip cut into 3-4 pieces depending on size of date) 1 cup maple syrup for drizzling Preheat oven to 350 degrees. Make a slit in each date, if there isn't one already and stuff with 1-2 pistachios. Remove the pit if they are pitted. Wrap each date with a piece of bacon so that the bacon just overlaps. Close with a toothpick. Place seam side down on the cookie sheet. Brush lightly with maple syrup. Bake until bacon is crisp, about 5 minutes each side. Dates can be made ahead of time and frozen. Bake for 8-10 minutes per side if frozen. Drizzle with additional maple syrup if desired. If you’ve tried this Bacon Wrapped Dates or any other recipe on Your Homebased Mom, then don’t forget to rate the recipe and let me know how it went in the comments below, I love hearing from you! You can also FOLLOW ME on FACEBOOK, INSTAGRAM and PINTEREST to see more delicious food, party ideas and travel tips and what I’m up to on a daily basis!     Continue reading Bacon Wrapped Dates. This post is from Your Homebased Mom. If you are not reading it from our feed, it has been STOLEN. Please contact Leigh Anne to let us know. Enjoy the posts.

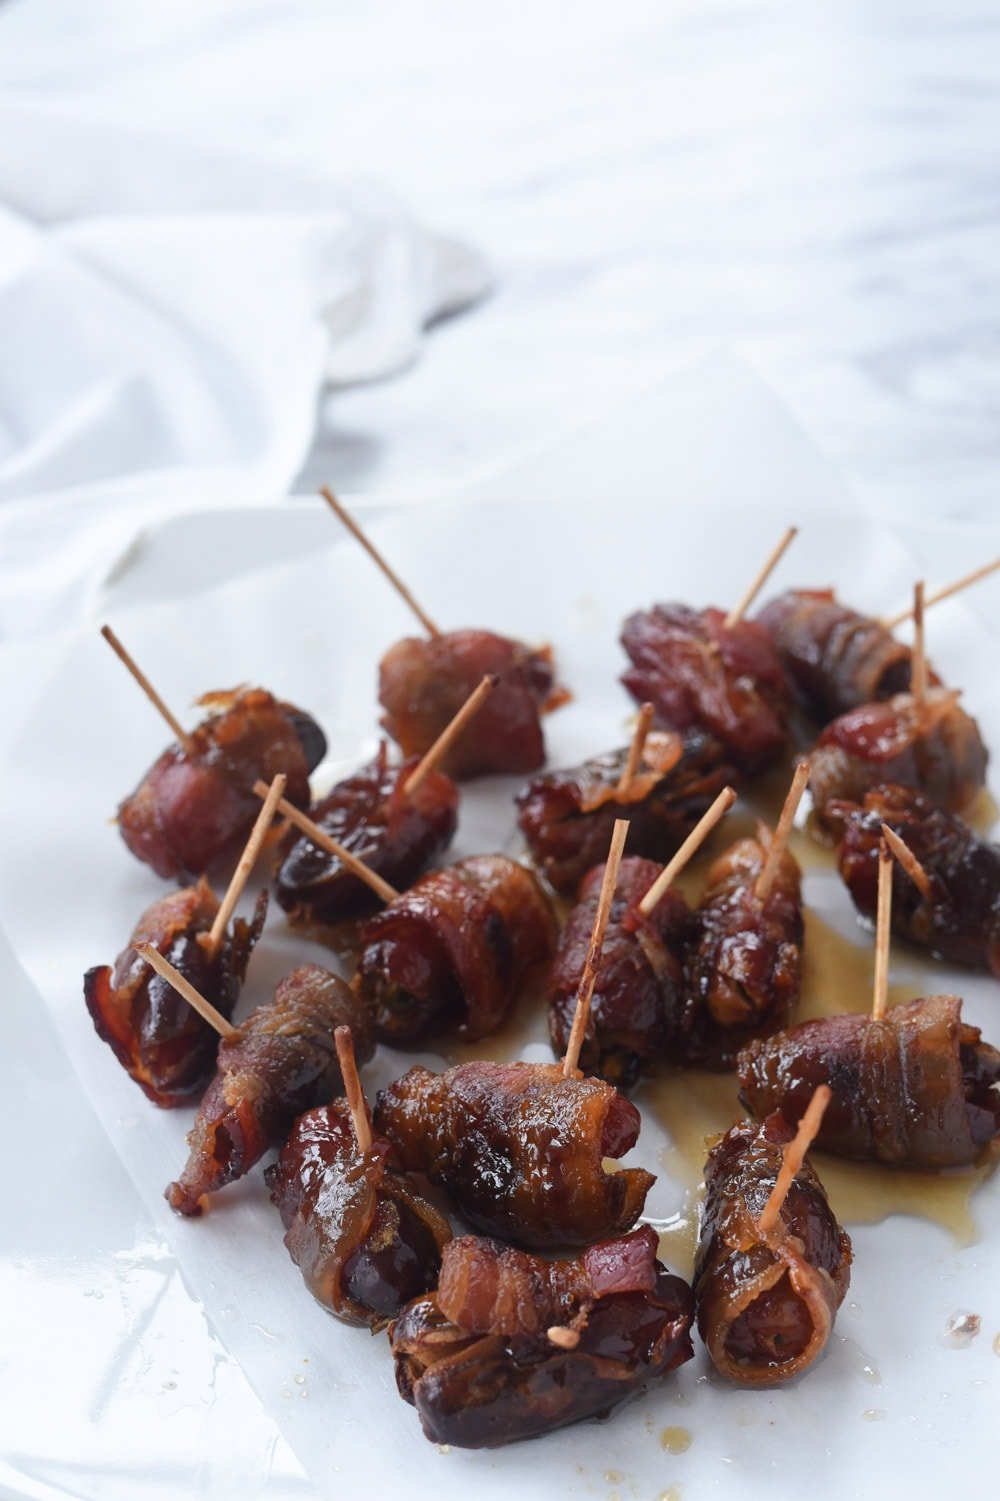
These bacon wrapped dates will fly off the plate at your  next party!  There is a special surprise waiting inside of them too!

I think appetizers are my favorite part of any holiday party and I often make meal just off the appetizers.  Be sure and check out the great collection of appetizer recipes here on the blog.  Two of my favorites are phyllo wrapped asparagus and bloomin onion bread.

bacon wrapped dates with tooth picks

So I thought I didn’t like dates.  But I was wrong.  At least when it comes to Bacon Wrapped Dates Drizzled with Maple Syrup I was wrong.

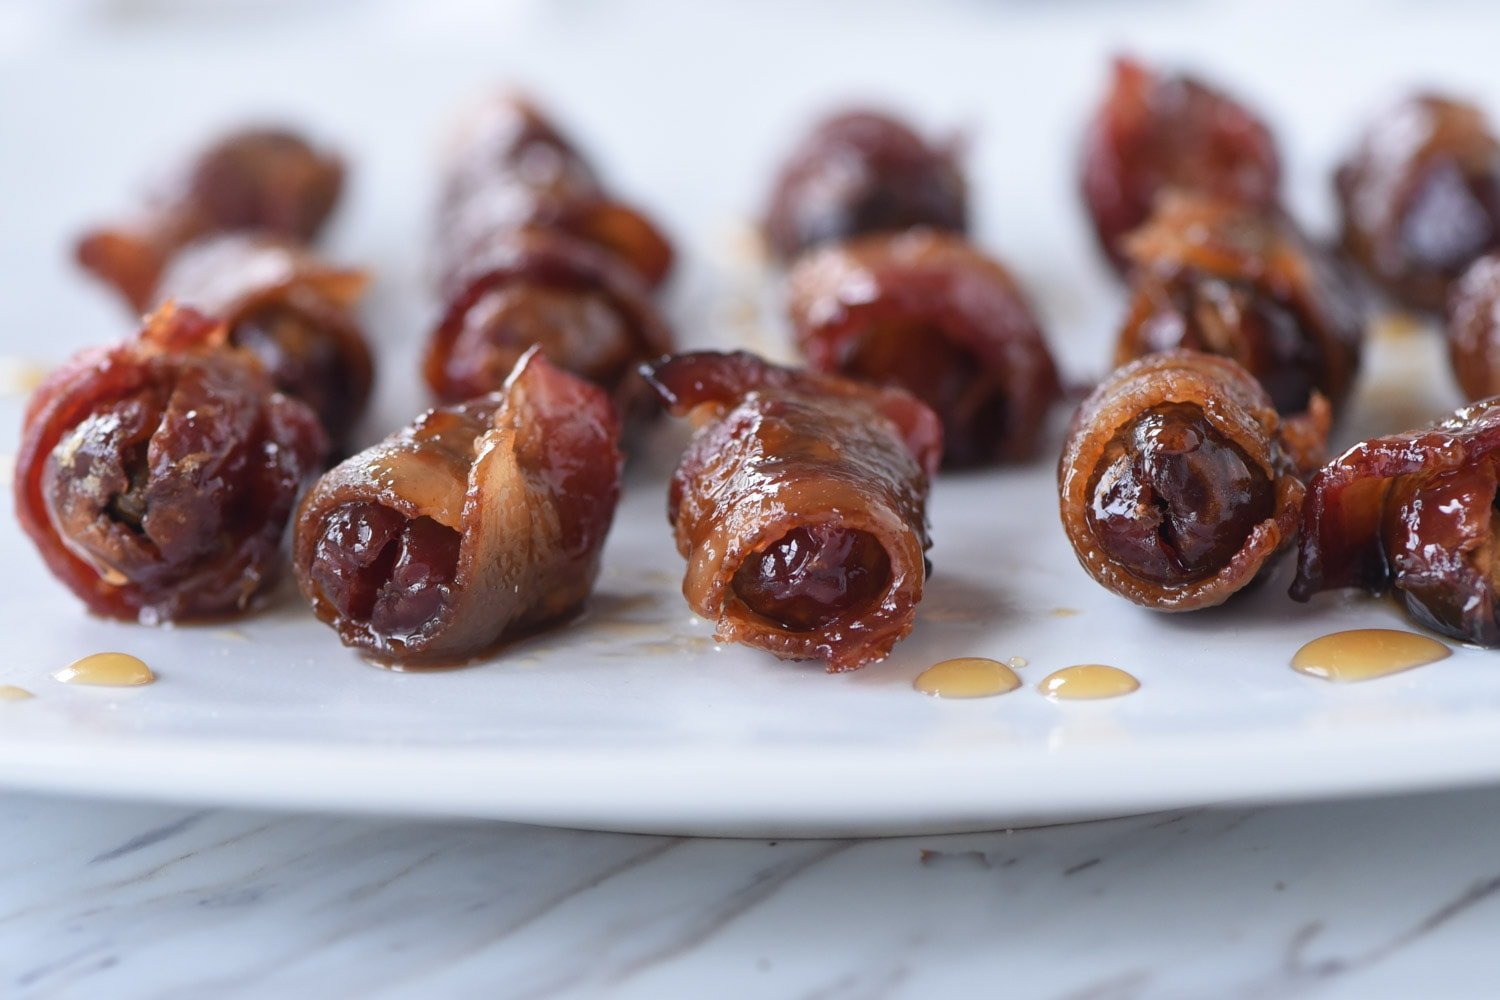
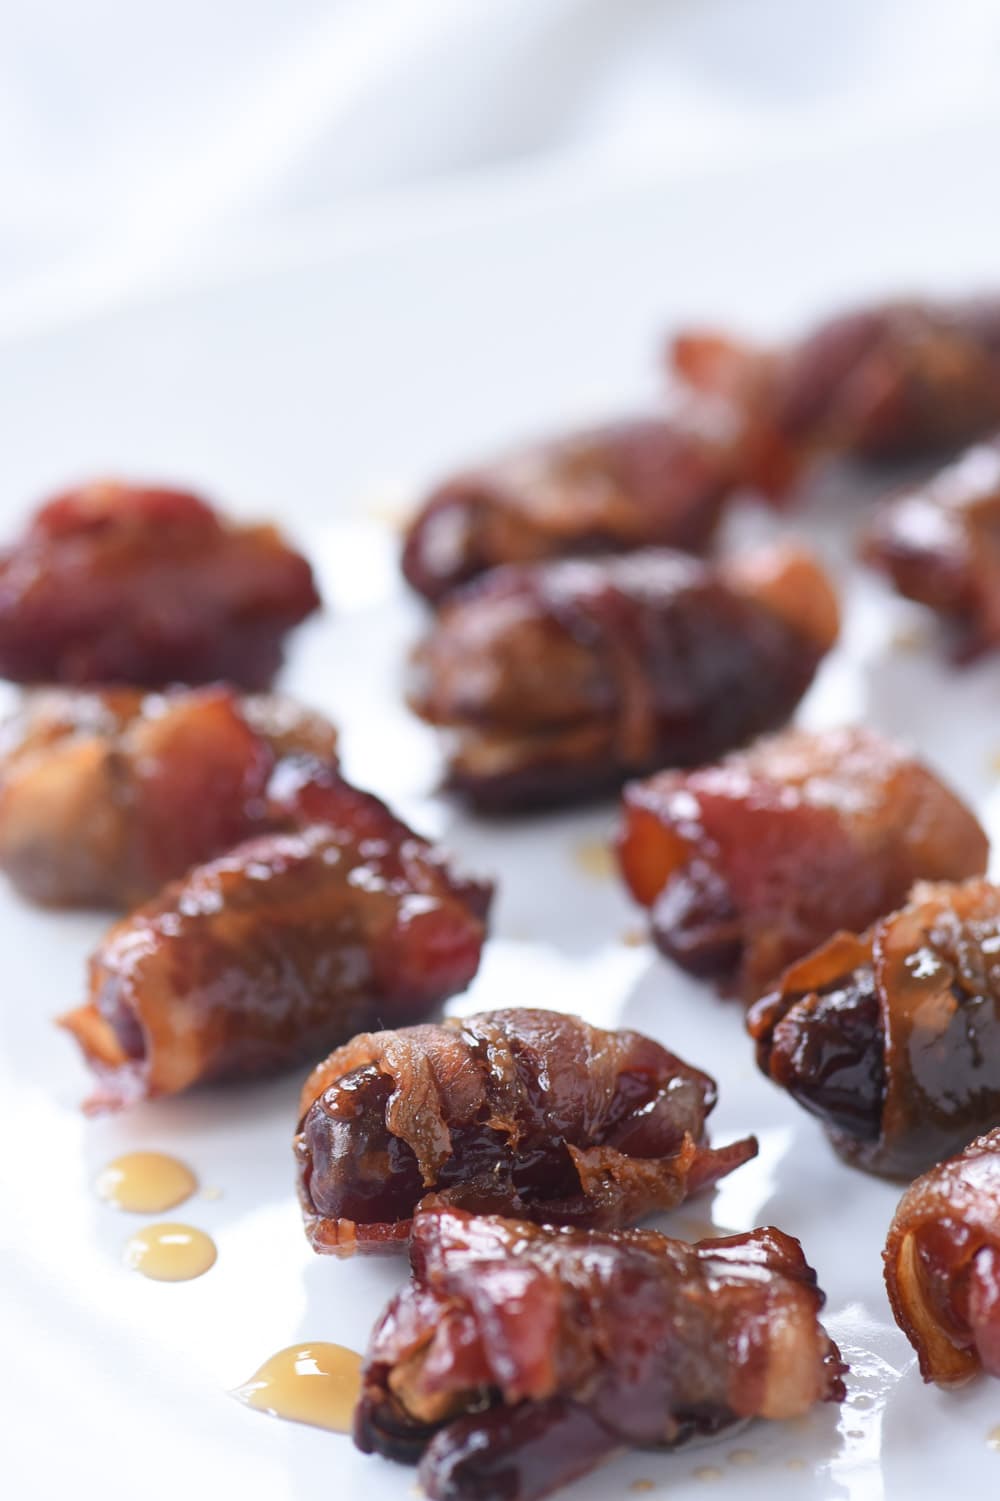
bacon wrapped dates on a white plate.

I first enjoyed this lovely little morsels at a Halloween party hosted by my neighbor Denise.  Jim found them first and fell in love.  He brought one to me and insisted that I try it, without telling me what it was.  I knew he thought I wouldn’t try it if I knew what it was and he was probably right.  I’m glad he didn’t tell me what it was.  It tasted like candy.

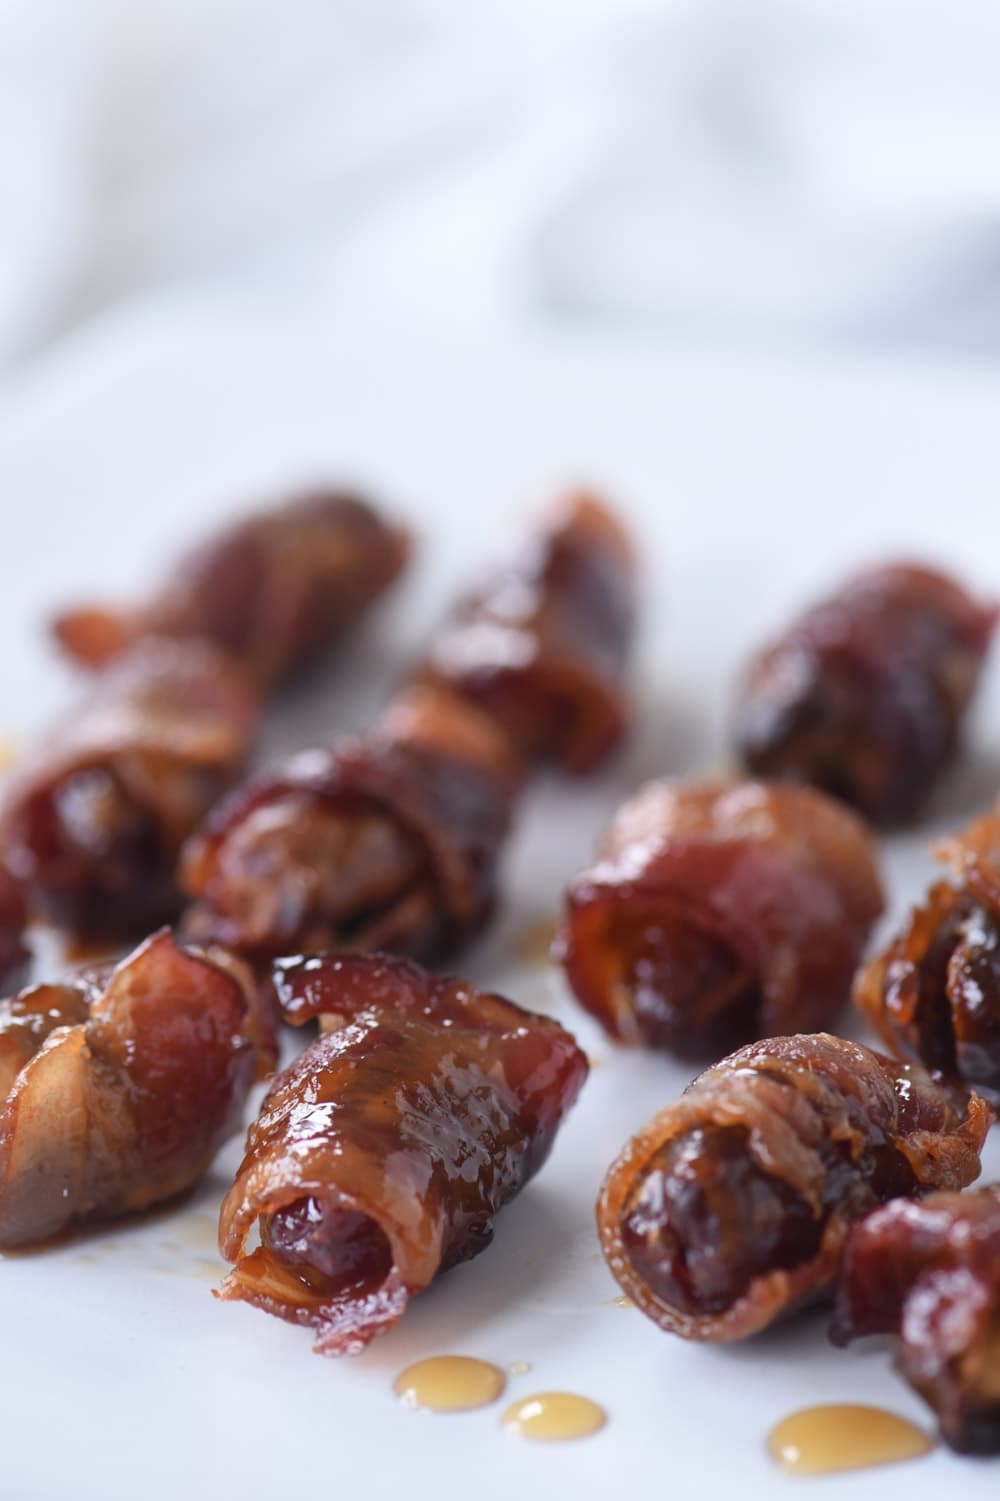
maple syrup covered bacon wrapped dates

These bacon wrapped dates would make a lovely addition to any New Year’s Eve party or just about any party!

How to Make Bacon Wrapped Dates

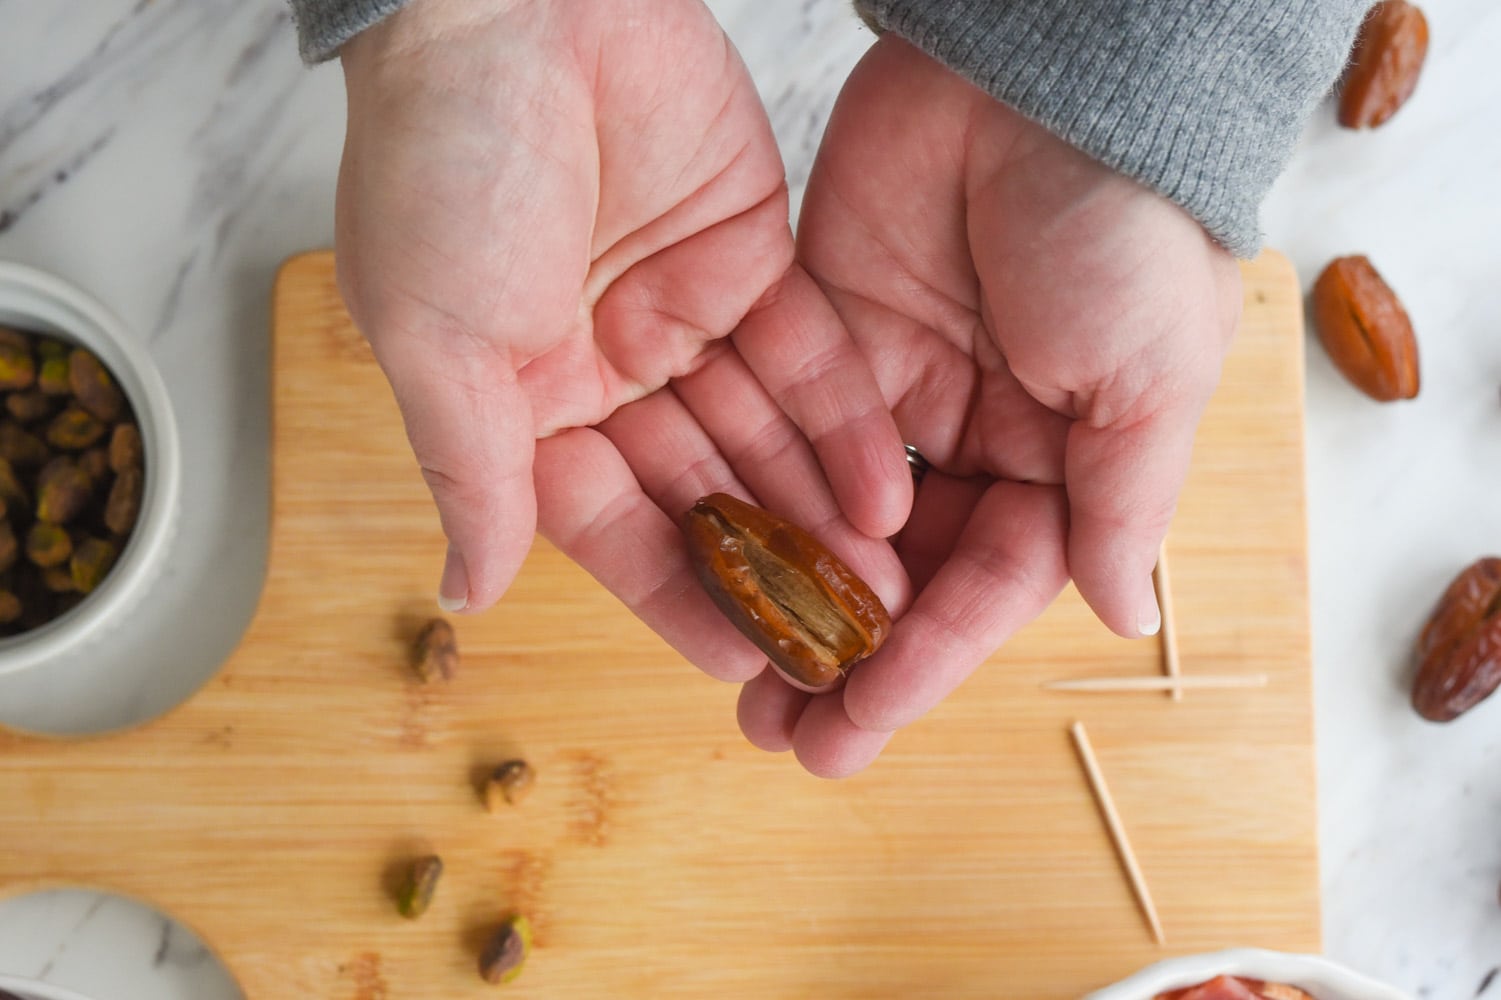
  • The dates I bought came pitted which means they had a slit cut into them already.  If your dates aren’t pitted, you will need to make a slit into the date (not all the way through) and remove the pit.

pitted date

  • Remember I mentioned there was surprise inside the date?  It’s a pistachio!  Open up the slit and place 1-2 pistachios inside of the date and then press the date closed.


pistachios in date

  • Cut each strip of bacon into 3-4 pieces.  If you are using larger dates you will cut it into 3 pieces. Use thin bacon as thicker bacon takes longer to cook.

Wrapping bacon around date

  • You want the bacon piece to be long enough to wrap around the date with a little bit of overlap and thin enough that it will cook fairly quickly.  Place the bacon seam side down on a parchment paper lined baking sheet.  Some of your bacon may come slightly unwrapped during the baking process but that’s o.k.

bacon wrapped dates on a baking sheet

  • For that added little touch and extra sweetness and goodness give them a nice little brush of real maple syrup (none of that fake stuff!)

Brushing dates with maple syrup

  • Bake them at 350 degrees until crisp.  The length of time will depend on the thickness of your bacon.  I baked mine about 5 minutes and then flipped them over with a fork for another 5 minutes.

The dates can also be stuffed and rolled and then frozen for a quick make a head appetizer.  They will just take a bit longer to bake if they are frozen.

bacon wrapped dates on a plate

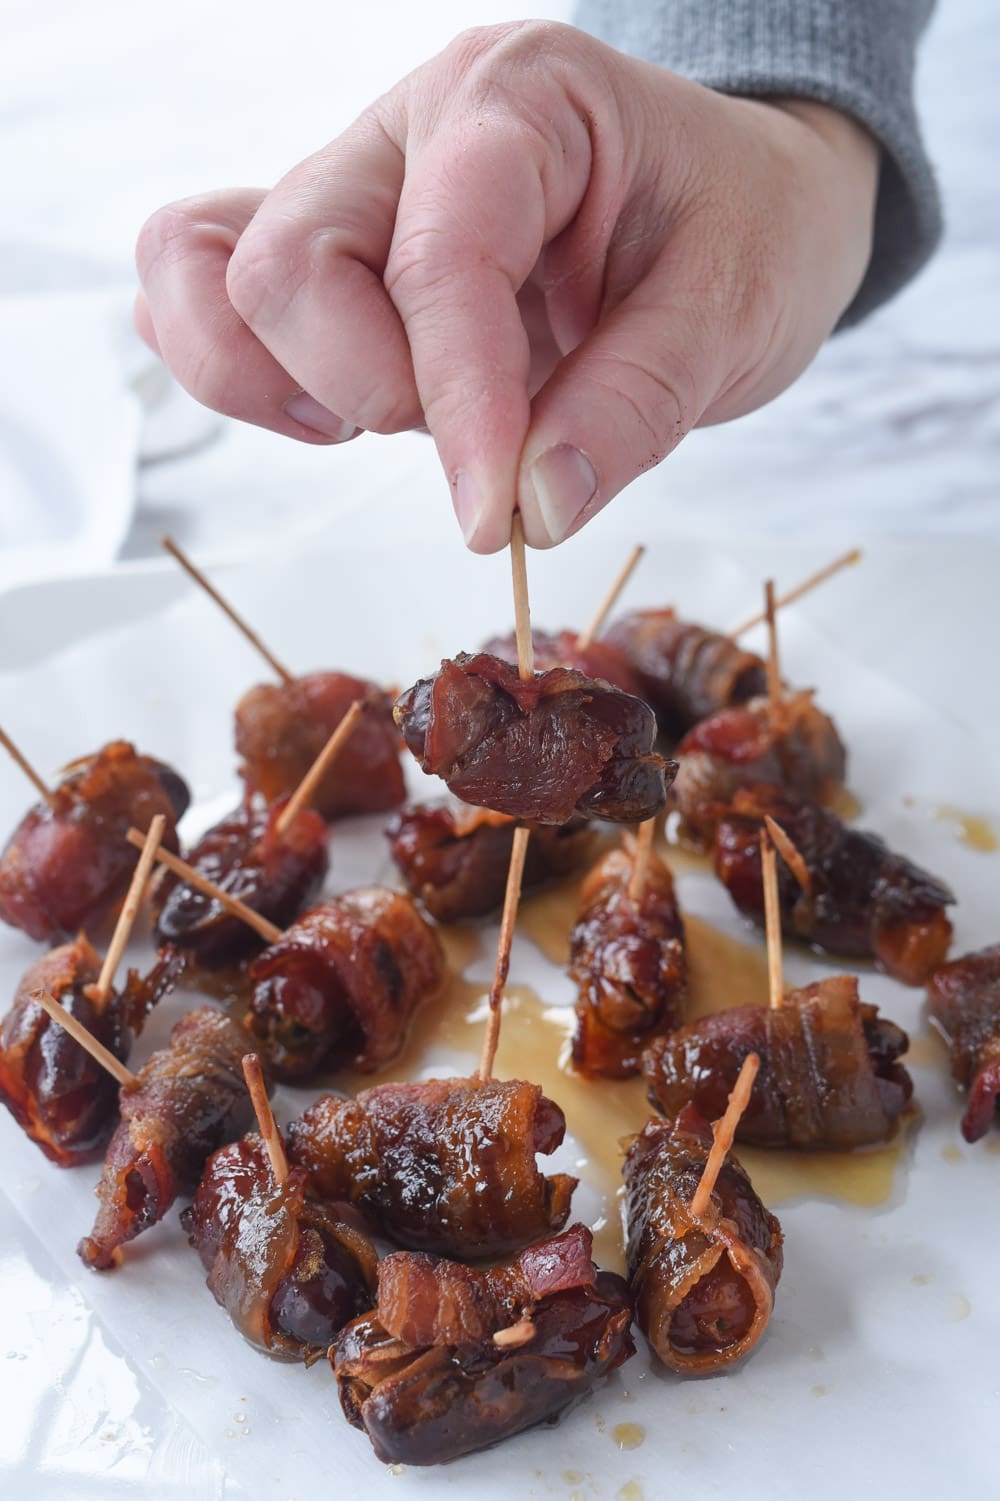
Before serving, I like to drizzle just a little bit more maple syrup over the top.  You can serve them with the tooth picks in or without the tooth picks, which ever you prefer.  The toothpicks make it a little easier for your guests to grab one, or two or three!

Picking up a bacon wrapped dateSome other favorite appetizers:

For all of my other favorite kitchen products and tools visit my Amazon Store. 

Did you know I wrote a cookbook?  Check out the Holiday Slow Cooker Cookbook for 100 delicious recipes

Bacon Wrapped Date Recipe

Bacon Wrapped Dates

These bacon wrapped dates will fly off the plate at your  next party!  There is a special surprise waiting inside of them too!

  • 32 pitted dates (or however many you want to make)
  • 32 shelled pistachios ((32-64) 1-2 per date)
  • 1 lb. lean (thin bacon, each strip cut into 3-4 pieces depending on size of date)
  • 1 cup maple syrup for drizzling
  1. Preheat oven to 350 degrees.
  2. Make a slit in each date, if there isn't one already and stuff with 1-2 pistachios. Remove the pit if they are pitted.

  3. Wrap each date with a piece of bacon so that the bacon just overlaps. Close with a toothpick.

  4. Place seam side down on the cookie sheet.
  5. Brush lightly with maple syrup.
  6. Bake until bacon is crisp, about 5 minutes each side.
  7. Dates can be made ahead of time and frozen.
  8. Bake for 8-10 minutes per side if frozen.
  9. Drizzle with additional maple syrup if desired.

If you’ve tried this Bacon Wrapped Dates or any other recipe on Your Homebased Mom, then don’t forget to rate the recipe and let me know how it went in the comments below, I love hearing from you!

You can also FOLLOW ME on FACEBOOK, INSTAGRAM and PINTEREST to see more delicious food, party ideas and travel tips and what I’m up to on a daily basis!

bacon wrapped dates on a plate


Continue reading Bacon Wrapped Dates. This post is from Your Homebased Mom. If you are not reading it from our feed, it has been STOLEN. Please contact Leigh Anne to let us know. Enjoy the posts.


from Your Homebased Mom https://ift.tt/2P9diLs
via IFTTThttps://ift.tt/2E8a3Oc