miércoles, 27 de febrero de 2019
Double Chocolate Waffles Double Chocolate Waffles https://ift.tt/2BVHdzT Home Cooking Adventure RSS Feed
sábado, 23 de febrero de 2019
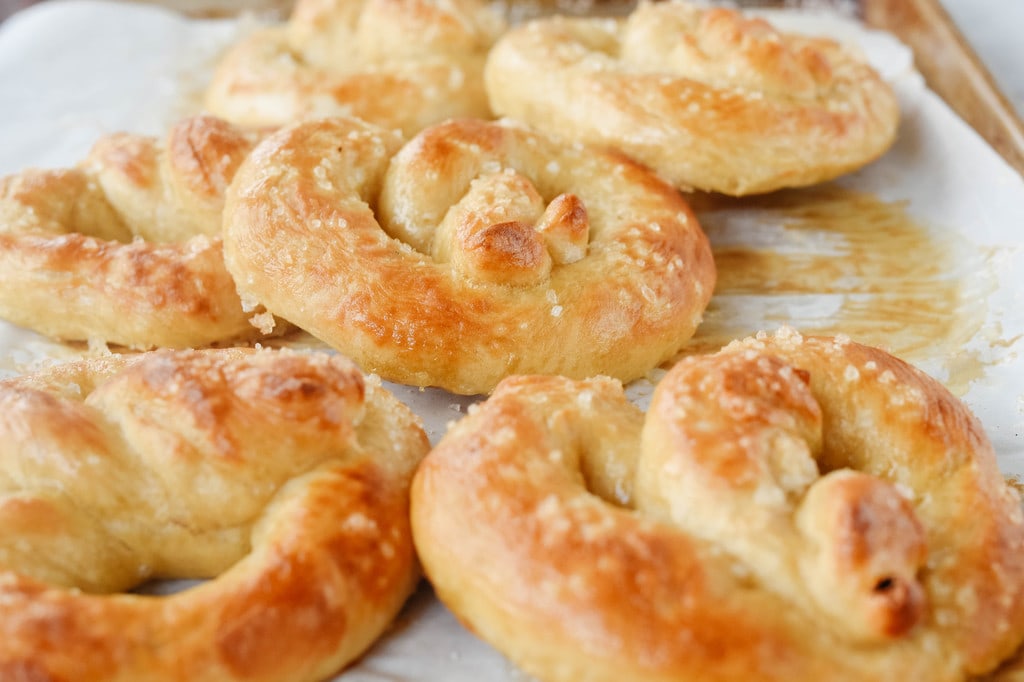
Homemade Soft Pretzels Do you love the warm, buttery soft pretzels you can buy at the mall? These homemade soft pretzels are even better! Everyone from sports fans to mall shoppers love soft pretzels. And what isn’t to love about the warm, salty, buttery snack. Now you can make them at home for a big game or just a family snack. And once you make them, you will be looking for excuses to make them again. How to Make Soft Pretzels After your soft pretzel dough has risen for about 30 minutes, divide the dough into 8-16 pieces. The recipe will make 8 larger pretzels like you would buy at a sporting event. But I love to use the smaller size for game day parties. Roll each piece of dough into a rope about 15-20 inches in length., form each rope into a pretzel shape. Then dip each pretzel into a mixture of water and baking soda. This gives the pretzels that nice golden brown color. Once dipped, place pretzels on a baking sheet covered with parchment paper. Sprinkle them with kosher salt and allow them to rise, uncovered, for 10-15 minutes. Bake at 500 degree for about 7-9 minutes or until golden brown. Remove them from the oven and brush each pretzel with melted butter. The more, the better! Don’t skimp here!! Finally, remove from the cookie sheet and enjoy! These are best eaten warm. They can be reheated in the microwave. If you like this recipe you might also enjoy: No Knead Bread Super Bowl Appetizers Strawberry and Avocado Roasted Corn Salsa Soft Pretzel Recipe Soft Pretzels Delicious homemade soft pretzels, just like the soft buttery pretzels you love at the mall. 2 1/2 C bread flour (or all purpose flour) 1/2 tsp salt 2 tsp sugar 2 1/4 tsp instant dry yeast 1 C warm water 1/2 C warm water 2 Tbsp baking soda kosher salt 4 Tbsp butter (melted) Preheat oven to 425 degrees F. In your mixer combine flour, salt, sugar and yeast. Stir to combine and then add 1 C warm water. Using bread hook, mix the dough until a soft, smooth dough forms. Knead for about 5-6 minutes. Cover dough with a clean cloth and allow to rise for 30-60 minutes. (I was short on time and only did it for 30 minutes) Place dough on floured counter and divide into 8-16 pieces depending on what size pretzels you want. For pretzels the size of the “mall pretzels” make 8 pieces. Roll each piece into a long rope, about 15-20 inches long. Form into a pretzel shape. Together 1/2 C warm water and 2 Tbsp baking soda. Stir to dissolve soda. Dip pretzel front and back into water mixture. Place on baking sheet covered with parchment or silicone baking mat. Sprinkle with kosher salt. Allow to sit for 10-15 minutes. Bake at 500 degrees for 7-9 minutes or until golden brown. Remove from oven and brush with melted butter. Don’t skimp here! Enjoy warm! Can be reheated in microwave If you prefer to use dry active yeast, Use 1/4 cup of the 1 cup water and add yeast to it. Allow to sit for 5-10 minutes until the yeast activates. Add that into the flour mixture with the remaining water. Originally posted January 9, 2013 Author information Leigh Anne Hi – I’m Leigh Anne! Food, family and friends are three of my favorite things. I love sharing easy, delicious recipes and entertaining ideas that everyone will love. When she started her blog, Your Homebased Mom, over 9 years ago she had no idea that it would one day house over 2,400 recipes and ideas! . | Facebook | Google+ | Pinterest | Continue reading Homemade Soft Pretzels. This post is from Your Homebased Mom. If you are not reading it from our feed, it has been STOLEN. Please contact Leigh Anne to let us know. Enjoy the posts.
Do you love the warm, buttery soft pretzels you can buy at the mall? These homemade soft pretzels are even better!
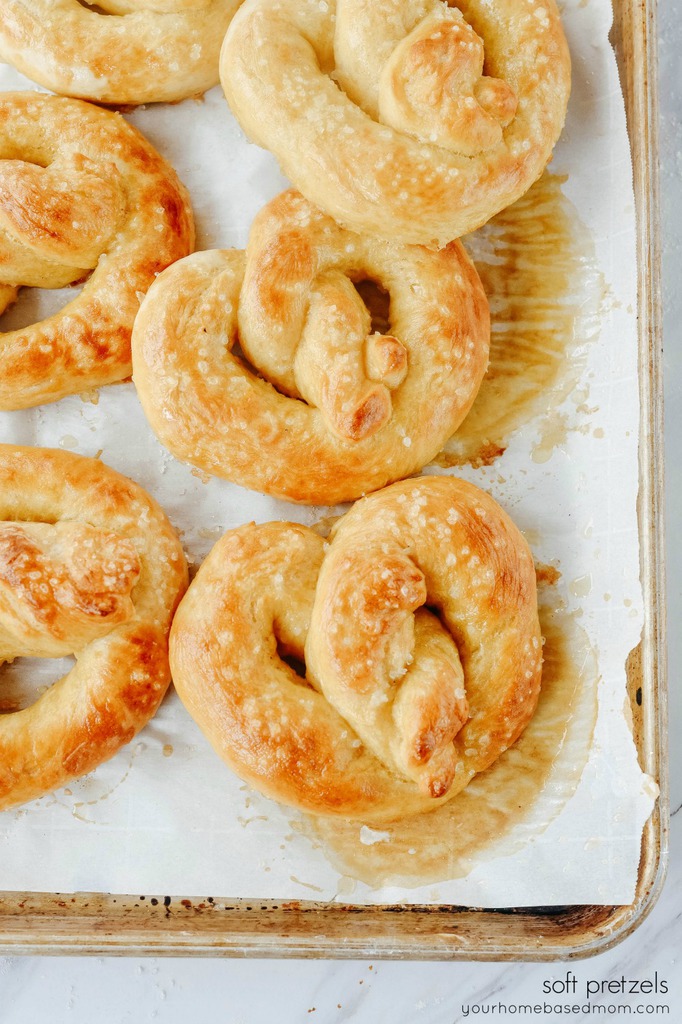
Everyone from sports fans to mall shoppers love soft pretzels. And what isn’t to love about the warm, salty, buttery snack. Now you can make them at home for a big game or just a family snack. And once you make them, you will be looking for excuses to make them again.
How to Make Soft Pretzels
After your soft pretzel dough has risen for about 30 minutes, divide the dough into 8-16 pieces. The recipe will make 8 larger pretzels like you would buy at a sporting event. But I love to use the smaller size for game day parties.
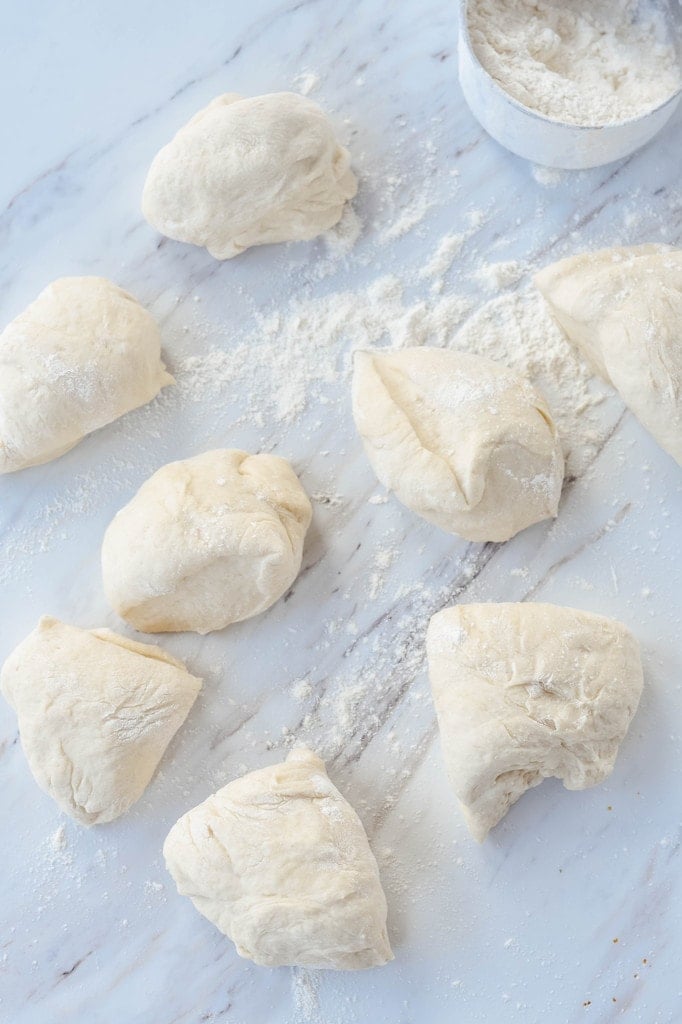
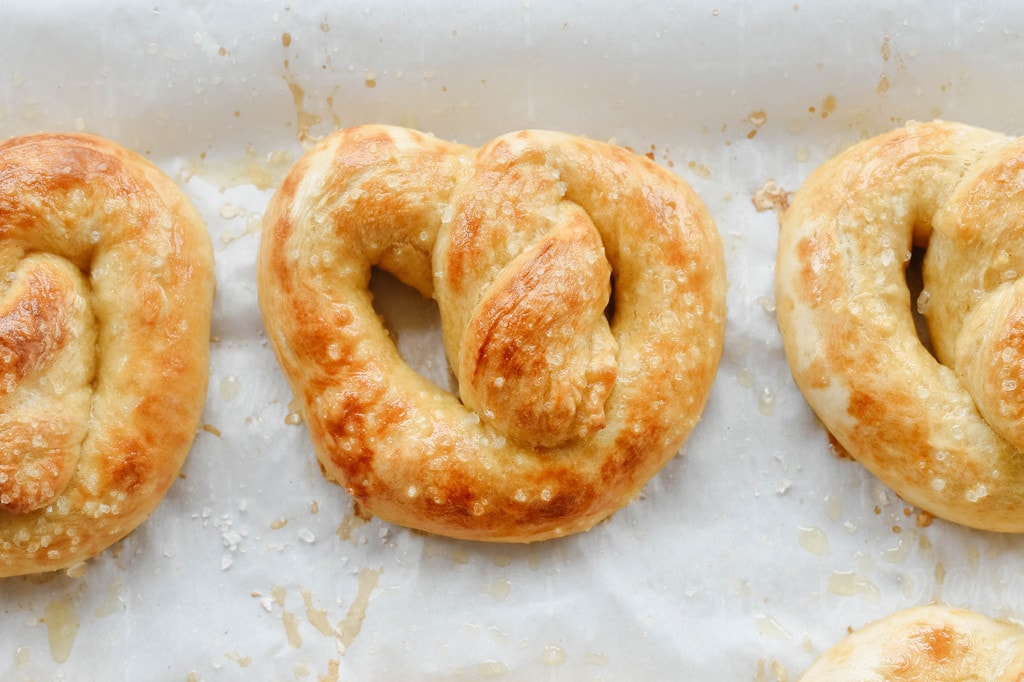
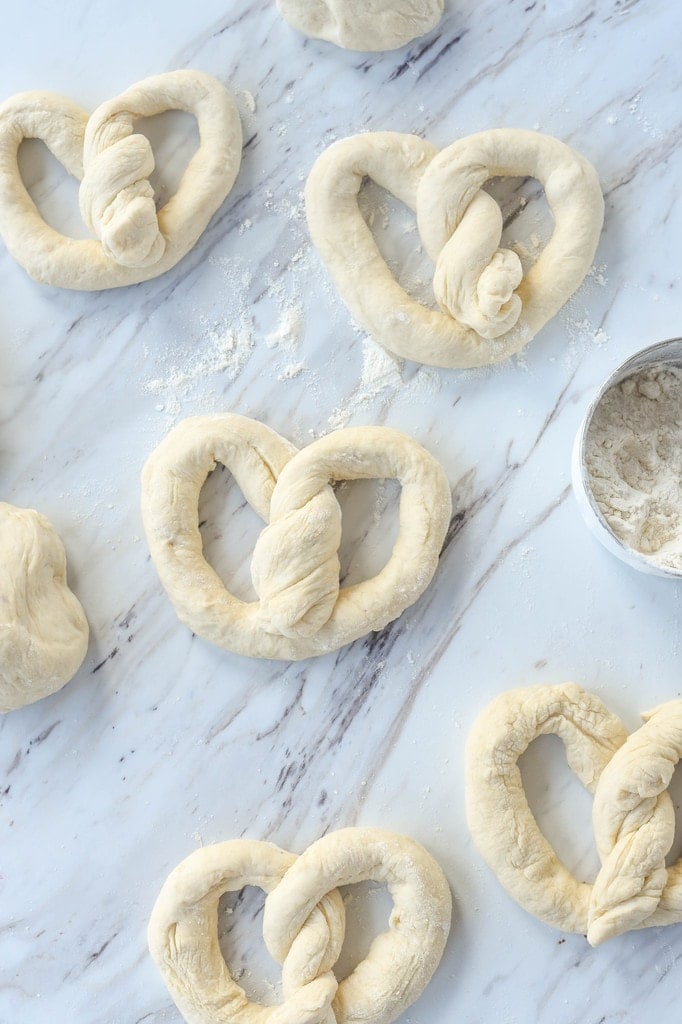
Roll each piece of dough into a rope about 15-20 inches in length., form each rope into a pretzel shape.
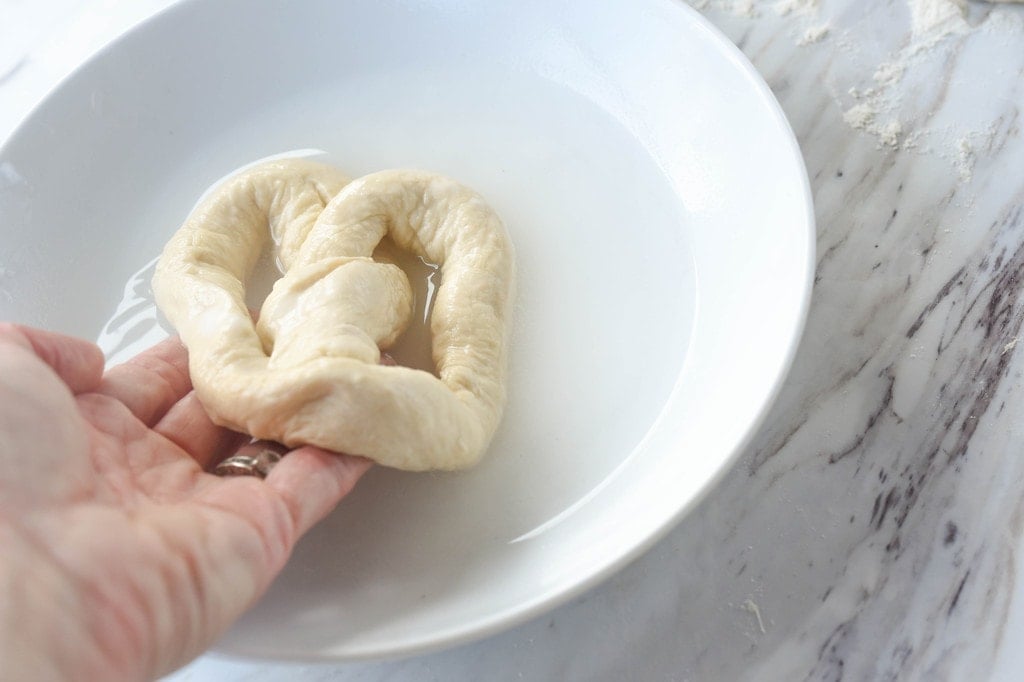
Then dip each pretzel into a mixture of water and baking soda. This gives the pretzels that nice golden brown color. Once dipped, place pretzels on a baking sheet covered with parchment paper.
Sprinkle them with kosher salt and allow them to rise, uncovered, for 10-15 minutes.
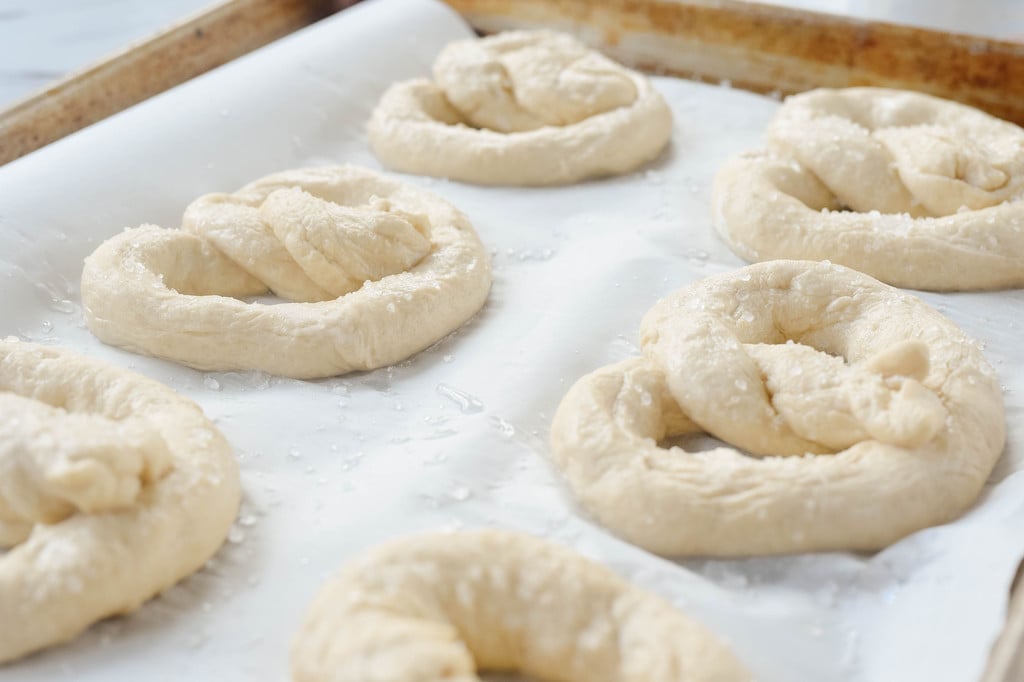
Bake at 500 degree for about 7-9 minutes or until golden brown. Remove them from the oven and brush each pretzel with melted butter. The more, the better! Don’t skimp here!!
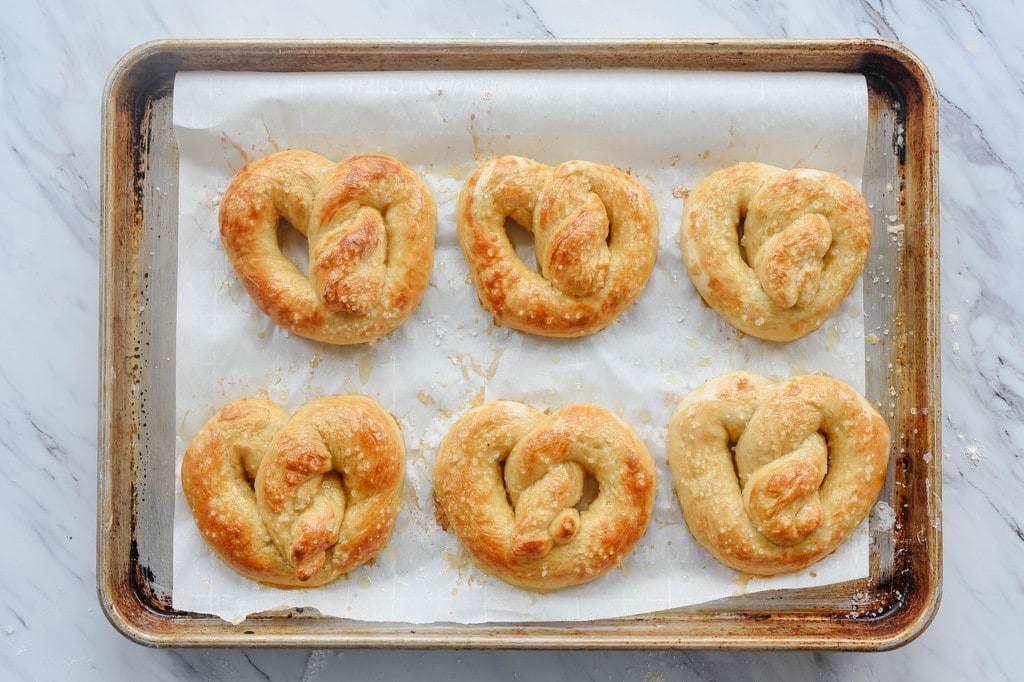
Finally, remove from the cookie sheet and enjoy! These are best eaten warm. They can be reheated in the microwave.
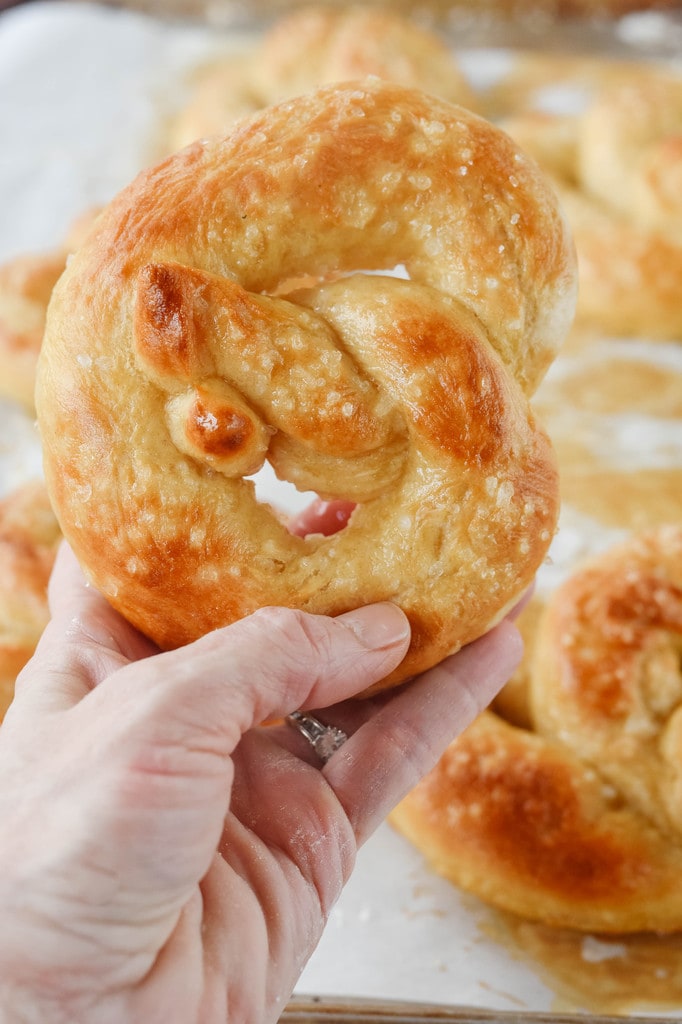
If you like this recipe you might also enjoy:
Strawberry and Avocado Roasted Corn Salsa
Soft Pretzel Recipe
Soft Pretzels

Delicious homemade soft pretzels, just like the soft buttery pretzels you love at the mall.
- 2 1/2 C bread flour (or all purpose flour)
- 1/2 tsp salt
- 2 tsp sugar
- 2 1/4 tsp instant dry yeast
- 1 C warm water
- 1/2 C warm water
- 2 Tbsp baking soda
- kosher salt
- 4 Tbsp butter (melted)
-
Preheat oven to 425 degrees F.
- In your mixer combine flour, salt, sugar and yeast.
- Stir to combine and then add 1 C warm water.
- Using bread hook, mix the dough until a soft, smooth dough forms. Knead for about 5-6 minutes.
- Cover dough with a clean cloth and allow to rise for 30-60 minutes. (I was short on time and only did it for 30 minutes)
- Place dough on floured counter and divide into 8-16 pieces depending on what size pretzels you want.
- For pretzels the size of the “mall pretzels” make 8 pieces.
- Roll each piece into a long rope, about 15-20 inches long. Form into a pretzel shape.
- Together 1/2 C warm water and 2 Tbsp baking soda. Stir to dissolve soda.
- Dip pretzel front and back into water mixture.
- Place on baking sheet covered with parchment or silicone baking mat.
- Sprinkle with kosher salt.
- Allow to sit for 10-15 minutes.
- Bake at 500 degrees for 7-9 minutes or until golden brown.
- Remove from oven and brush with melted butter. Don’t skimp here!
- Enjoy warm! Can be reheated in microwave
If you prefer to use dry active yeast, Use 1/4 cup of the 1 cup water and add yeast to it. Allow to sit for 5-10 minutes until the yeast activates. Add that into the flour mixture with the remaining water.
Originally posted January 9, 2013
Author information
Hi – I’m Leigh Anne! Food, family and friends are three of my favorite things. I love sharing easy, delicious recipes and entertaining ideas that everyone will love. When she started her blog, Your Homebased Mom, over 9 years ago she had no idea that it would one day house over 2,400 recipes and ideas! .
Continue reading Homemade Soft Pretzels. This post is from Your Homebased Mom. If you are not reading it from our feed, it has been STOLEN. Please contact Leigh Anne to let us know. Enjoy the posts.
from Your Homebased Mom https://ift.tt/2VfnUZf
via IFTTThttps://ift.tt/2Et4n2g
miércoles, 20 de febrero de 2019
Marbled Cookies with Gold Trim and Pink Roses I’ve had this design floating around in my head for a while, but recently we got some exciting news and these marbled cookies with pink roses seemed like the perfect cookie to share along with the announcement! — This post … Continue reading → The post Marbled Cookies with Gold Trim and Pink Roses appeared first on SweetAmbs. https://ift.tt/eA8V8J SweetAmbs

martes, 12 de febrero de 2019
Brownie Strawberry Chocolate Cheesecake Brownie Strawberry Chocolate Cheesecake http://bit.ly/2tjHdVy Home Cooking Adventure RSS Feed
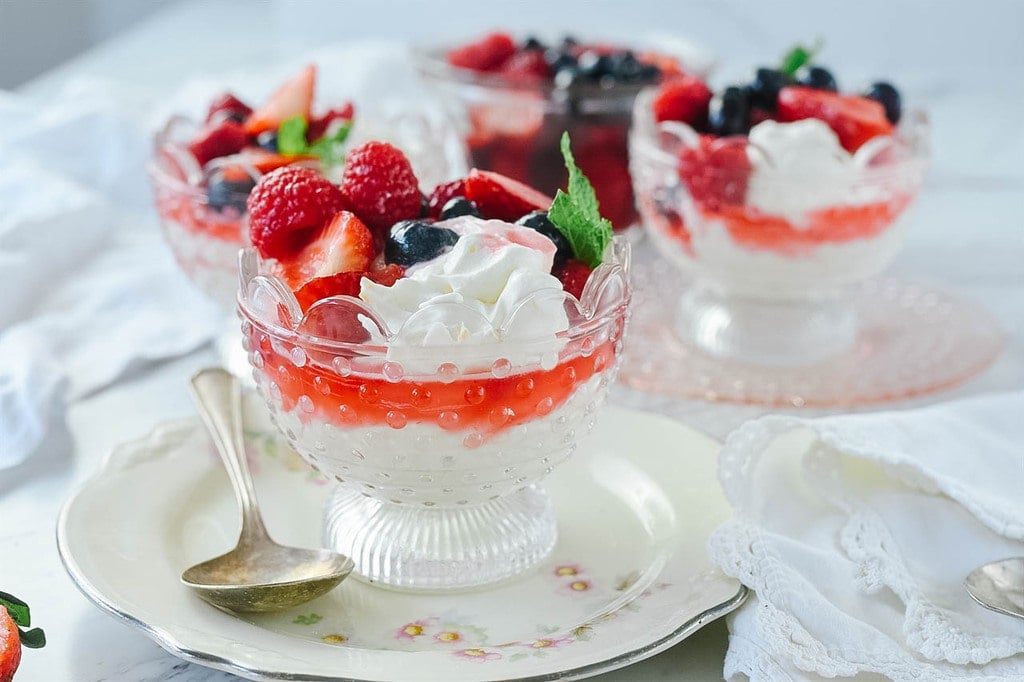
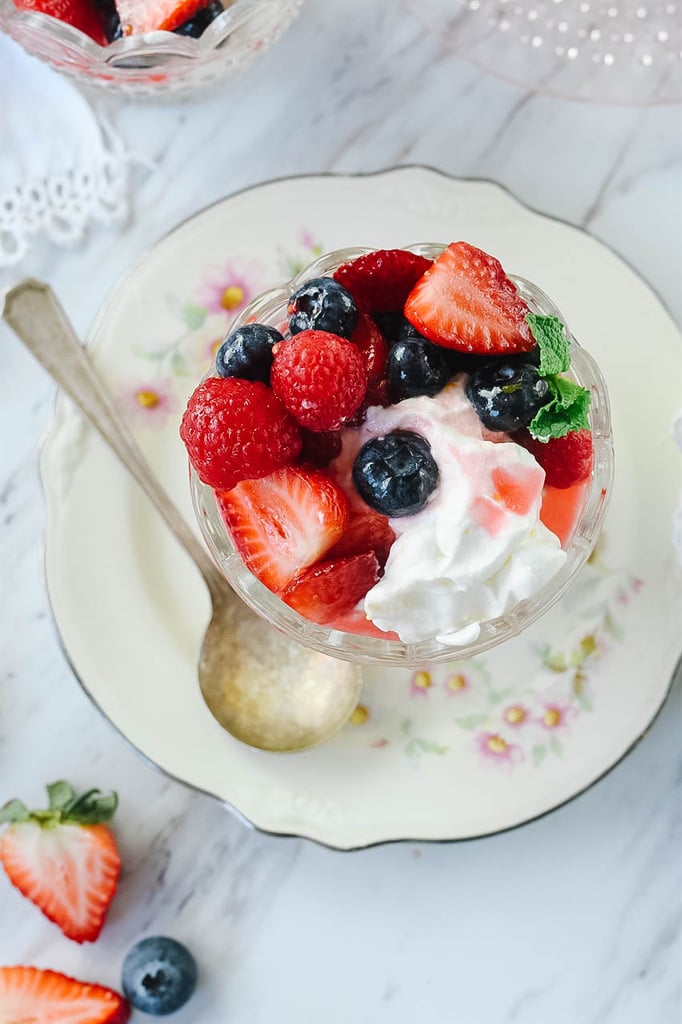
Berries and Cream A delicious bowl of fresh berries and cream where the berries are served over a lovely orange infused whipped cream. A light and delicious dessert. Fresh berries are one of my favorite things about living in the Pacific Northwest. But lucky for all of us fresh berries are available year round and when I’ve had enough of the grey, rainy days of winter I like to pretend it is summer again and enjoy some berries and cream. It definitely tastes like summer in a bowl. I love the ease of the dessert and the simplicity of it too. A bowl of ripe, sweet, berries on top of a light, lovely orange infused whipped cream! It’s the perfect dessert to serve after a heavy meal. How to Make Berries and Cream Use fresh berries. Start with about 1 cup each of blueberries, raspberries and strawberries or your berries of choice. I slice the strawberries. Macerate the berries. I know that’s an awkward word. What does macerate mean? It basically means letting your berries soak in juice and sugar. Place the berries in a bowl and cover with sugar and fresh orange juice. Stir to combine. Let the berries sit for an hour or so. This allows the berries to give off their natural juices and creates a sweet delicious syrup. You do not need to refrigerate the berries while doing this. Make a simple syrup. While the berries are marcerating make a simple orange syrup that will be folded into the whipped cream. (see below for directions) How to make a Simple Syrup To make a simple syrup combine sugar, orange juice and orange zest. Place in a small sauce pan and stir to dissolve sugar over medium heat. Allow mixture to simmer for about 10 minutes so that syrup begins to thicken. Cool syrup before adding it to the whipped cream. You can find directions for making perfect homemade whipped cream here. Leave the sugar and vanilla out from the whipped cream recipe for this recipe since you will be sweetening it with the orange simple syrup. If you are not an orange fan, just serve this with regular sweetened whipped cream. But let me tell you, the orange cream is just amazing! Place the orange cream in a pretty dish and then spoon the berries and juice over the whipped cream. Don’t tell anyone but I ate two bowls of it the night we had it!! If you liked this dessert you may like: Atlantic Beach Lemon Cream Pie Lemon Sour Cream Pie Fresh Orange Cake Berries and Cream Recipe Berries and Cream A delicious bowl of fresh berries and cream where the berries are served over a lovely orange infused whipped cream. A light and delicious dessert. 1 cup strawberries (sliced) 1 cup raspberries 1 cup blueberries 1/2 C sugar 1/2 C fresh orange juice 2 C heavy whipping cream Combine the sugar, orange juice and rind(if using) into a small pan Heat and bring to a boil, stirring until the sugar dissolves Simmer for about 10 minutes without stirring Cool syrup Whip cream to medium peaks Fold orange syrup into whip cream Serve over berries If just making regular cream, add 1 tsp vanilla and 2-3 Tbsp powdered sugar (more to taste if wanted) and whip until soft peaks form Originally posted July 28, 2011 Need some help figuring out what’s for dinner tonight? Come join our Facebook Group! Join hundreds of others who love sharing dinner time ideas. You don’t want to miss out on the fun! You’ll find lots of ideas for dinner from all our awesome members and you can share your ideas too! Join the Family Dinner Table today. Author information Leigh Anne Hi – I’m Leigh Anne! Food, family and friends are three of my favorite things. I love sharing easy, delicious recipes and entertaining ideas that everyone will love. When she started her blog, Your Homebased Mom, over 9 years ago she had no idea that it would one day house over 2,400 recipes and ideas! . | Facebook | Google+ | Pinterest | Continue reading Berries and Cream. This post is from Your Homebased Mom. If you are not reading it from our feed, it has been STOLEN. Please contact Leigh Anne to let us know. Enjoy the posts.
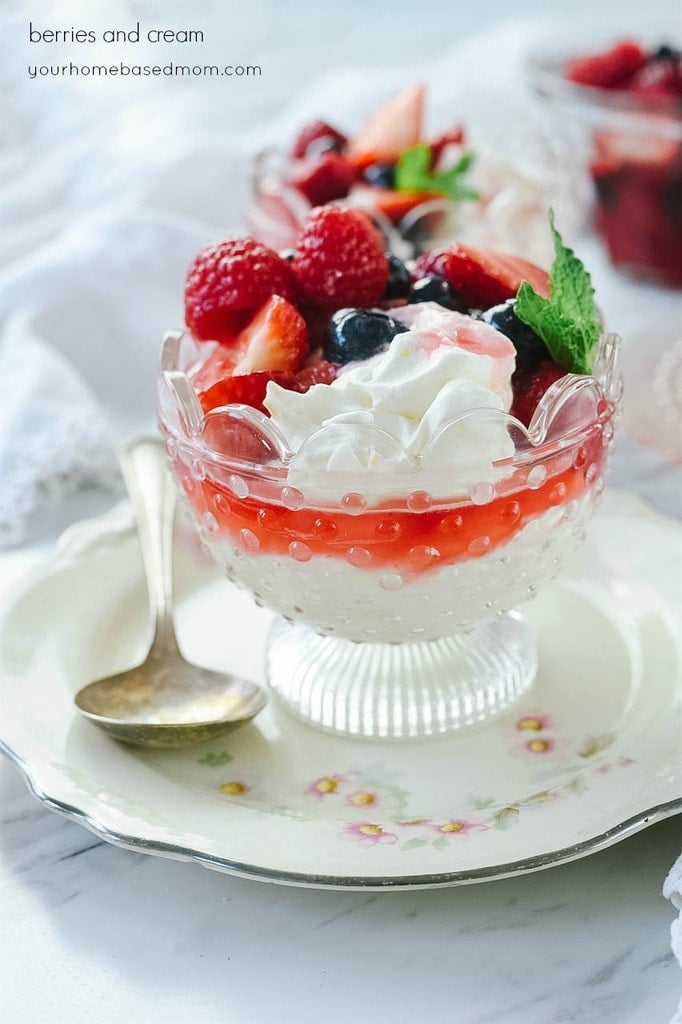
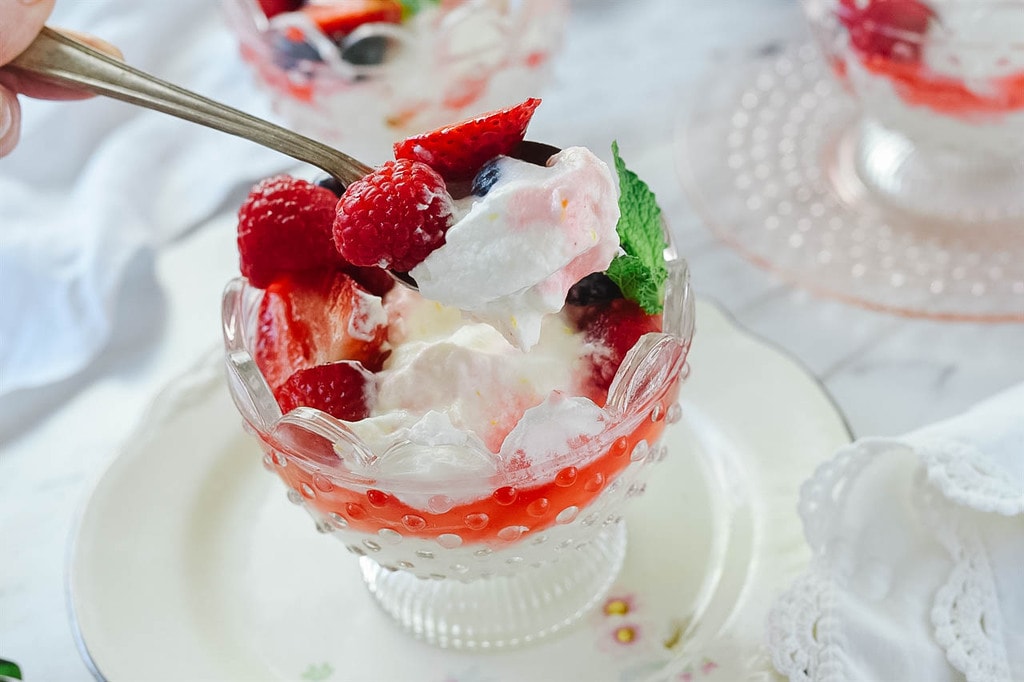
A delicious bowl of fresh berries and cream where the berries are served over a lovely orange infused whipped cream. A light and delicious dessert.
Fresh berries are one of my favorite things about living in the Pacific Northwest. But lucky for all of us fresh berries are available year round and when I’ve had enough of the grey, rainy days of winter I like to pretend it is summer again and enjoy some berries and cream. It definitely tastes like summer in a bowl. I love the ease of the dessert and the simplicity of it too. A bowl of ripe, sweet, berries on top of a light, lovely orange infused whipped cream!
It’s the perfect dessert to serve after a heavy meal.
How to Make Berries and Cream
Use fresh berries. Start with about 1 cup each of blueberries, raspberries and strawberries or your berries of choice. I slice the strawberries.
Macerate the berries. I know that’s an awkward word. What does macerate mean? It basically means letting your berries soak in juice and sugar. Place the berries in a bowl and cover with sugar and fresh orange juice. Stir to combine. Let the berries sit for an hour or so. This allows the berries to give off their natural juices and creates a sweet delicious syrup. You do not need to refrigerate the berries while doing this.
Make a simple syrup. While the berries are marcerating make a simple orange syrup that will be folded into the whipped cream. (see below for directions)
How to make a Simple Syrup
To make a simple syrup combine sugar, orange juice and orange zest. Place in a small sauce pan and stir to dissolve sugar over medium heat. Allow mixture to simmer for about 10 minutes so that syrup begins to thicken. Cool syrup before adding it to the whipped cream.
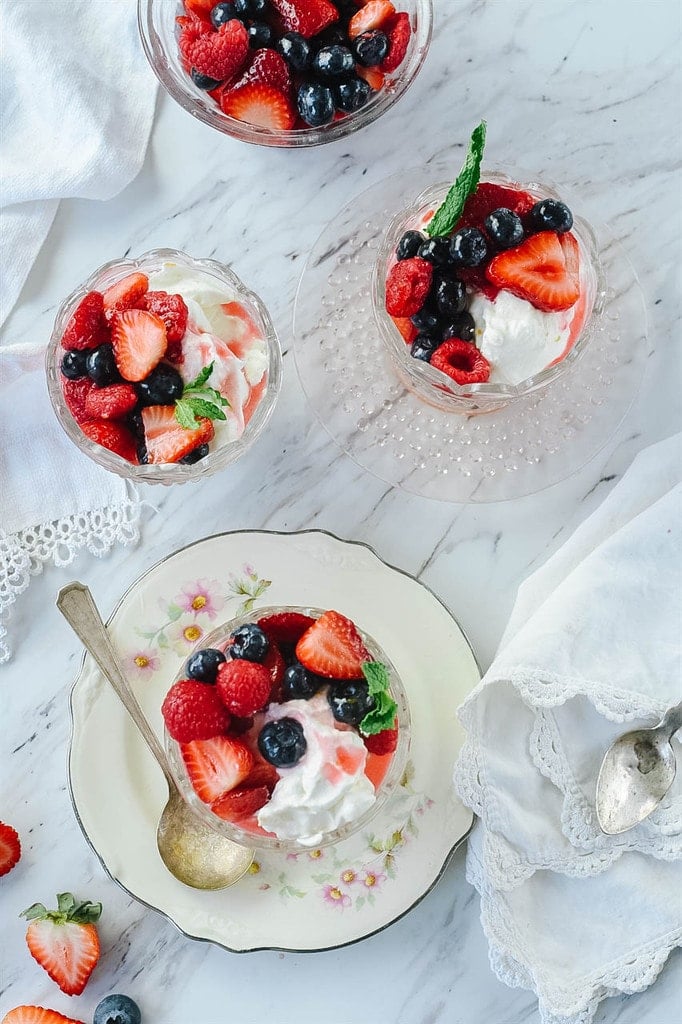
You can find directions for making perfect homemade whipped cream here. Leave the sugar and vanilla out from the whipped cream recipe for this recipe since you will be sweetening it with the orange simple syrup. If you are not an orange fan, just serve this with regular sweetened whipped cream. But let me tell you, the orange cream is just amazing! Place the orange cream in a pretty dish and then spoon the berries and juice over the whipped cream. Don’t tell anyone but I ate two bowls of it the night we had it!!
If you liked this dessert you may like:
Atlantic Beach Lemon Cream Pie
Berries and Cream Recipe
Berries and Cream

A delicious bowl of fresh berries and cream where the berries are served over a lovely orange infused whipped cream. A light and delicious dessert.
- 1 cup strawberries (sliced)
- 1 cup raspberries
- 1 cup blueberries
- 1/2 C sugar
- 1/2 C fresh orange juice
- 2 C heavy whipping cream
- Combine the sugar, orange juice and rind(if using) into a small pan
- Heat and bring to a boil, stirring until the sugar dissolves
- Simmer for about 10 minutes without stirring
-
Cool syrup
-
Whip cream to medium peaks
- Fold orange syrup into whip cream
- Serve over berries
- If just making regular cream, add 1 tsp vanilla and 2-3 Tbsp powdered sugar (more to taste if wanted) and whip until soft peaks form
Originally posted July 28, 2011
Need some help figuring out what’s for dinner tonight?
Come join our Facebook Group! Join hundreds of others who love sharing dinner time ideas. You don’t want to miss out on the fun!

You’ll find lots of ideas for dinner from all our awesome members and you can share your ideas too! Join the Family Dinner Table today.
Author information
Hi – I’m Leigh Anne! Food, family and friends are three of my favorite things. I love sharing easy, delicious recipes and entertaining ideas that everyone will love. When she started her blog, Your Homebased Mom, over 9 years ago she had no idea that it would one day house over 2,400 recipes and ideas! .
Continue reading Berries and Cream. This post is from Your Homebased Mom. If you are not reading it from our feed, it has been STOLEN. Please contact Leigh Anne to let us know. Enjoy the posts.
from Your Homebased Mom http://bit.ly/2MZGoKo
via IFTTThttp://bit.ly/2SFU1Uz
lunes, 11 de febrero de 2019
How to Make Whipped Cream Making homemade whipped cream is a life skill everyone should have! It is easy and only takes 3 ingredients. And it tastes so much better than anything you can buy in a can! Making your own whipped cream is simple and it tastes SO MUCH better than the stuff that comes out of the can. Once you start making your own homemade whipped cream you will never go back to the canned stuff. I love using it on pies and cakes, topping off my hot chocolate with it and serving it with fresh berries. And I’m not opposed to just eating it by the spoonful! Homemade Whipped Cream Gather your ingredients. Heavy whipping cream has a higher milk fat content than regular whipping cream so it makes for a thicker whipped cream. Use the heavy stuff ! You will also need some powdered sugar and vanilla. If you don’t have powdered sugar, I have also used regular granulated sugar. You can always make whipped cream without sugar and vanilla but it tastes so much better with it. You can make your cream as sweet as you want, depending on the amount of sugar you add. I usually use 2 Tbsp per pint and that makes it just slightly sweet. You can also use maple syrup or honey to sweetened it if you prefer. Even if I don’t use sweetener, I always use vanilla. You can also change up your extract and add in peppermint, orange or any other flavor for flavoring. A teaspoon of cinnamon makes for a delicious cinnamon whipped cream too. Equipment options. I like to use my Kitchen Aid stand mixer to make whipped cream but it will work just as well with a hand mixer, I find it just takes a little more time and you can even whip it by hand, just be prepared to be patient. Chill your equipment. I always chill my mixer bowl and beaters in my freezer for about 10-15 minutes first. If you don’t have room, use your refrigerator for 20 minutes. How much whipping cream do I need? Your cream will double in size so if you need 2 cups of whipped cream, use 1 cup of heavy whipping cream. Add in your ingredients. Everything can be added into the bowl at the same time and then beat to your desired thickness and texture. How long do I whip my whipped cream? That pretty much depends on how you are going to use your whipped cream. There are basically three stages of whipped cream, soft peak, medium peak and stiff peaks. Soft Peaks – soft peaks will resemble softened ice cream. The cream will easily fall off the end of the beater and is a perfect choice if you are topping a hot drink or folding it into something. Medium Peaks – this is the perfect whipped cream for topping a piece of pie or cake. It has some swirls in it but is still soft yet stable. Firm Peaks – this is how I beat my cream when I am going to need it to hold it’s shape for a while, maybe I won’t be using it right away or I’m going to need to keep it refrigerated for a while. The whipping cream will have definite folds in it with a rippled texture. You can also use this to frost a cake with. Don’t take it beyond the firm peak or you might end up with butter! However you whip it, it’s delicious! Homemade whipped cream is easy, quick and delicious! Now that you know how to make whipped cream, serve it with these desserts: Lemon Pound Cake Key Lime Pie Chocolate Pot de Creme Whipped Cream Homemade Whipped Cream Making homemade whipped cream is a life skill everyone should have! It only requires three ingredients and you have delicious, lightly sweetened, homemade whipped cream ready for all your whipped cream needs! 2 cups Heavy Whipping Cream 1 tsp vanilla 2 tsp powdered sugar Combine ingredients in a chilled mixing bowl, using chilled beaters. Beat ingredients together until desired consistency. Serve immediately or refrigerate. Author information Leigh Anne Hi – I’m Leigh Anne! Food, family and friends are three of my favorite things. I love sharing easy, delicious recipes and entertaining ideas that everyone will love. When she started her blog, Your Homebased Mom, over 9 years ago she had no idea that it would one day house over 2,400 recipes and ideas! . | Facebook | Google+ | Pinterest | Continue reading How to Make Whipped Cream. This post is from Your Homebased Mom. If you are not reading it from our feed, it has been STOLEN. Please contact Leigh Anne to let us know. Enjoy the posts.
Making homemade whipped cream is a life skill everyone should have! It is easy and only takes 3 ingredients. And it tastes so much better than anything you can buy in a can!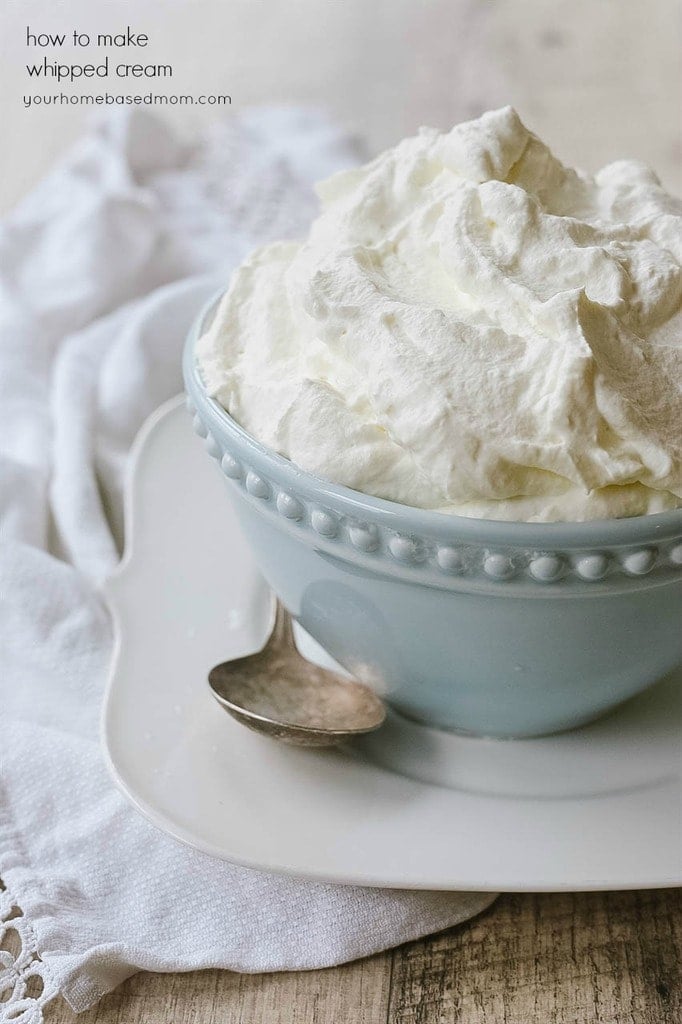
Making your own whipped cream is simple and it tastes SO MUCH better than the stuff that comes out of the can. Once you start making your own homemade whipped cream you will never go back to the canned stuff. I love using it on pies and cakes, topping off my hot chocolate with it and serving it with fresh berries. And I’m not opposed to just eating it by the spoonful!
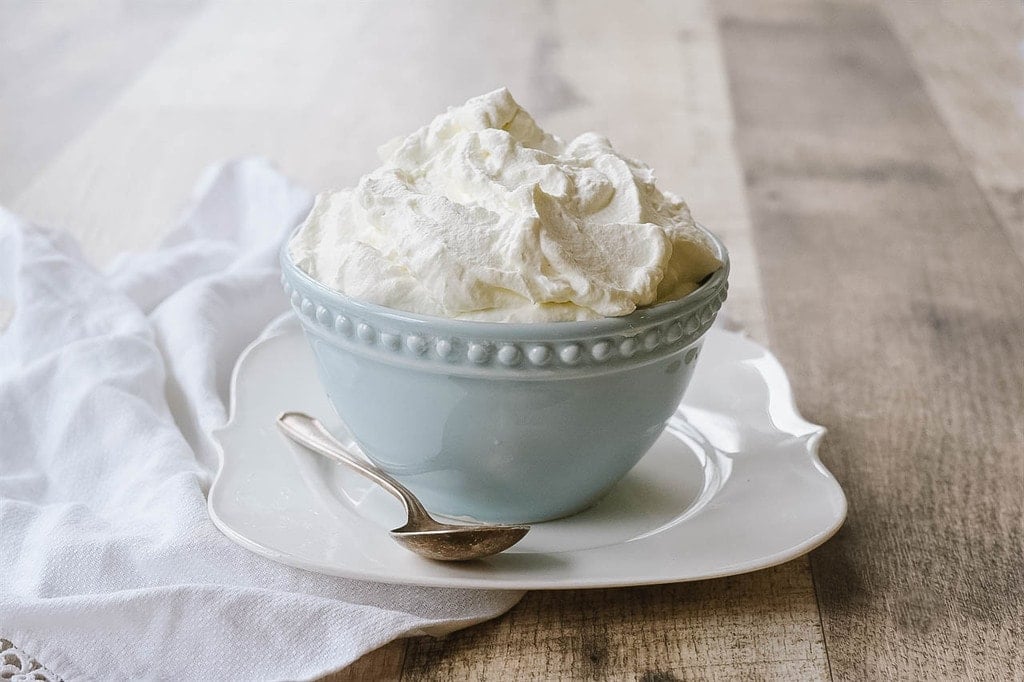
Homemade Whipped Cream
- Gather your ingredients. Heavy whipping cream has a higher milk fat content than regular whipping cream so it makes for a thicker whipped cream. Use the heavy stuff ! You will also need some powdered sugar and vanilla. If you don’t have powdered sugar, I have also used regular granulated sugar. You can always make whipped cream without sugar and vanilla but it tastes so much better with it. You can make your cream as sweet as you want, depending on the amount of sugar you add. I usually use 2 Tbsp per pint and that makes it just slightly sweet. You can also use maple syrup or honey to sweetened it if you prefer. Even if I don’t use sweetener, I always use vanilla. You can also change up your extract and add in peppermint, orange or any other flavor for flavoring. A teaspoon of cinnamon makes for a delicious cinnamon whipped cream too.
- Equipment options. I like to use my Kitchen Aid stand mixer to make whipped cream but it will work just as well with a hand mixer, I find it just takes a little more time and you can even whip it by hand, just be prepared to be patient.
- Chill your equipment. I always chill my mixer bowl and beaters in my freezer for about 10-15 minutes first. If you don’t have room, use your refrigerator for 20 minutes.
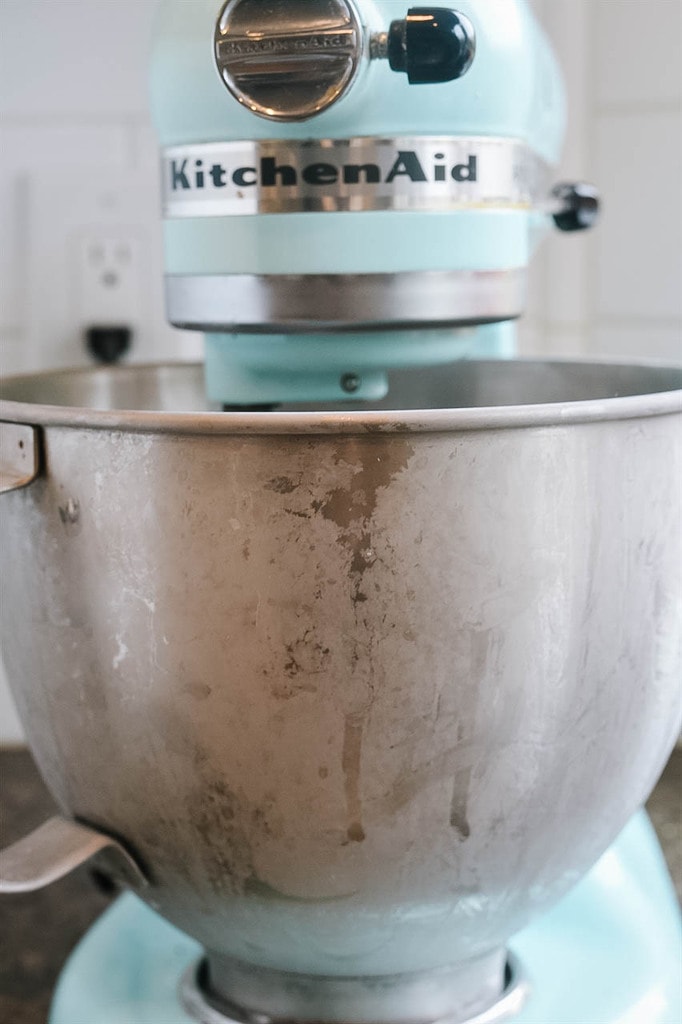
- How much whipping cream do I need? Your cream will double in size so if you need 2 cups of whipped cream, use 1 cup of heavy whipping cream.
- Add in your ingredients. Everything can be added into the bowl at the same time and then beat to your desired thickness and texture.
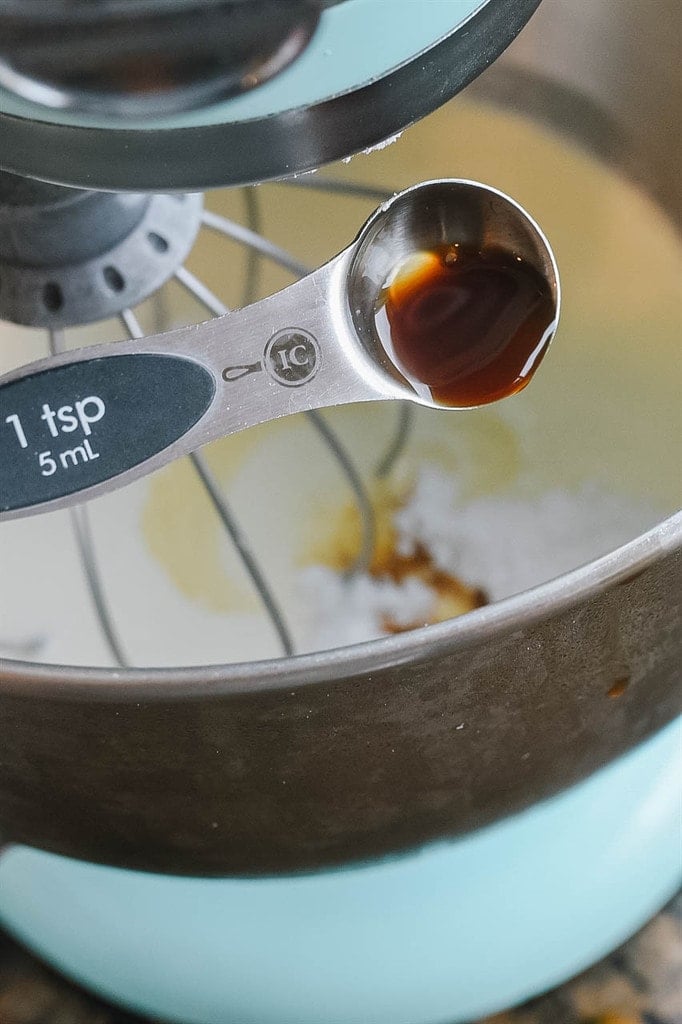
How long do I whip my whipped cream?
That pretty much depends on how you are going to use your whipped cream. There are basically three stages of whipped cream, soft peak, medium peak and stiff peaks.
Soft Peaks – soft peaks will resemble softened ice cream. The cream will easily fall off the end of the beater and is a perfect choice if you are topping a hot drink or folding it into something.
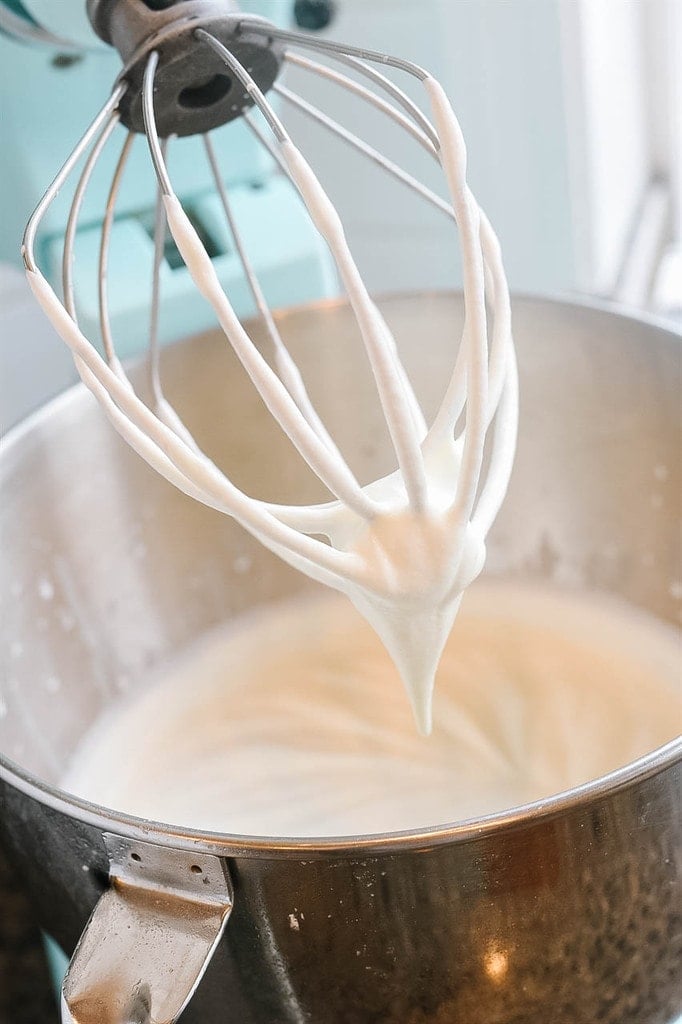
Medium Peaks – this is the perfect whipped cream for topping a piece of pie or cake. It has some swirls in it but is still soft yet stable.
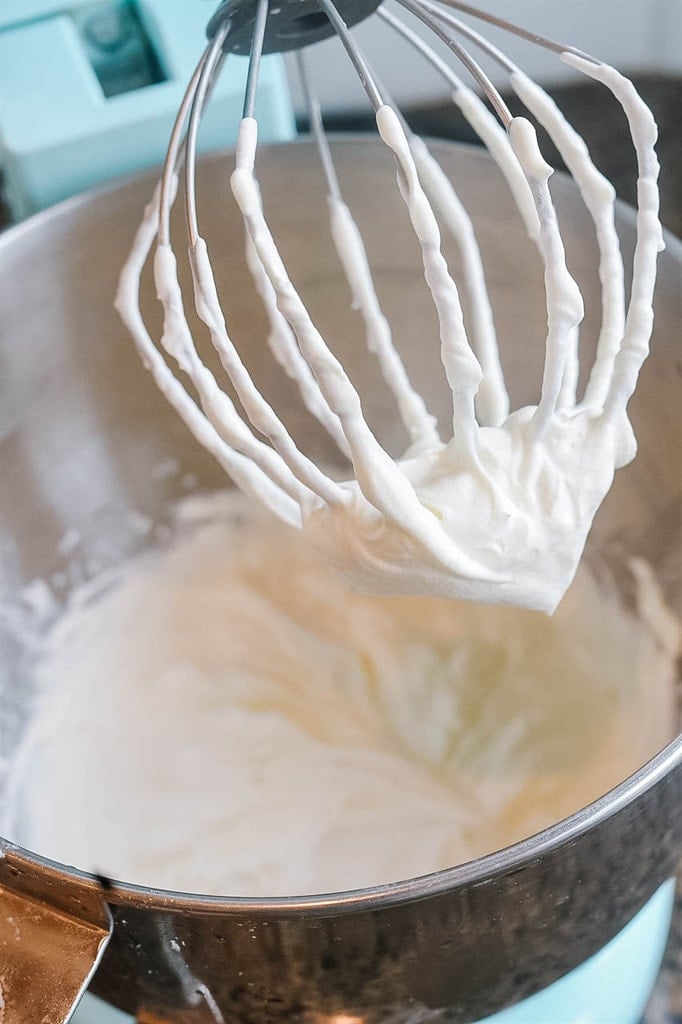
Firm Peaks – this is how I beat my cream when I am going to need it to hold it’s shape for a while, maybe I won’t be using it right away or I’m going to need to keep it refrigerated for a while. The whipping cream will have definite folds in it with a rippled texture. You can also use this to frost a cake with. Don’t take it beyond the firm peak or you might end up with butter!
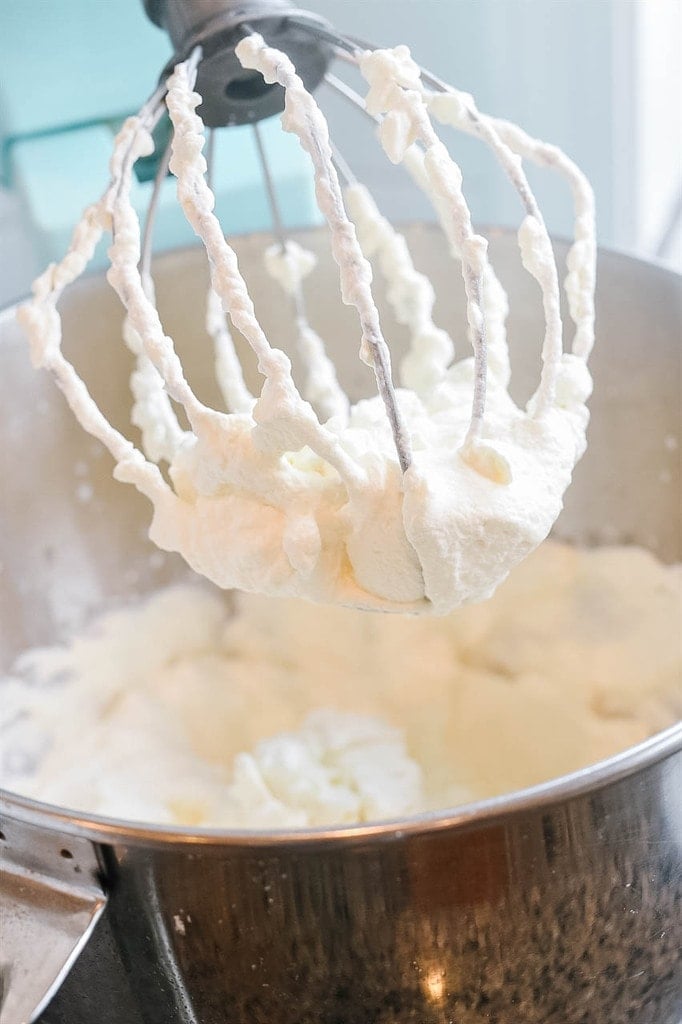
However you whip it, it’s delicious! Homemade whipped cream is easy, quick and delicious!
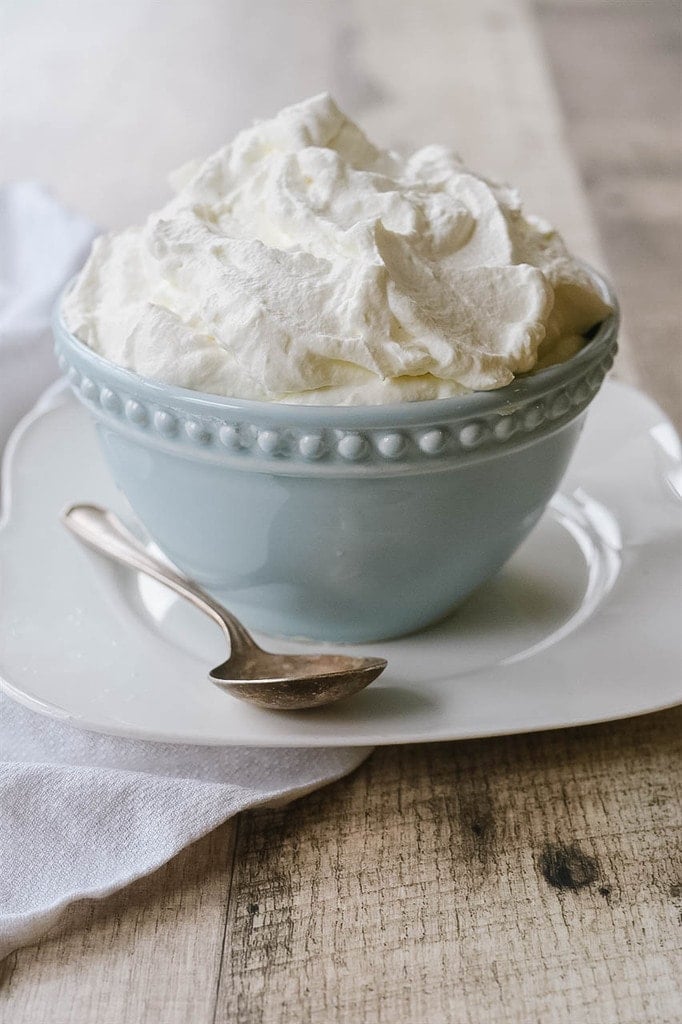
Now that you know how to make whipped cream, serve it with these desserts:
Whipped Cream
Homemade Whipped Cream
Making homemade whipped cream is a life skill everyone should have! It only requires three ingredients and you have delicious, lightly sweetened, homemade whipped cream ready for all your whipped cream needs!
- 2 cups Heavy Whipping Cream
- 1 tsp vanilla
- 2 tsp powdered sugar
-
Combine ingredients in a chilled mixing bowl, using chilled beaters.
-
Beat ingredients together until desired consistency. Serve immediately or refrigerate.
Author information
Hi – I’m Leigh Anne! Food, family and friends are three of my favorite things. I love sharing easy, delicious recipes and entertaining ideas that everyone will love. When she started her blog, Your Homebased Mom, over 9 years ago she had no idea that it would one day house over 2,400 recipes and ideas! .
Continue reading How to Make Whipped Cream. This post is from Your Homebased Mom. If you are not reading it from our feed, it has been STOLEN. Please contact Leigh Anne to let us know. Enjoy the posts.
from Your Homebased Mom http://bit.ly/2RUrlCD
via IFTTThttp://bit.ly/2WRUVwm
domingo, 10 de febrero de 2019
Flourless Chocolate Cake Flourless chocolate cake is a dense, rich, decadent chocolate dessert. And it’s also naturally gluten free. Flourless Chocolate Cake is dream come true for all chocolate lovers. The chocolate level on this is intense and the richness level is amazing. You may think you only need a few bites but I guarantee you are going to want to eat the whole thing! I do cut the pieces fairly small and that way I don’t feel bad about eating a second piece! They call this cake but I think it’s more like eating a delicious piece of chocolate fudge in a cake like form! The Best Flourless Chocolate Cake This is the perfect dessert to serve your chocolate loving friends, your gluten free friends, just about any friend! Your friends and family are going to think you are so fancy. Flourless Chocolate Cake is often found on the menus of the swankiest restaurants in town and top notch bakeries. As fancy as it looks and tastes, it is super easy to make. It only has 5 ingredients: chocolate butter sugar eggs vanilla extract To finish it off, I gave it a dusting of powdered sugar and some fresh berries on top and you’ve got the perfect dessert for any occasion. How to Make Flourless Chocolate Cake I used an 8 inch round cake pan. You can also use a springform pan. I greased my pan, lined the bottom of it with parchment paper and then greased the parchment paper. I wanted to make sure it came out of the pan! Use high quality chocolate. I like to use the squares of semisweet baking chocolate instead of chips but chips would probably work too. To make the cake not quite as dense, I like to separate my eggs and beat the egg whites to a nice soft peak and then fold them into the chocolate mixture. You can melt your chocolate and butter in a double boiler or or in the microwave. I like to serve the cake chilled but you can always eat it warm too. It is fudgier if it is chilled. Is Flourless Chocolate Cake Gluten Free? Yes, it is. Just like it’s name says there is no flour in this cake! But it is so delicious no one will ever know, so even your gluten eating friends and family are going to love it too! If you like this recipe you may also like: Chocolate Chip Cookie Pie Chocolate Pot de Creme The Best Chocolate Cake Flourless Chocolate Cake Recipe Flourless Chocolate Cake Flourless chocolate cake is a dense, rich, decadent chocolate dessert and it’s also naturally gluten free. 8 oz. semisweet chocolate (chopped) 1/2 cup butter 3/4 cup sugar 3 eggs (beaten) 1 tsp vanilla Preheat oven to 300 degrees F. Grease an 8 inch round cake pan and line bottom with parchment paper. Grease the parchment paper. In a double boiler or in a bowl in the microwave, melt chocolate and butter together. Separate eggs. Remove chocolate from heat and stir in sugar, egg yolks and vanilla. In a mixing bowl, beat egg whites until fluffy and a soft peak forms. Fold egg white mixture gently into chocolate mixture. Pour into prepared pan. Bake for 30-35 minutes. Allow to cool in pan for 10 minutes. Remove from pan and allow to cool completely on a wire rack. Serve warm or chilled. Before serving, remove from refrigerator and allow it to set at room temperature for 5-10 minutes. Dust with powdered sugar and top with berries and serve. Can also be reheated in the microwave. Need some help figuring out what’s for dinner tonight? Come join our Facebook Group! Join hundreds of others who love sharing dinner time ideas. You don’t want to miss out on the fun! You’ll find lots of ideas for dinner from all our awesome members and you can share your ideas too! Join the Family Dinner Table today. Author information Leigh Anne Hi – I’m Leigh Anne! Food, family and friends are three of my favorite things. I love sharing easy, delicious recipes and entertaining ideas that everyone will love. When she started her blog, Your Homebased Mom, over 9 years ago she had no idea that it would one day house over 2,400 recipes and ideas! . | Facebook | Google+ | Pinterest | Continue reading Flourless Chocolate Cake. This post is from Your Homebased Mom. If you are not reading it from our feed, it has been STOLEN. Please contact Leigh Anne to let us know. Enjoy the posts.
Flourless chocolate cake is a dense, rich, decadent chocolate dessert. And it’s also naturally gluten free.
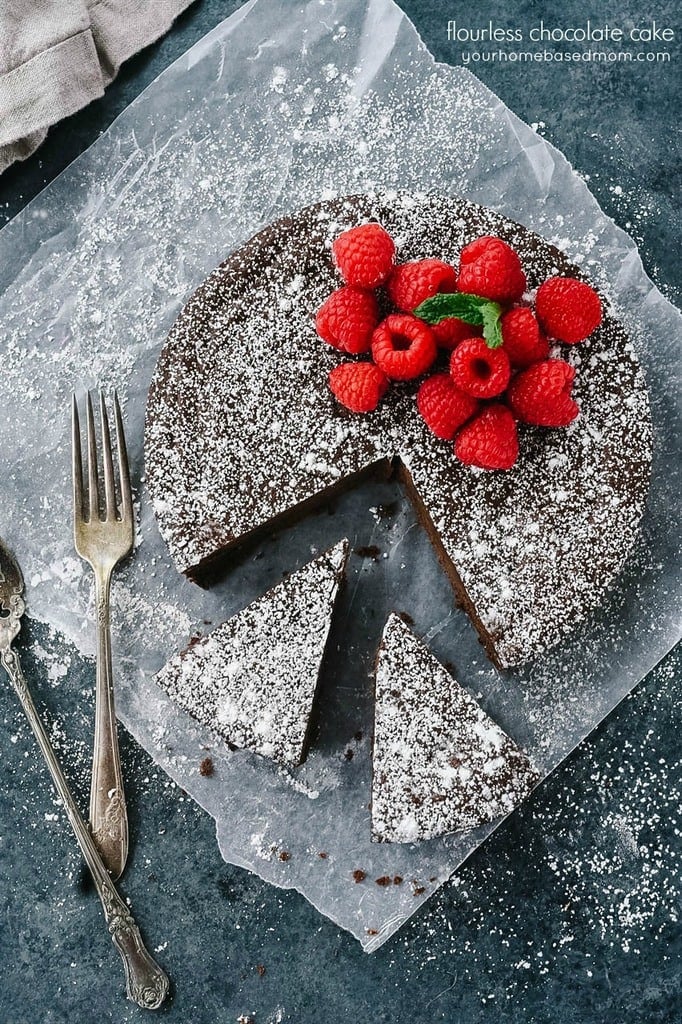
Flourless Chocolate Cake is dream come true for all chocolate lovers. The chocolate level on this is intense and the richness level is amazing. You may think you only need a few bites but I guarantee you are going to want to eat the whole thing! I do cut the pieces fairly small and that way I don’t feel bad about eating a second piece!
They call this cake but I think it’s more like eating a delicious piece of chocolate fudge in a cake like form!
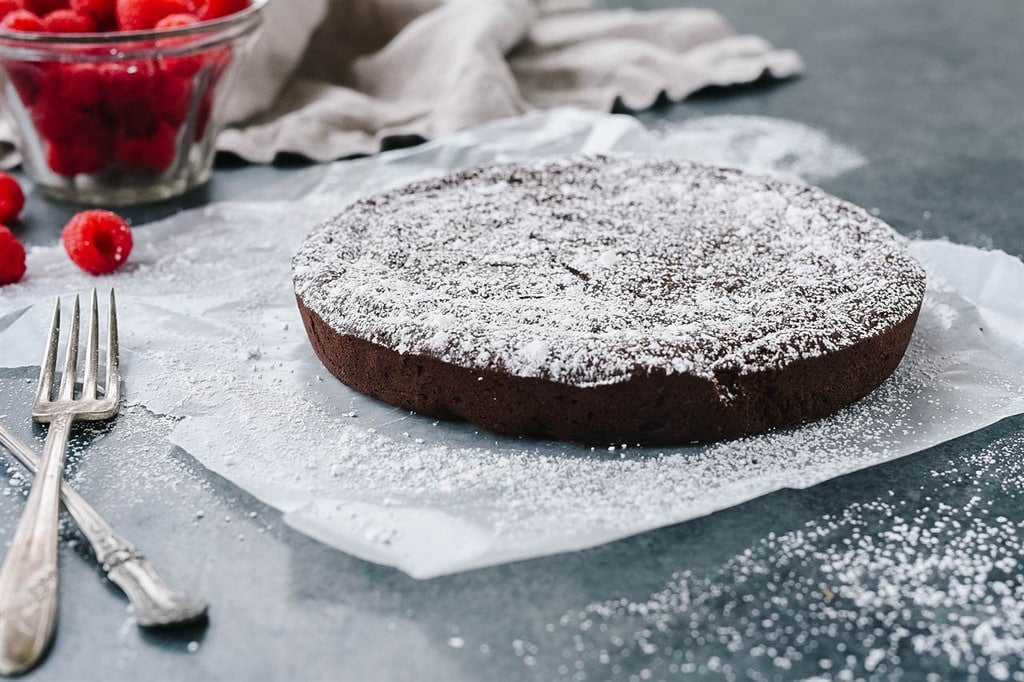
The Best Flourless Chocolate Cake
This is the perfect dessert to serve your chocolate loving friends, your gluten free friends, just about any friend! Your friends and family are going to think you are so fancy. Flourless Chocolate Cake is often found on the menus of the swankiest restaurants in town and top notch bakeries. As fancy as it looks and tastes, it is super easy to make. It only has 5 ingredients:
- chocolate
- butter
- sugar
- eggs
- vanilla extract
To finish it off, I gave it a dusting of powdered sugar and some fresh berries on top and you’ve got the perfect dessert for any occasion.
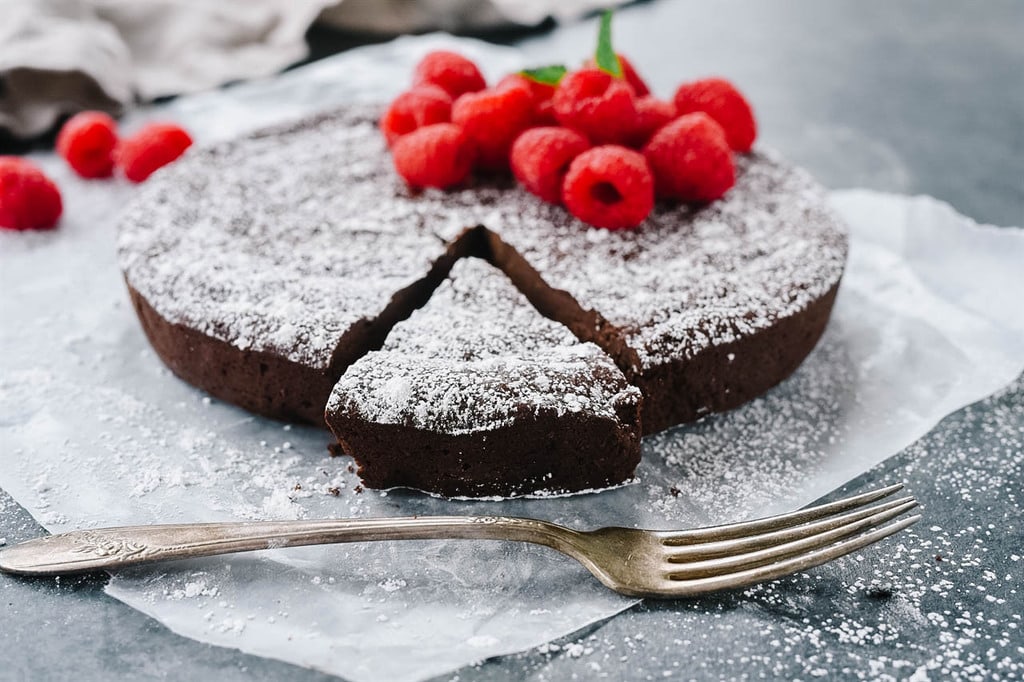
How to Make Flourless Chocolate Cake
- I used an 8 inch round cake pan. You can also use a springform pan. I greased my pan, lined the bottom of it with parchment paper and then greased the parchment paper. I wanted to make sure it came out of the pan!
- Use high quality chocolate. I like to use the squares of semisweet baking chocolate instead of chips but chips would probably work too.
- To make the cake not quite as dense, I like to separate my eggs and beat the egg whites to a nice soft peak and then fold them into the chocolate mixture.
- You can melt your chocolate and butter in a double boiler or or in the microwave.
- I like to serve the cake chilled but you can always eat it warm too. It is fudgier if it is chilled.
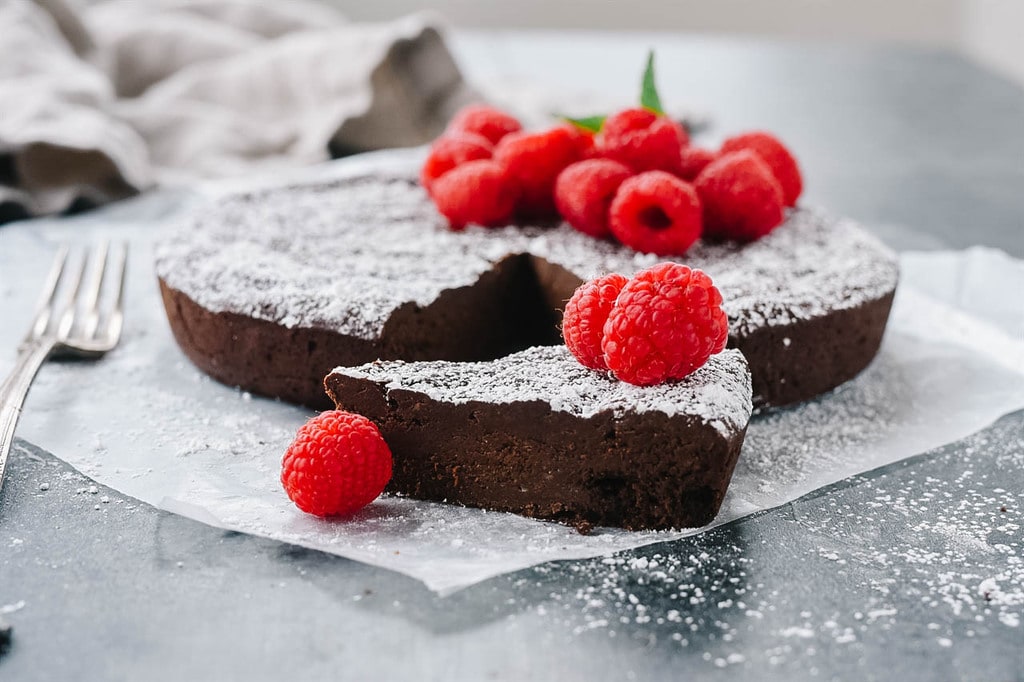
Is Flourless Chocolate Cake Gluten Free?
Yes, it is. Just like it’s name says there is no flour in this cake! But it is so delicious no one will ever know, so even your gluten eating friends and family are going to love it too!
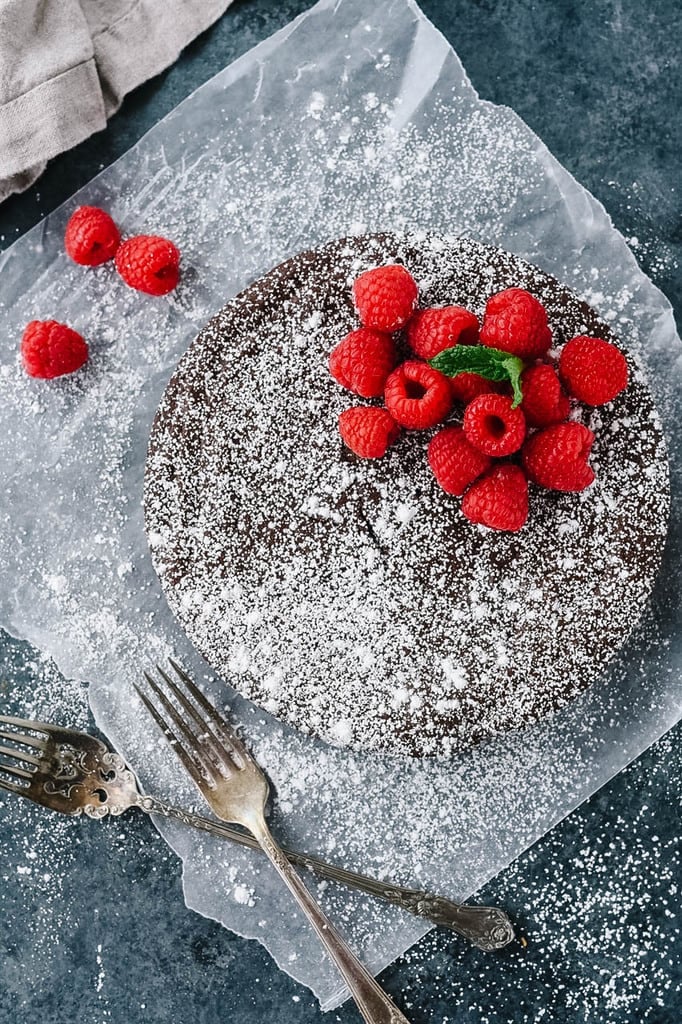
If you like this recipe you may also like:
Flourless Chocolate Cake Recipe
Flourless Chocolate Cake
Flourless chocolate cake is a dense, rich, decadent chocolate dessert and it’s also naturally gluten free.
- 8 oz. semisweet chocolate (chopped)
- 1/2 cup butter
- 3/4 cup sugar
- 3 eggs (beaten)
- 1 tsp vanilla
-
Preheat oven to 300 degrees F.
-
Grease an 8 inch round cake pan and line bottom with parchment paper. Grease the parchment paper.
-
In a double boiler or in a bowl in the microwave, melt chocolate and butter together.
-
Separate eggs. Remove chocolate from heat and stir in sugar, egg yolks and vanilla.
-
In a mixing bowl, beat egg whites until fluffy and a soft peak forms. Fold egg white mixture gently into chocolate mixture.
-
Pour into prepared pan. Bake for 30-35 minutes. Allow to cool in pan for 10 minutes. Remove from pan and allow to cool completely on a wire rack. Serve warm or chilled.
-
Before serving, remove from refrigerator and allow it to set at room temperature for 5-10 minutes. Dust with powdered sugar and top with berries and serve.
-
Can also be reheated in the microwave.
Need some help figuring out what’s for dinner tonight?
Come join our Facebook Group! Join hundreds of others who love sharing dinner time ideas. You don’t want to miss out on the fun!

You’ll find lots of ideas for dinner from all our awesome members and you can share your ideas too! Join the Family Dinner Table today.
Author information
Hi – I’m Leigh Anne! Food, family and friends are three of my favorite things. I love sharing easy, delicious recipes and entertaining ideas that everyone will love. When she started her blog, Your Homebased Mom, over 9 years ago she had no idea that it would one day house over 2,400 recipes and ideas! .
Continue reading Flourless Chocolate Cake. This post is from Your Homebased Mom. If you are not reading it from our feed, it has been STOLEN. Please contact Leigh Anne to let us know. Enjoy the posts.
from Your Homebased Mom http://bit.ly/2Iew826
via IFTTThttp://bit.ly/2GkoOAC
viernes, 8 de febrero de 2019
Naan Bread Indian style Naan bread is soft and chewy and so easy to make at home. It’s the perfect accompaniment to so many meals. What is Naan Bread? Similar to pita bread or flat bread, naan bread is a soft, thick bread. It is usually cooked in a clay tandoori oven and served warm with butter. It is traditionally served with Indian foods and used to scoop up foods such as tiki masala, chicken korma and others. Making it at home is easy and you can do it without a clay oven! How to Make Naan Naan bread uses yeast. For those of you who are scared of the word, don’t be! I used instant or rapid rise yeast in this recipe so you don’t have to worry about proofing your yeast in water first. With instant yeast you can add it right in with your dry ingredients, add your liquid and knead. So easy and pretty much fail proof. The only thing you need to be careful of is, is that your water is not too hot when you add it in, usually around 100 degrees F is perfect. Allow your dough to rise, covered with plastic wrap, for about an hour. If my house isn’t very warm, I like to turn my oven onto about 100 degrees, let it preheat and then turn the oven off. Then, place your covered dough into the oven and let it rise there. Divide your dough into 14 equal pieces. I often use my food scale to make sure they are approximately the same size. This is not crucial. You will just end up with different sizes of naan bread, it will still taste delicious. Place the balls of dough on a greased baking sheet and cover with plastic wrap again. You want to make sure no air gets in as this will dry out the dough. Let it rise for another 30 minutes. Since not too many of us have a clay oven at our house I experimented with several different ways of baking the naan bread. I used my cast iron skillet, I put my pizza stone in a 500 degrees F. oven and baked it on there and I also used my electric griddle. I liked using my electric griddle the best! Roll out each ball of dough thinly. Shape doesn’t really matter. How to Cook Naan Heat your griddle to about 350 degrees F. Brush your dough with melted butter on both sides and place it on the griddle, cook it for a minute or two on each side. It cooks quickly. The dough will begin to puff up and bubbles will form on the surface and those bubbles will get golden brown. After removing the naan from the griddle, cover it with a dish towel to keep it warm and from drying out. I prefer to eat my naan bread warm and fresh off the griddle but it can be stored in a air tight bag or container and reheated to use later. It freezes well too. How to Reheat Naan Bread It can be reheated in the microwave or I prefer to heat it up my oven at about 350 degrees, spritz the naan bread lightly with water and place it right on the oven rack. It will only take a minute or two to heat up. If you are putting it in the oven frozen, it may take a minute longer. What to serve with Naan Bread Butter Chicken Coconut Chicken Korma Slow Cooker Chicken Curry Naan Bread Recipe Naan Bread Indian style Naan is soft and chewy and so easy to make at home. It’s the perfect accompaniment to so many meals. 2 1/4 tsp rapid rise yeast 1 egg (lightly beaten) 4 1/2 cups bread flour 2 Tbsp sugar 2 tsp salt 1 cup warm water 1/4 milk (room temperature) 1/4 cup butter (melted) In a mixer bowl combine yeast, flour, salt, and sugar. Add in water and milk and mix together. Knead for about 5-6 minutes or until dough is smooth. Place dough into an oiled bowl and cover tightly with plastic wrap. Let rise for an hour. Punch down dough and form 14 balls of dough. Place balls of dough onto a greased baking sheet and cover with plastic wrap and allow to rise for about 30 minutes, or until doubled in size. Heat electric griddle to 350 degrees F. Roll out dough thinly and brush both sides with melted butter. Place dough on grill and cook for 2-3 minutes or until puffy and lightly browned. Flip and cook on other side until browned, another 2-3 minutes. Keep cooked naan covered with a towel to keep it warm and to prevent it from drying out. Serve warm. Need some help figuring out what’s for dinner tonight? Come join our Facebook Group! Join hundreds of others who love sharing dinner time ideas. You don’t want to miss out on the fun! You’ll find lots of ideas for dinner from all our awesome members and you can share your ideas too! Join the Family Dinner Table today. Author information Leigh Anne Hi – I’m Leigh Anne! Food, family and friends are three of my favorite things. I love sharing easy, delicious recipes and entertaining ideas that everyone will love. When she started her blog, Your Homebased Mom, over 9 years ago she had no idea that it would one day house over 2,400 recipes and ideas! . | Facebook | Google+ | Pinterest | Continue reading Naan Bread. This post is from Your Homebased Mom. If you are not reading it from our feed, it has been STOLEN. Please contact Leigh Anne to let us know. Enjoy the posts.
Indian style Naan bread is soft and chewy and so easy to make at home. It’s the perfect accompaniment to so many meals.
What is Naan Bread?
Similar to pita bread or flat bread, naan bread is a soft, thick bread. It is usually cooked in a clay tandoori oven and served warm with butter. It is traditionally served with Indian foods and used to scoop up foods such as tiki masala, chicken korma and others. Making it at home is easy and you can do it without a clay oven!
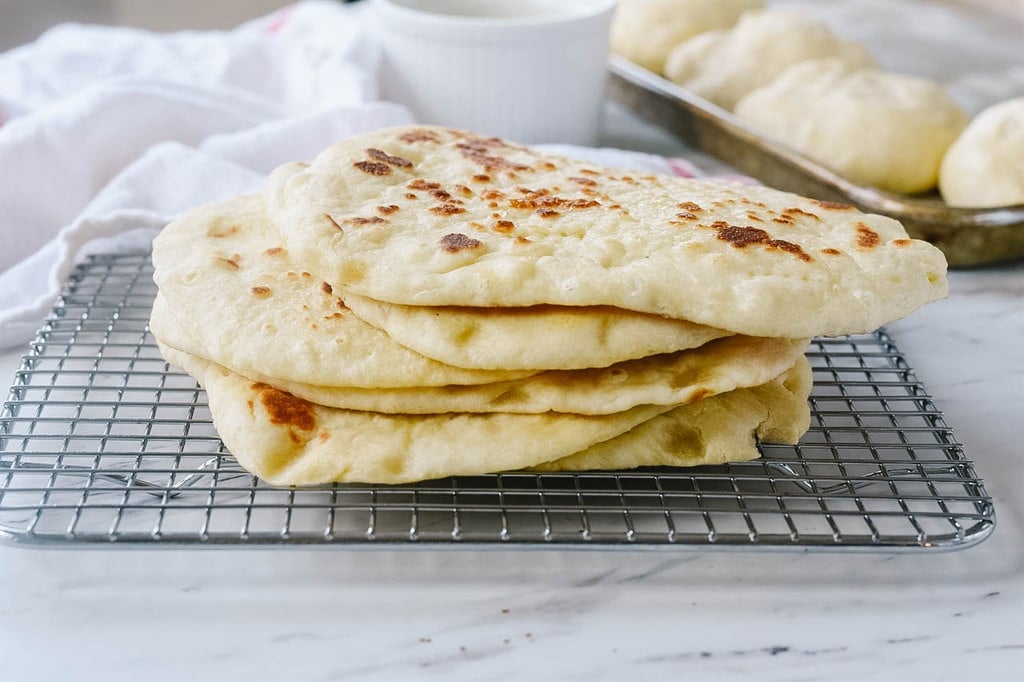
How to Make Naan
Naan bread uses yeast. For those of you who are scared of the word, don’t be! I used instant or rapid rise yeast in this recipe so you don’t have to worry about proofing your yeast in water first. With instant yeast you can add it right in with your dry ingredients, add your liquid and knead. So easy and pretty much fail proof. The only thing you need to be careful of is, is that your water is not too hot when you add it in, usually around 100 degrees F is perfect.
Allow your dough to rise, covered with plastic wrap, for about an hour. If my house isn’t very warm, I like to turn my oven onto about 100 degrees, let it preheat and then turn the oven off. Then, place your covered dough into the oven and let it rise there.
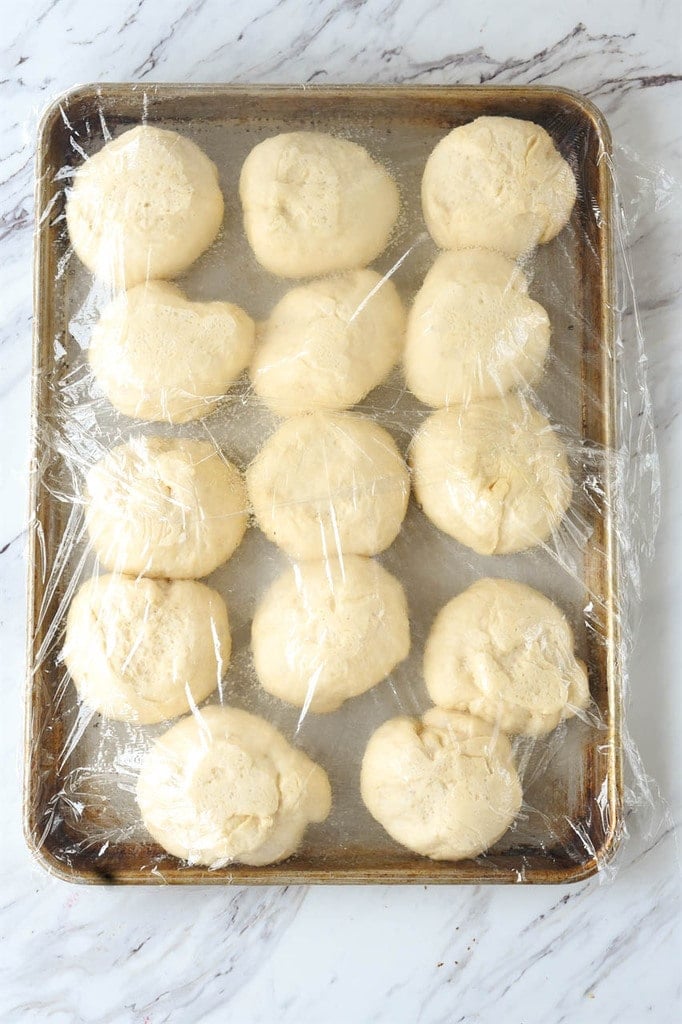
Divide your dough into 14 equal pieces. I often use my food scale to make sure they are approximately the same size. This is not crucial. You will just end up with different sizes of naan bread, it will still taste delicious. Place the balls of dough on a greased baking sheet and cover with plastic wrap again. You want to make sure no air gets in as this will dry out the dough. Let it rise for another 30 minutes.
Since not too many of us have a clay oven at our house I experimented with several different ways of baking the naan bread. I used my cast iron skillet, I put my pizza stone in a 500 degrees F. oven and baked it on there and I also used my electric griddle. I liked using my electric griddle the best! Roll out each ball of dough thinly. Shape doesn’t really matter.
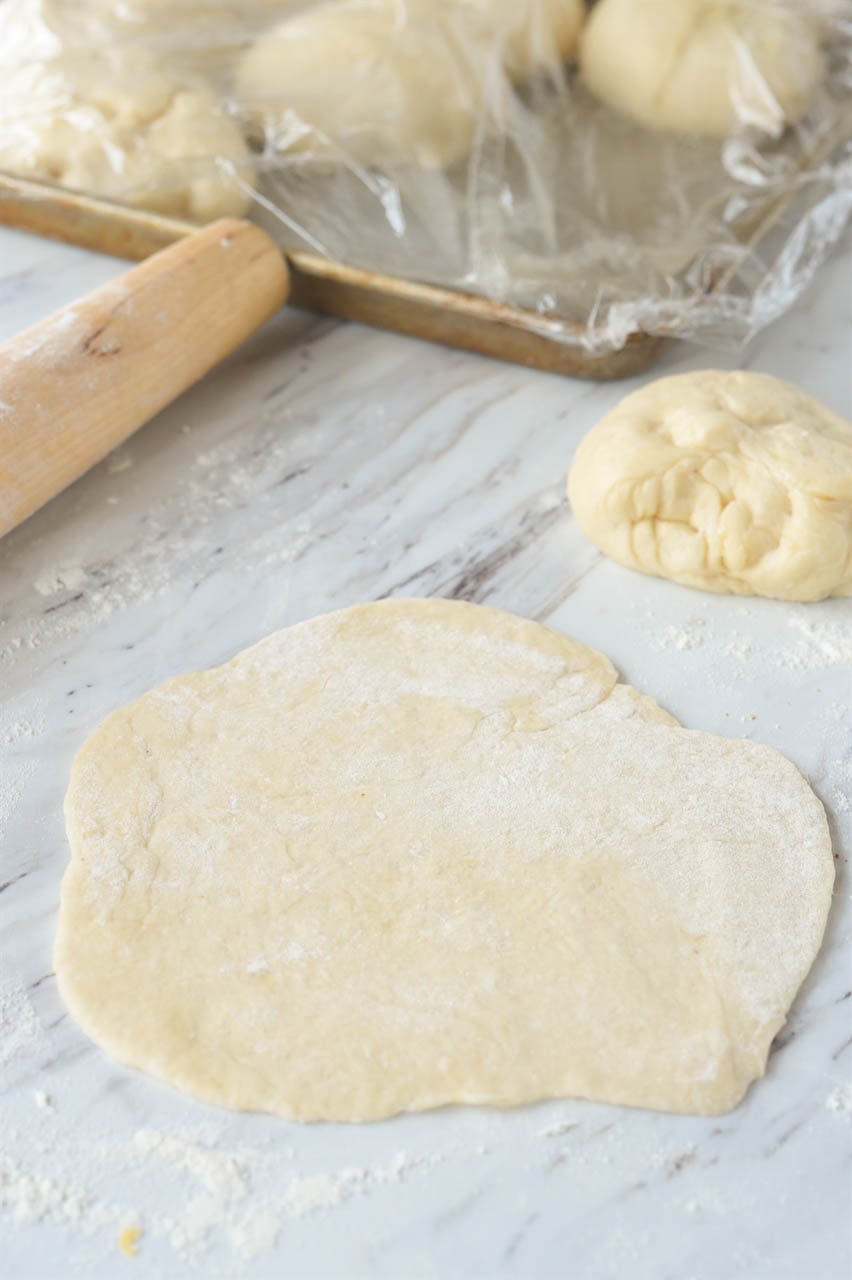
How to Cook Naan
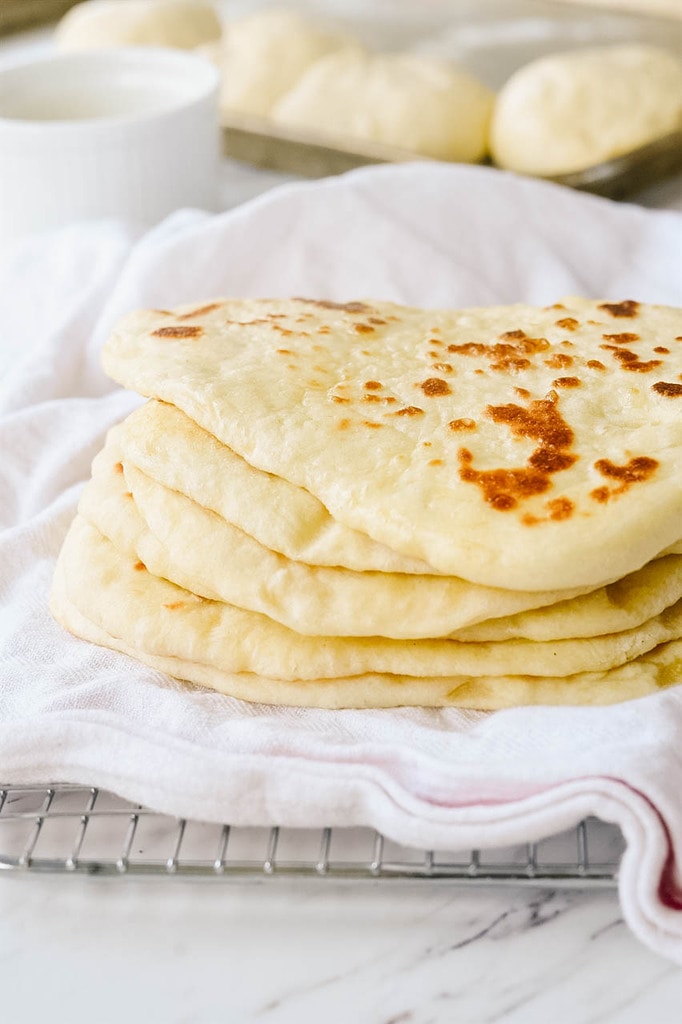
Heat your griddle to about 350 degrees F. Brush your dough with melted butter on both sides and place it on the griddle, cook it for a minute or two on each side. It cooks quickly. The dough will begin to puff up and bubbles will form on the surface and those bubbles will get golden brown.
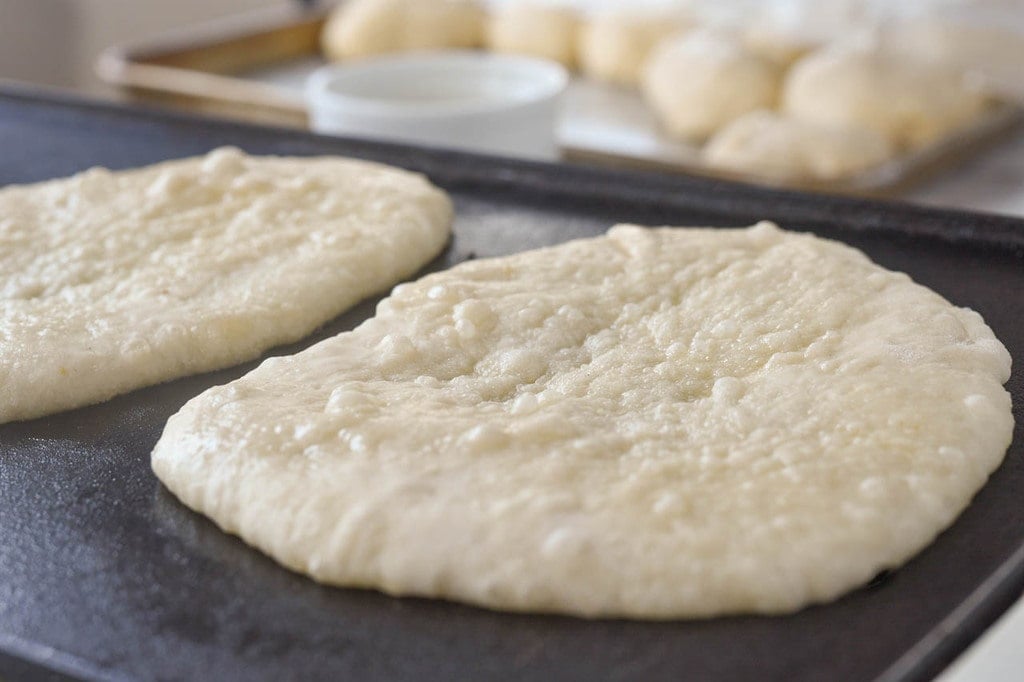
After removing the naan from the griddle, cover it with a dish towel to keep it warm and from drying out. I prefer to eat my naan bread warm and fresh off the griddle but it can be stored in a air tight bag or container and reheated to use later. It freezes well too.
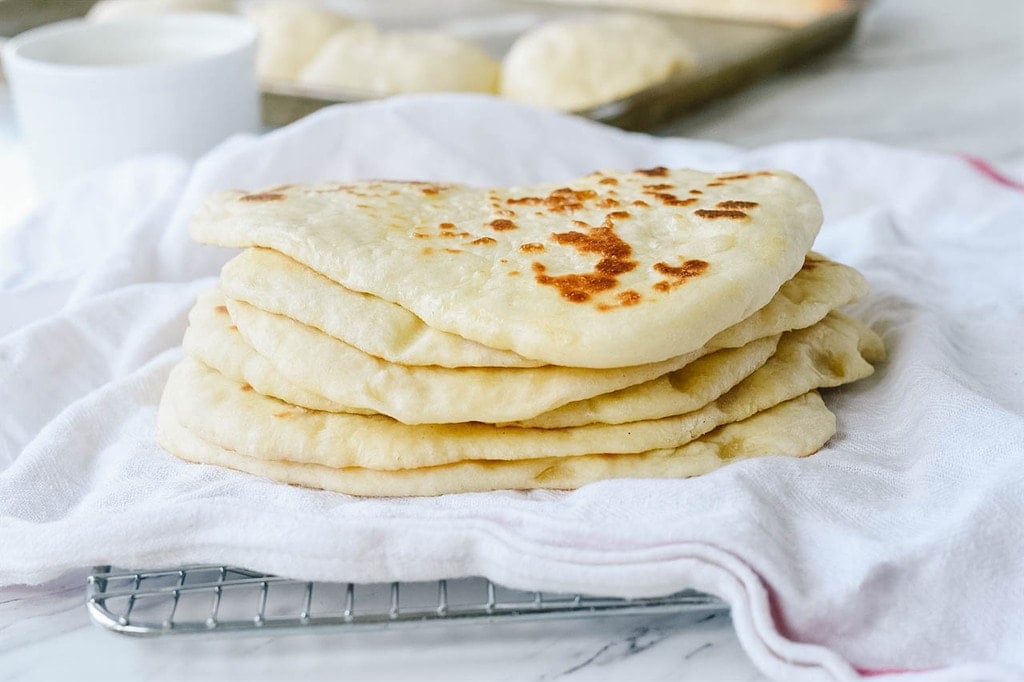
How to Reheat Naan Bread
It can be reheated in the microwave or I prefer to heat it up my oven at about 350 degrees, spritz the naan bread lightly with water and place it right on the oven rack. It will only take a minute or two to heat up. If you are putting it in the oven frozen, it may take a minute longer.
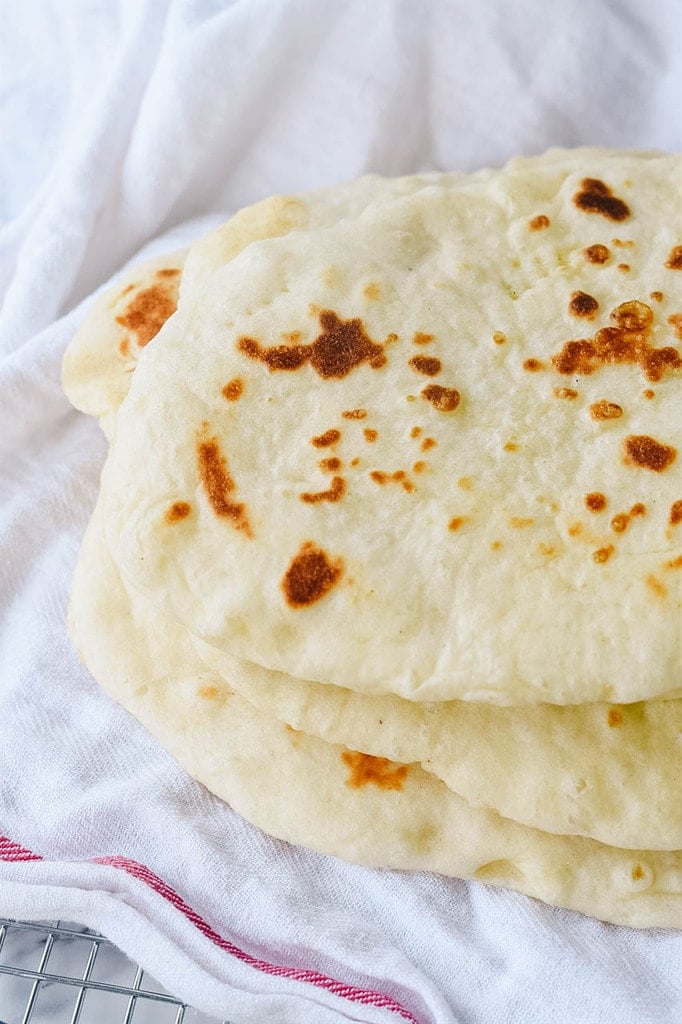
What to serve with Naan Bread
Naan Bread Recipe
Naan Bread
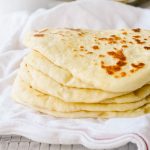
Indian style Naan is soft and chewy and so easy to make at home. It’s the perfect accompaniment to so many meals.
- 2 1/4 tsp rapid rise yeast
- 1 egg (lightly beaten)
- 4 1/2 cups bread flour
- 2 Tbsp sugar
- 2 tsp salt
- 1 cup warm water
- 1/4 milk (room temperature)
- 1/4 cup butter (melted)
-
In a mixer bowl combine yeast, flour, salt, and sugar.
-
Add in water and milk and mix together. Knead for about 5-6 minutes or until dough is smooth.
-
Place dough into an oiled bowl and cover tightly with plastic wrap. Let rise for an hour.
-
Punch down dough and form 14 balls of dough. Place balls of dough onto a greased baking sheet and cover with plastic wrap and allow to rise for about 30 minutes, or until doubled in size.
-
Heat electric griddle to 350 degrees F. Roll out dough thinly and brush both sides with melted butter. Place dough on grill and cook for 2-3 minutes or until puffy and lightly browned. Flip and cook on other side until browned, another 2-3 minutes.
-
Keep cooked naan covered with a towel to keep it warm and to prevent it from drying out. Serve warm.
Need some help figuring out what’s for dinner tonight?
Come join our Facebook Group! Join hundreds of others who love sharing dinner time ideas. You don’t want to miss out on the fun!

You’ll find lots of ideas for dinner from all our awesome members and you can share your ideas too! Join the Family Dinner Table today.
Author information
Hi – I’m Leigh Anne! Food, family and friends are three of my favorite things. I love sharing easy, delicious recipes and entertaining ideas that everyone will love. When she started her blog, Your Homebased Mom, over 9 years ago she had no idea that it would one day house over 2,400 recipes and ideas! .
Continue reading Naan Bread. This post is from Your Homebased Mom. If you are not reading it from our feed, it has been STOLEN. Please contact Leigh Anne to let us know. Enjoy the posts.
from Your Homebased Mom http://bit.ly/2WRnqKE
via IFTTThttp://bit.ly/2RP1ThL
